Hiking the Torres Del Paine W Trek in Patagonia is a bucket list item for many. Doing the W Trek without a guide is the most cost efficient way to trek through the park and it feels very rewarding to do it yourself.
However, sorting out the W Trek was one of the most challenging bookings we have made to this day. Non English websites, sparse accredited blog coverage on routes, and limited availability due to popularity, made for a difficult journey before we even got to the park.
We have put together a clear and concise way to plan and book your self-guided W trek, including the best W Trek route with a map and W Trek itinerary with hiking distances.
Best time to visit Torres Del Paine
You want to have the best chance possible of seeing the towers in clear light. The weather can be treacherous in these mountains, so the best time to hike the W Trek is in the summer months from November to March.
During the months outside of summer, most of the services at main lodging companies are closed and the days will also be shorter and cloudier.
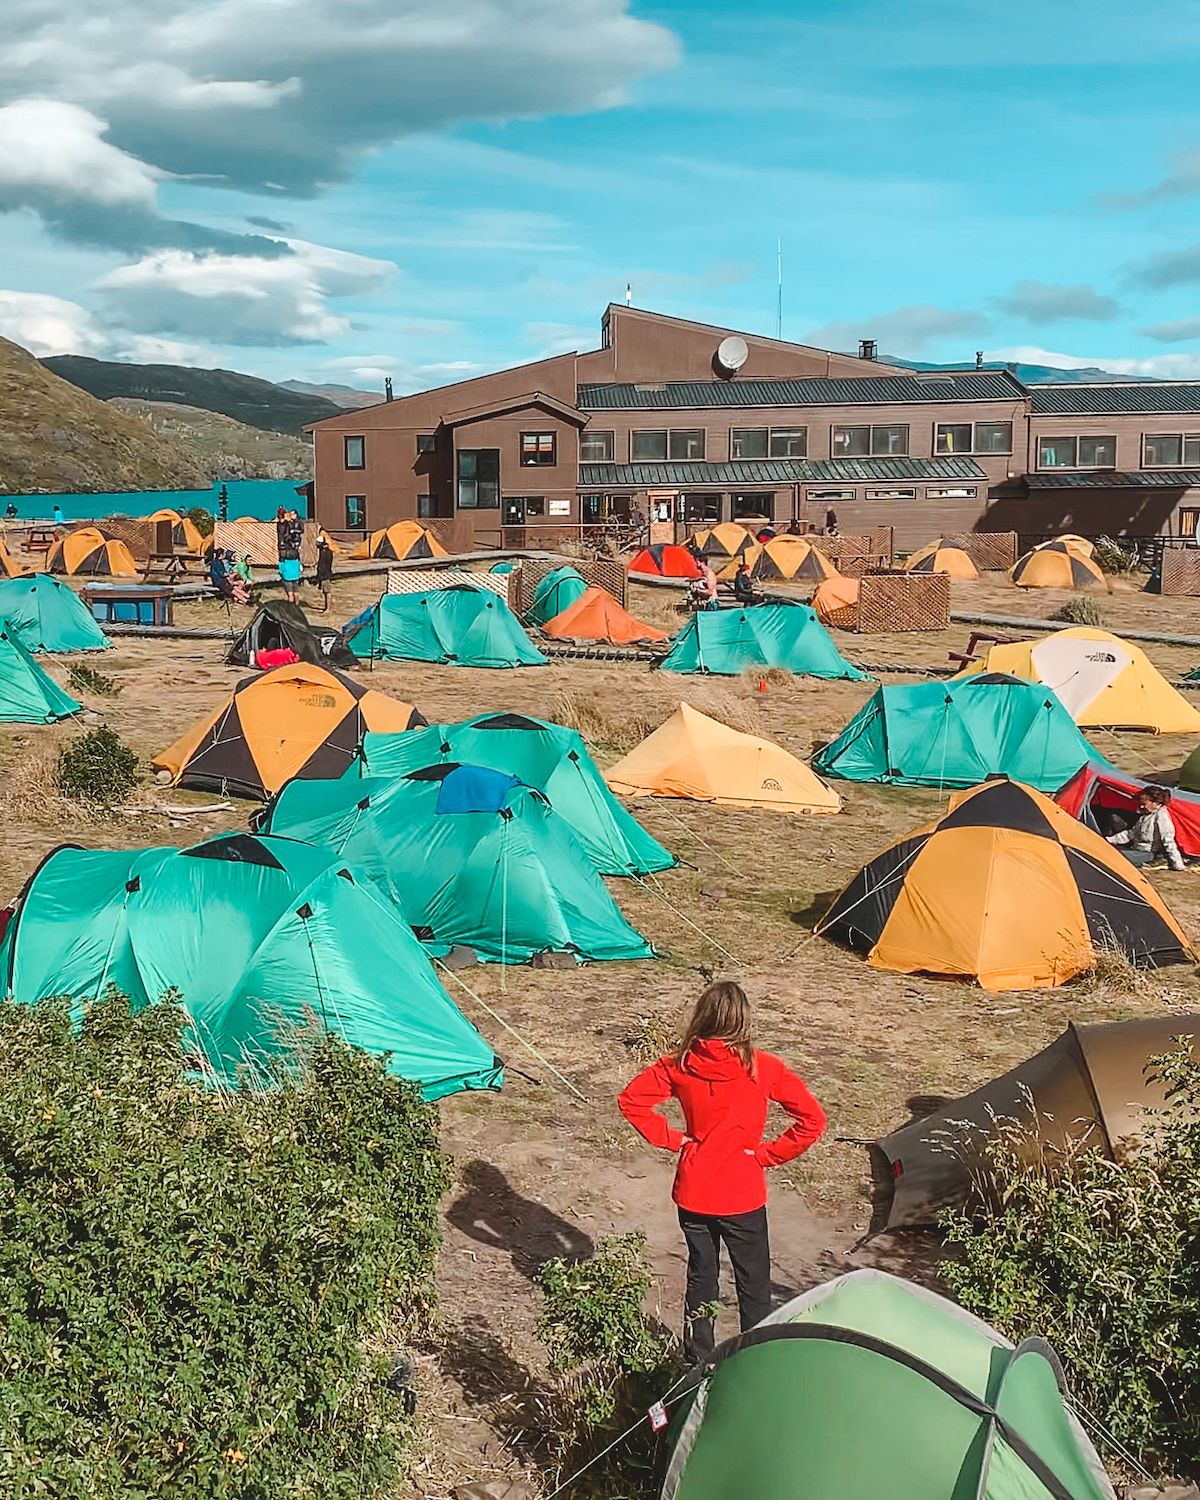
How to book refugios and campsites in Torres Del Paine
Torres Del Paine National Park has been split up so you must book your sites with at least two of three companies operating campsites there.
The first two companies, Fantasticosur and Vertice, have paid refugios (lodges and campsites) where you can either reserve a spot to pitch your tent, rent a tent, or stay in the lodge.
CONAF on the other hand, is a non-profit organization that offers free camping. The CONAF site at Italiano is extremely basic with no lodge, but hey it's free! Whichever you choose, you'll need to book your accommodation through their online booking systems.
Beautiful and strategic sites like Glacier Grey and Chileno book up fast. Book the refugios as far in advance as you can to ensure you get the sites you want.
Top booking tip:
Bookings for the following year's season open around the middle of May. For example, bookings open in May 2020 for the November 2020 - April 2021 season.
Message the companies, Vertice and Fantasticosur, directly in advance and ask if they can email you once reservations open up. We got our emails and booked right away!
Should you travel the W Trek east to west or west to east?
This question left us scratching our heads until we finished our trek. There are pros and cons of each.
We hiked the 'W' from the left to the right which starts at Paine Grande and ends at Torres Central, but would actually recommend hiking from east to west, since its pros outweigh the cons and the itinerary works out a bit better.
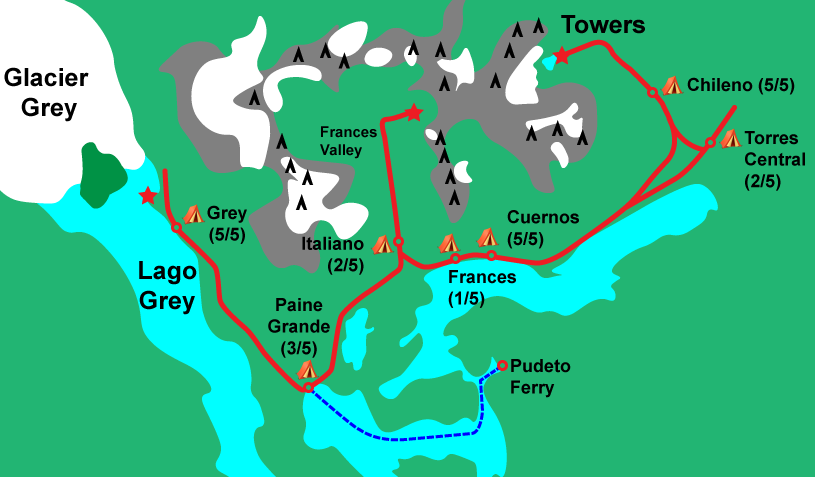
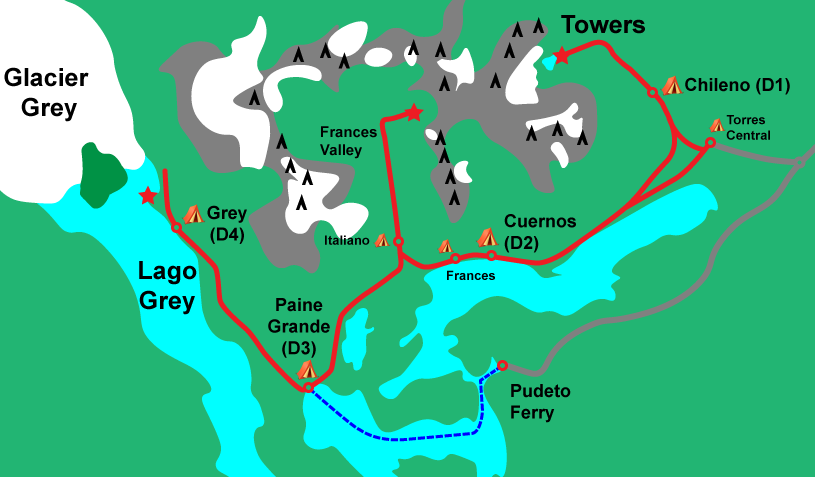
W Trek Map with our Refugio & Campsite ratings
What we did and why it wasn't as great:
We hiked the W Trek from left to right and stayed 5 nights. We stayed in Glacier Grey, Paine Grande, Cuernos, and Toores Central (2 nights).
Ultimately, the views are better and the itinerary works more nicely hiking the W Trek from right to left.
The drawbacks of our original route:
- On the way to the start of our trek, we almost didn't make the catamaran from Pudeto to Paine Grande due to the long line up of people (it's first come, first served). If we missed it we would have had to either wait 3 hours for the next ferry or hike an additional five hours to the start of our trek at Paine Grande.
- Staying at Torres Central rather than Chileno added an extra 5 km total to our whole trek. It is a 1 km hike from the campsite to the main trail on a gravel road, which is included in the 5km total.
- Torres Central feels as if you are not actually on the trek. The camp and refugio is located on a road with tour busses and other vehicles driving by. The service was also the worst we experienced out of all refugios.
- We had to spend an additional night in Torres Central so we could avoid rushing our hike up to the towers and back in order to catch the bus.
- The view from Cuernos to Chileno wasn't as nice as the other way around since the sun wasn't in our favour.
The benefits of our original route:
- Saving the crown jewel, the three Torres Del Paine, for last. After the multi-day trek it was satisfying to finish with the a view of the famous centrepiece of the park.
- The first two days of the trek covering the Paine Grande to Glacier Grey then back the next day to Paine Grande are the easiest of the trek. It was nice to warm our muscles up and get used to our packs before the harder hiking days.
Will all of these factors in mind, we came up with the ideal itinerary we would use next time!
The Best W Trek Route
- Day 1: Arrive at Torres Central, hike up to the three Towers and back down to Chileno (13.8km)
- Day 2: Chileno to Cuernos (13km)
- Day 3: Cuernos to Frances Valley and back down to Paine Grande (21.5km)
- Day 4: Paine Grande to Grey (11km)
- Day 5: Grey to Pudeto where you catch your bus back to Puerto Natales (11km)
W Trek Map with Recommended Route
W Trek Itinerary Breakdown
Day 1: Puerto Natales - Las Torres Hotel - Towers Lookout - Chileno (7 hour hike, 13.8km, 750m ascent, 400m descent)
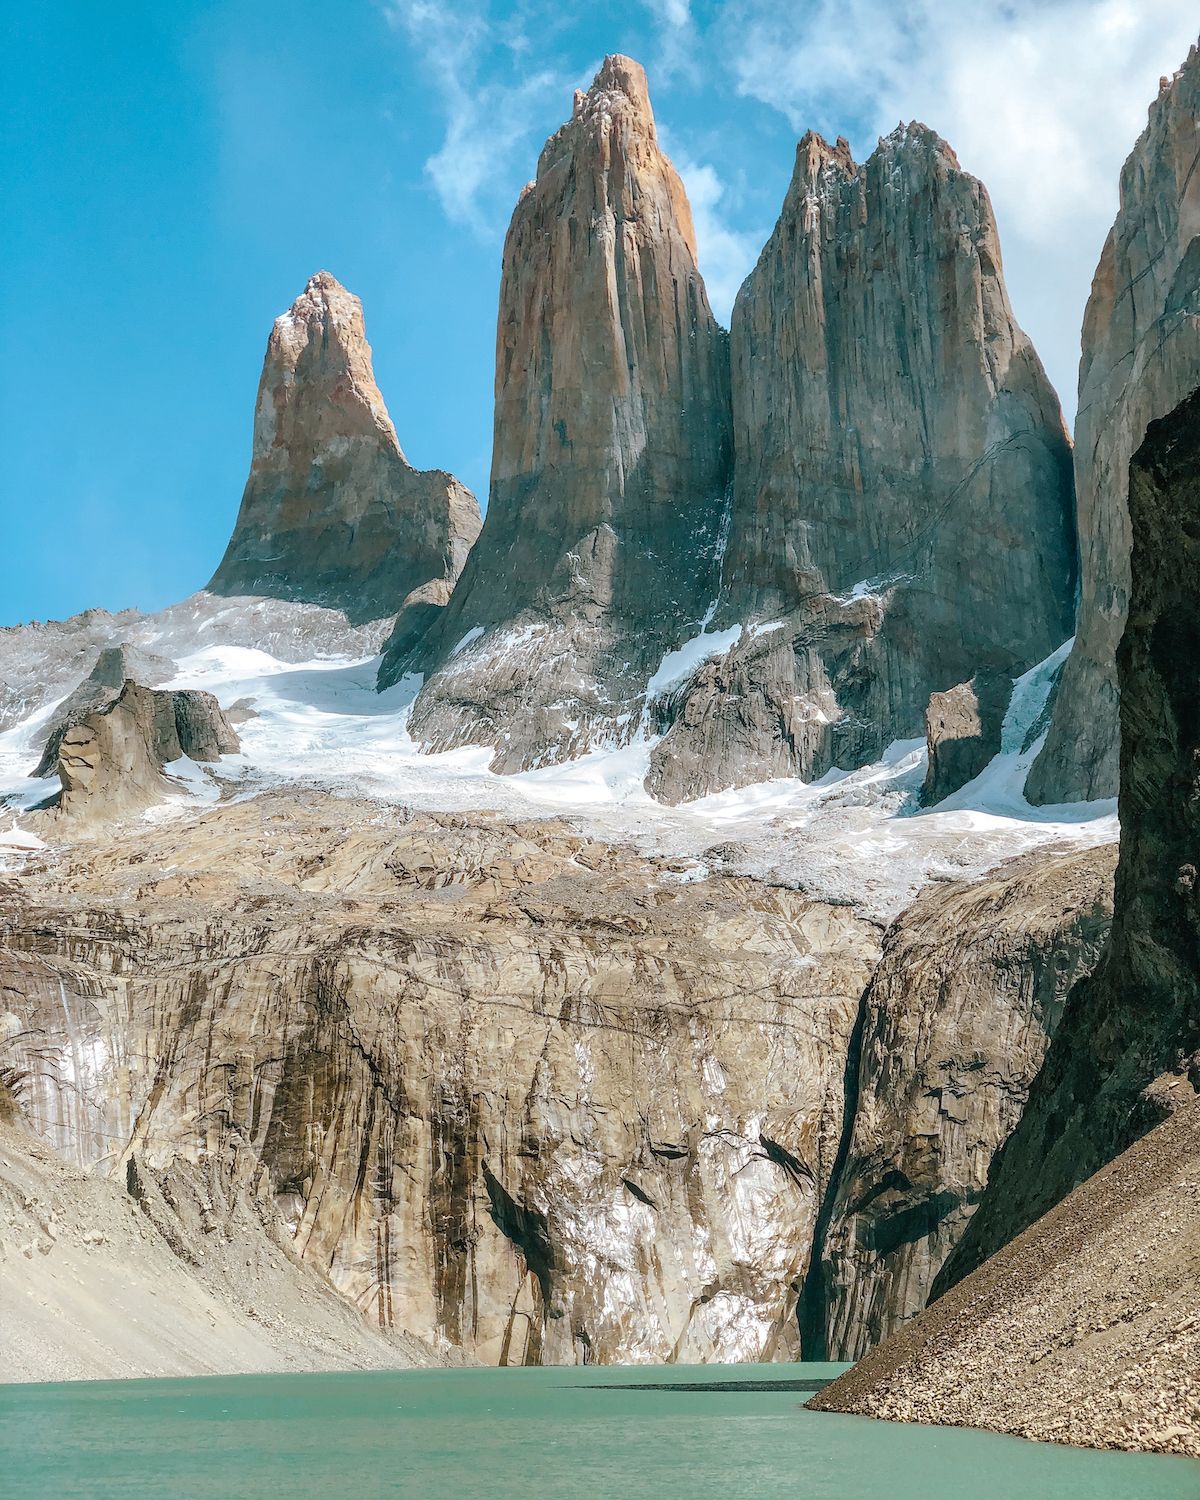
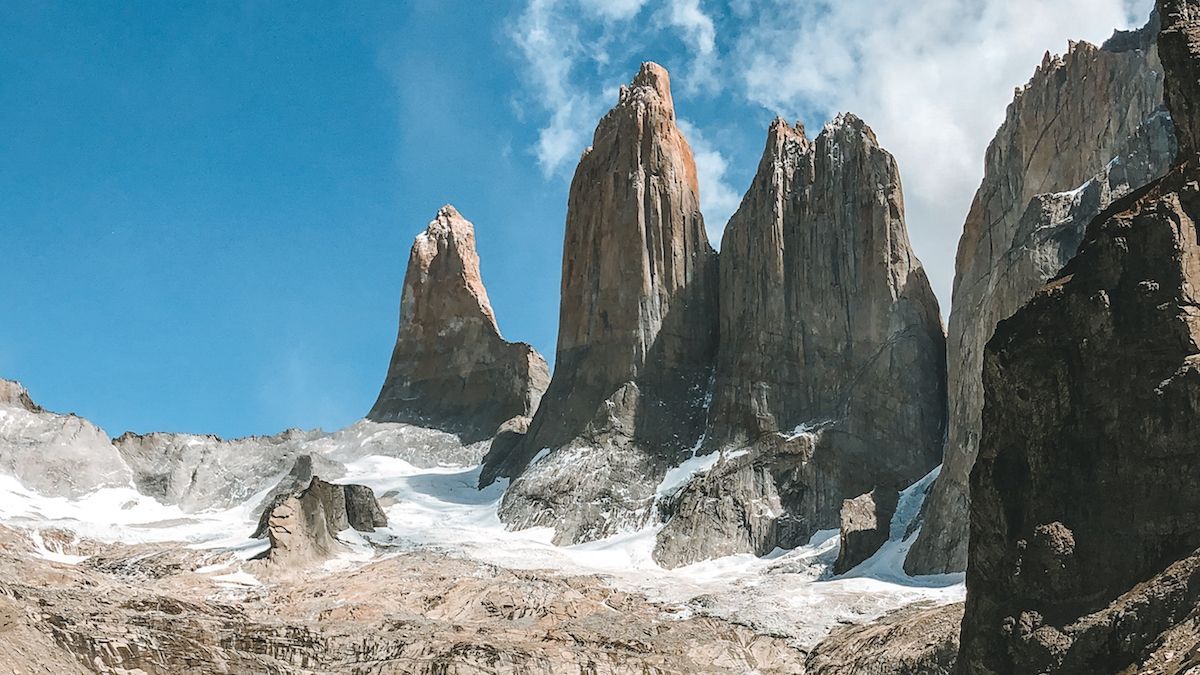
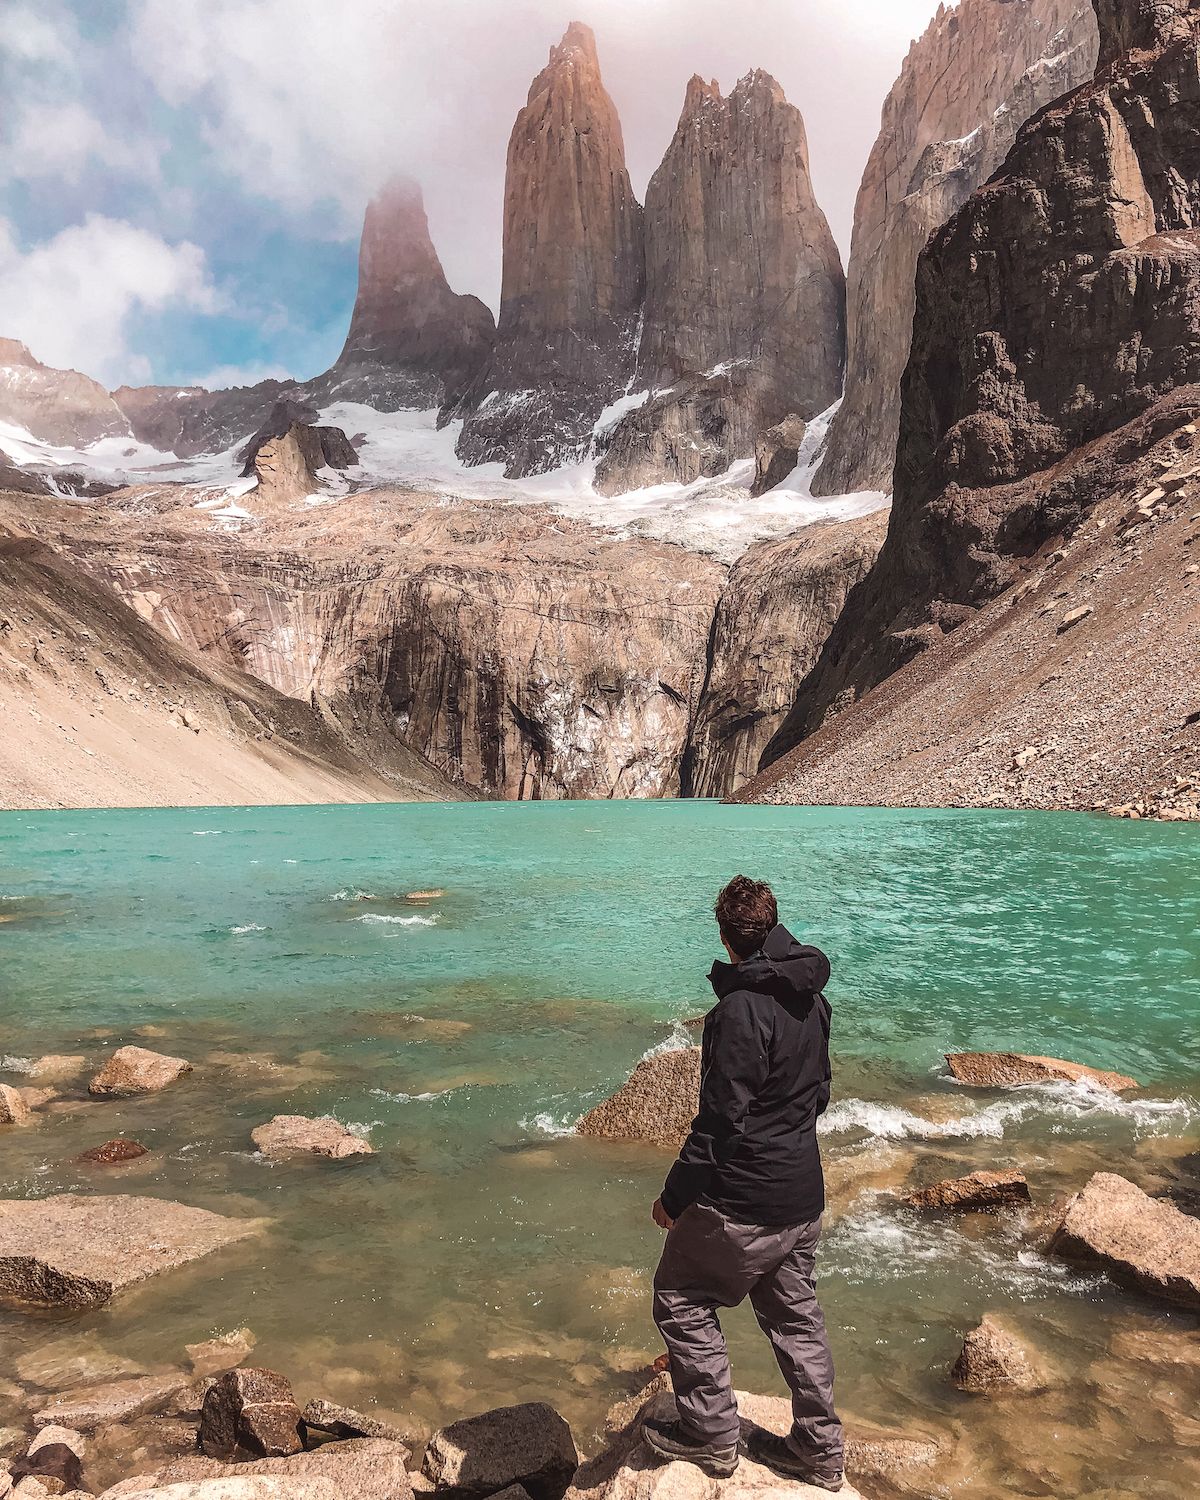
Highlight: Today you will see the crown jewel of the park, the granite towers!
Your first task is getting to the park entrance (Amarga) from Puerto Natales. The bus ride takes 2 hours.
- 🚌 Buy your bus ticket to the park entrance (Amarga) through Busbud.
- 💳 Purchase your entrance ticket to Torres del Paine National Park in advance (the Safari browser worked for us, but not Chrome).
From Amarga, take the shuttle to Los Torres Hotel to start your hike.
Congratulations, you made it. Time to start hiking! From Las Torres Hotel to Chileno it's a 5 km hike with a total ascent of 325 m. Careful on your way, there are very high winds as you enter the valley, so hike slowly and crouch down if a gust catches you off step.
Drop off your bags/tent in Chileno where you will be staying the night and take some water. It's much easier hiking with just a day pack up to the spectacular granite peaks. From Chileno, the roundtrip distance to the Towers Lookout is 7.8 km.
Read our article on all you need to know about the Chileno refugio.
The weather is crazy in this area. We had two snow storms on our way mixed with sunny blue skies. The last half of the hike to the towers is tough and includes scrambling up large rocks. The 90 km/hour winds didn't help!
When we reached the top we were sad to see the towers completely covered by cloud and yet another snow storm. However, we waited patiently beside a large rock for 45 minutes and the weather cleared up to perfect sunny blue skies! Seeing Torres Del Paine in real life was breathtaking.
Top Tip: There are weather reports posted at Chileno, so consider staying a bit or heading off right away depending on the hourly cloud cover forecast.
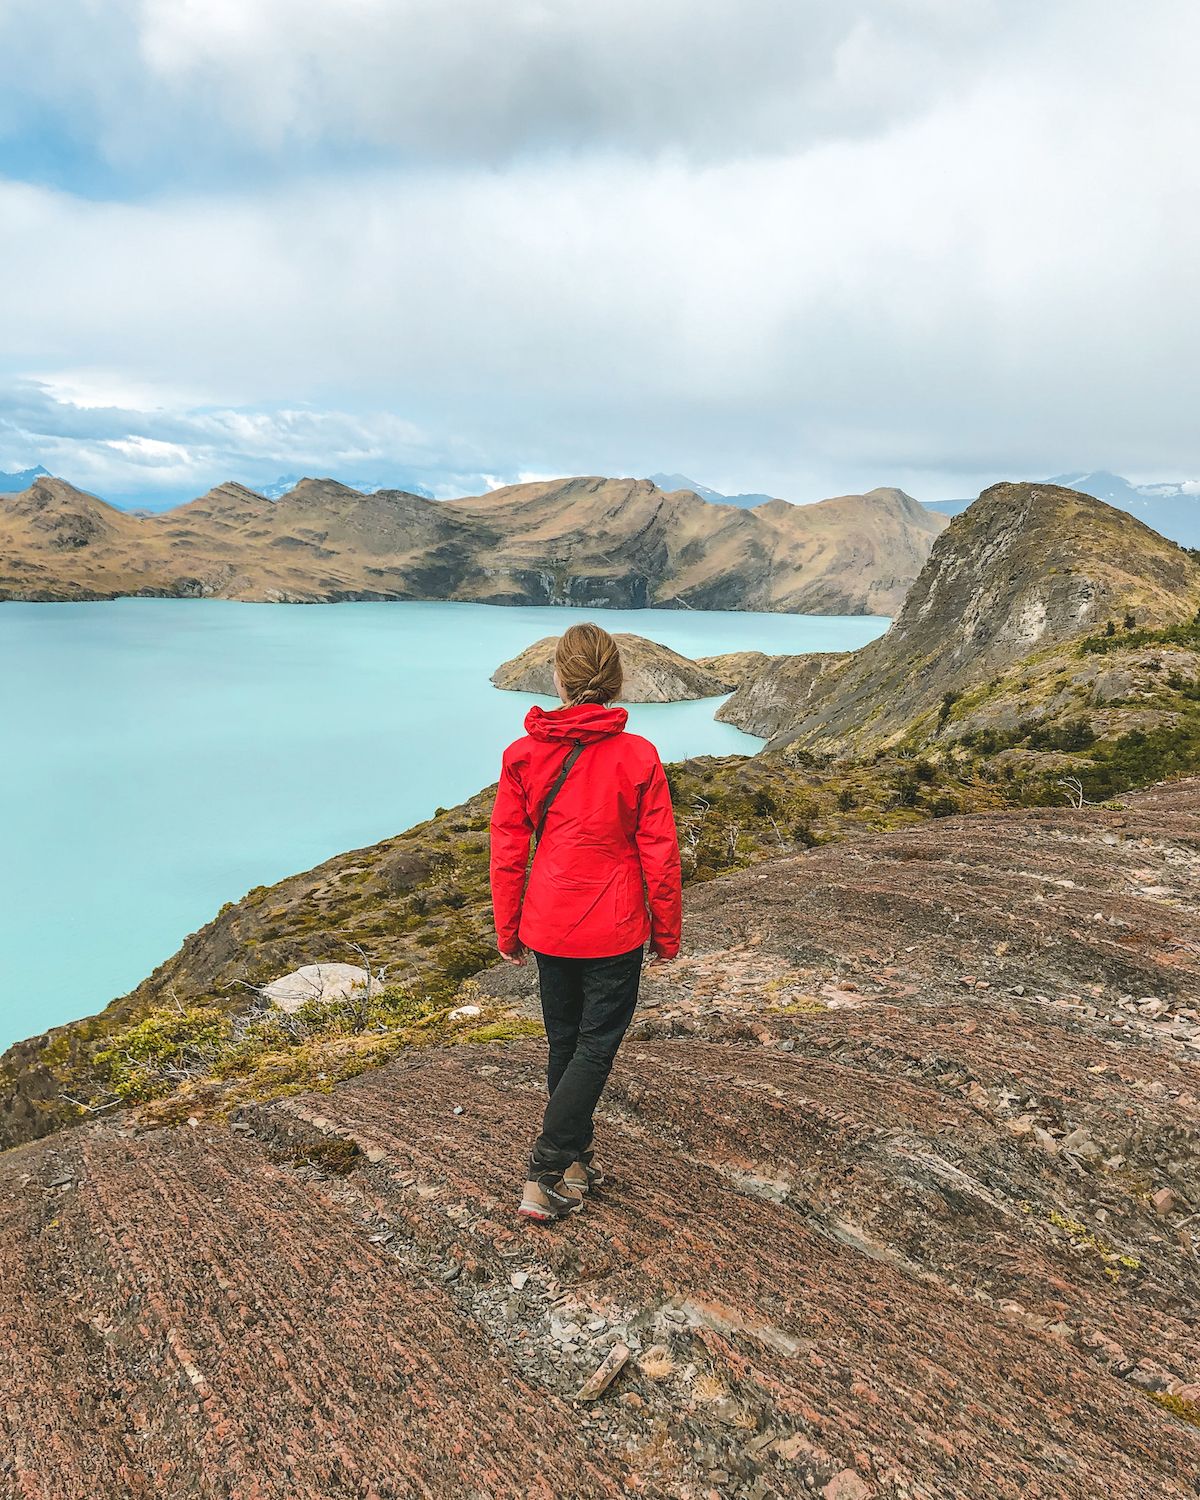
Day 2: Chileno to Cuernos (4 hours, 13km, 125m ascent, 406m descent)
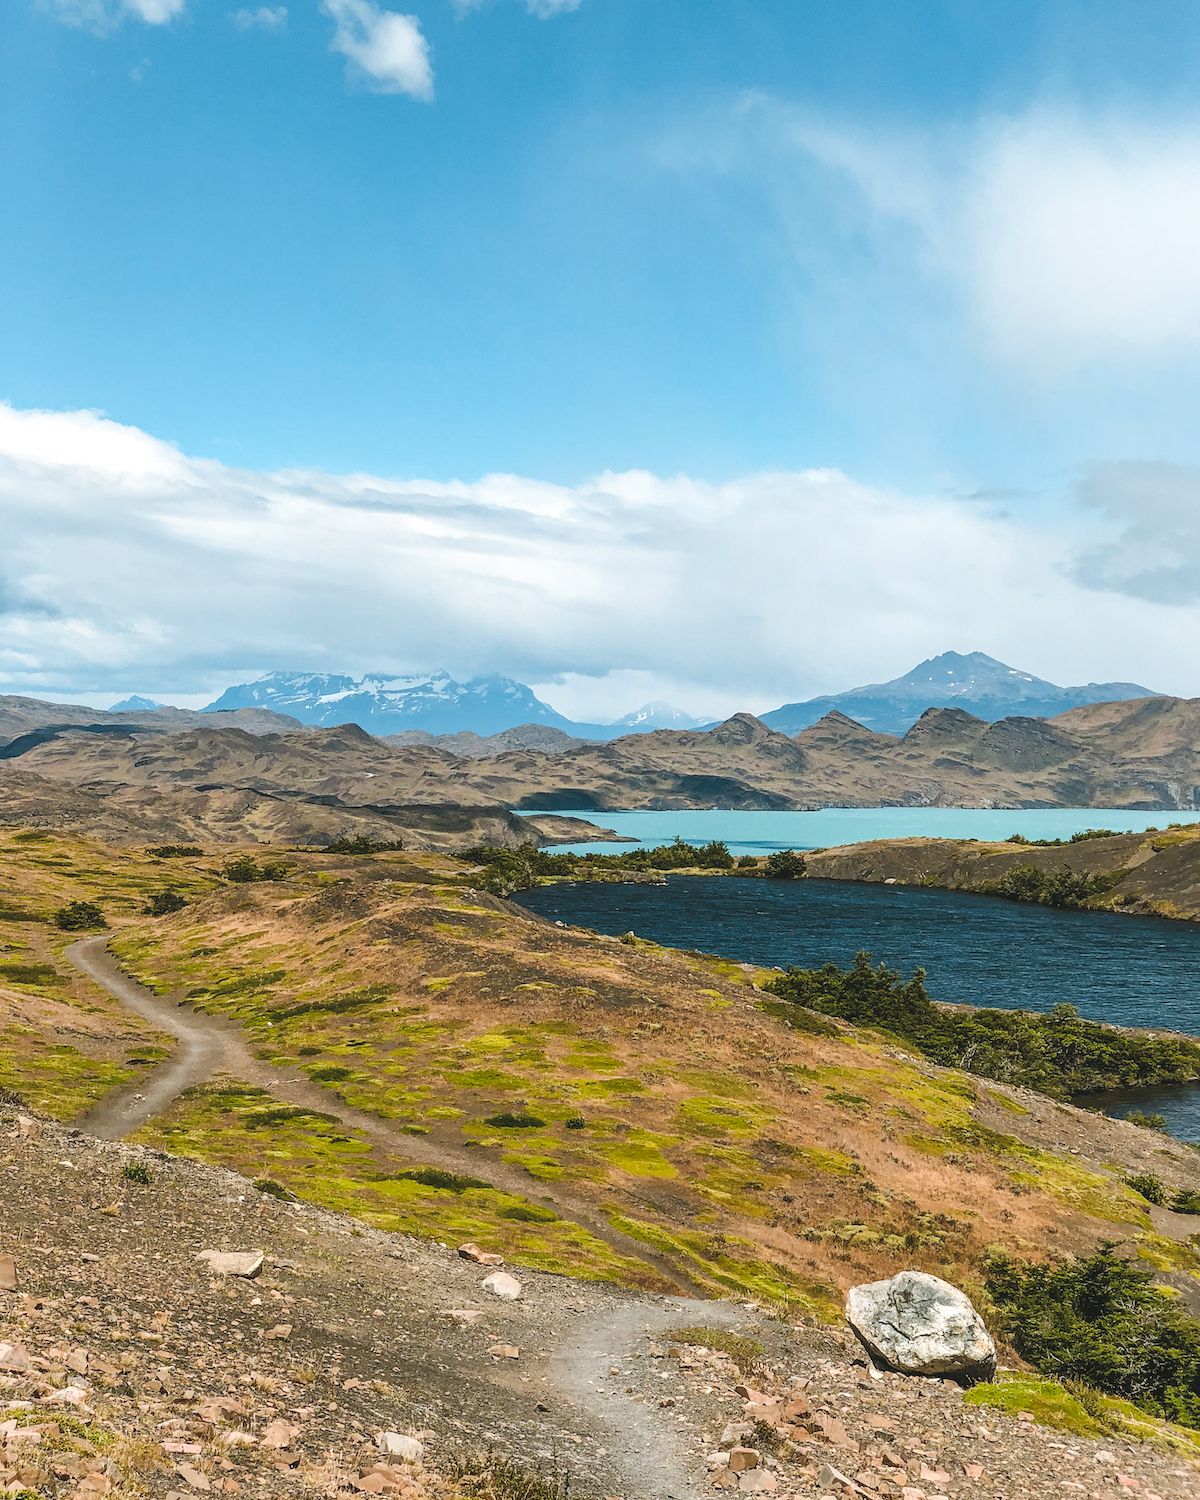
Highlight: Passing the multi coloured lakes and relaxing at the lovely Cuernos camp.
Today you will have spectacular views of the lake as you walk through otherworldly landscapes. The hike is relatively easy with a total descent of 406 meters and a small 125 m ascent in the middle of your hike.
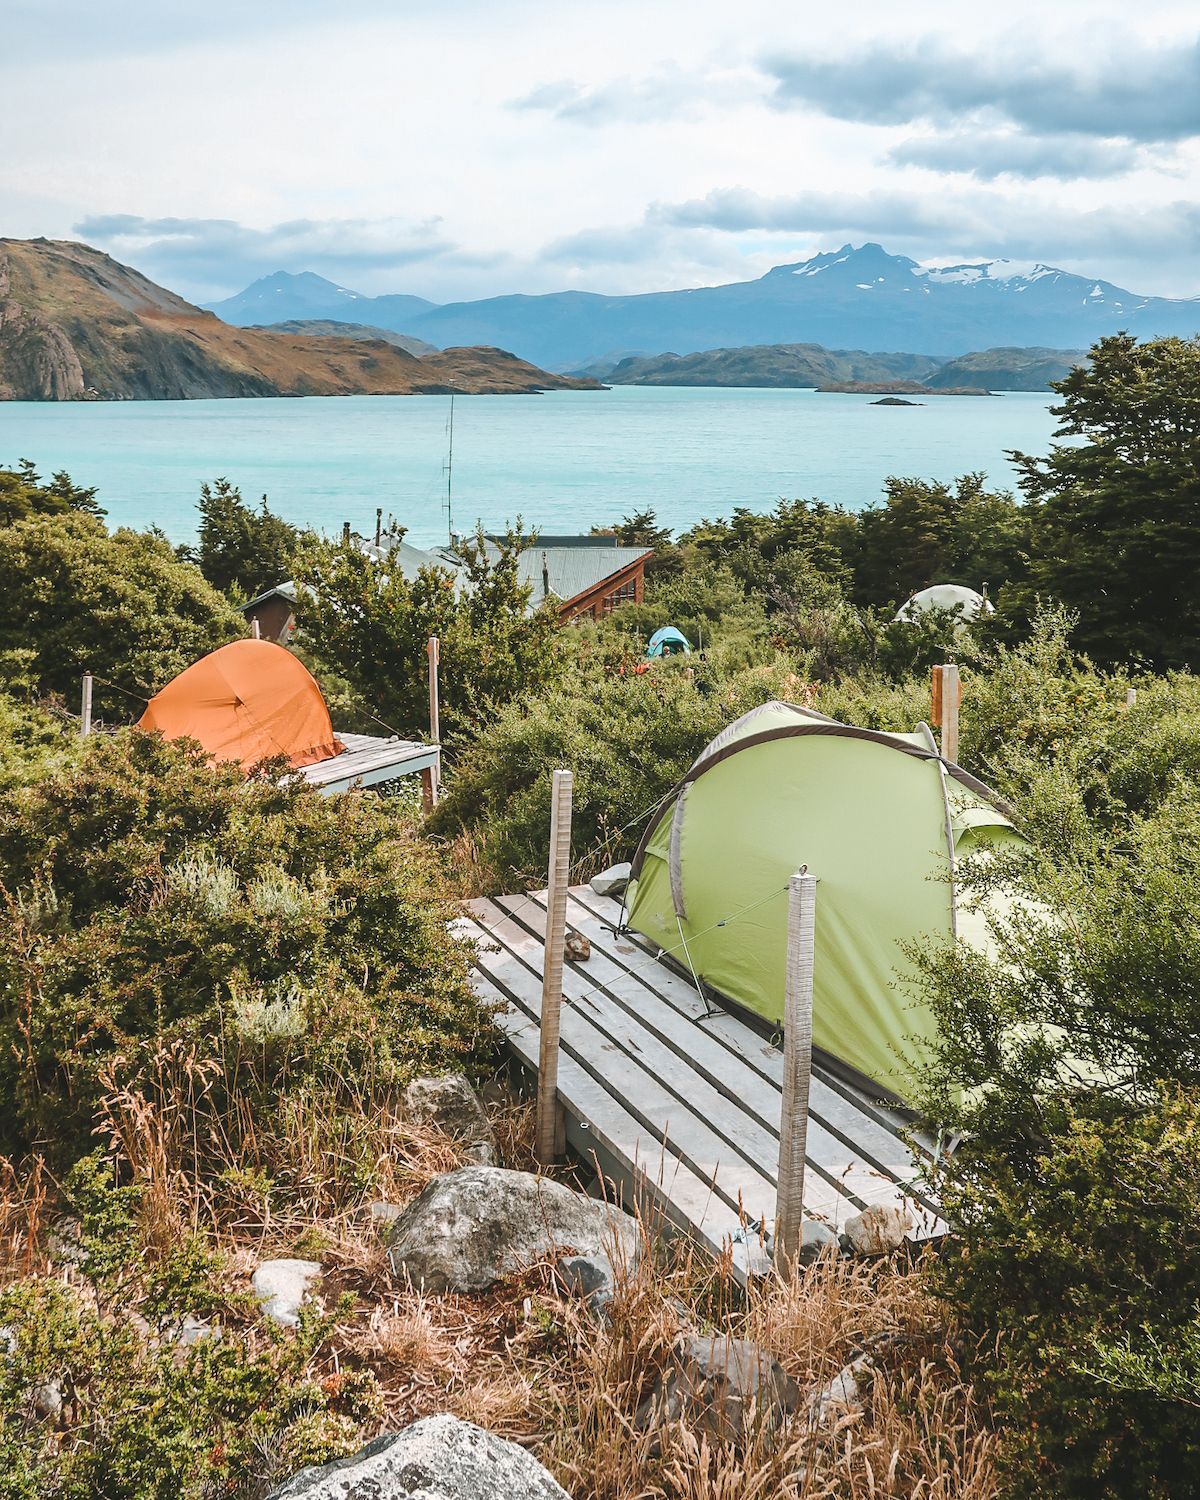
Cuernos was our favourite refugio we stayed at. It didn't feel too busy and we got to pitch our tent on a wooden tent pad overlooking the beautiful lake! It's the perfect place to relax after your long first day.
Read our article on what to know about the Cuernos refugio.
Day 3: Cuernos to Britanico to Paine Grande (10 hours, 21.5 km, 550m ascent, 600m descent)
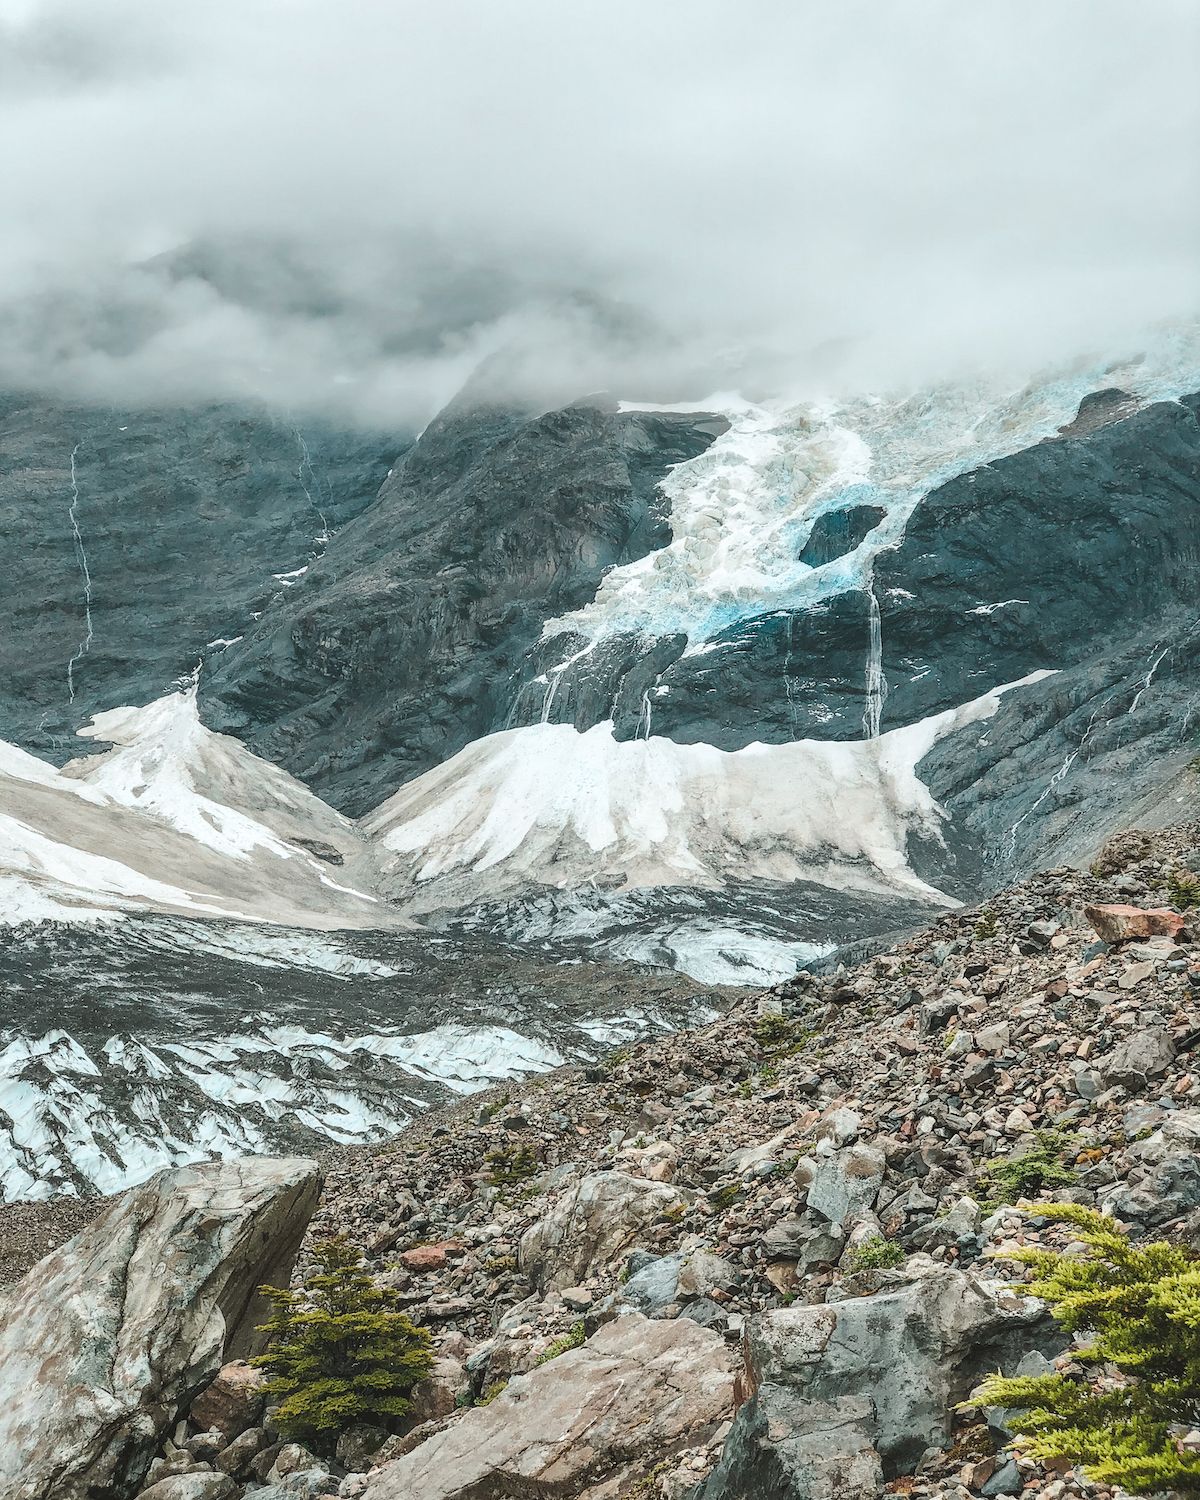
Highlight: Seeing the very much alive Frances Glacier drop massive chunks of ice with a thunderous roar.
Today will be your longest hiking day. Once you reach the Italiano campsite, drop your bags off to lessen your load for the return hike to Frances Lookout and Britanico.
It was partly cloudy when we hiked, but we were lucky to see Frances Glacier and even see and hear the thunderous roar of ice breaking and falling!
Since the clouds were rolling in we decided to stop at Frances lookout and forgo hiking to Britanico further up the mountain. We heard mixed reviews about Britanico and that it wasn't any more spectacular than the view at Frances Lookout.
To shorten your hike, you could opt to stop at Frances Lookout and forgo Britanico. This would take about 5 km and 2.75 hours off your total journey that day. Shortcut!
After picking up your bags from Italiano, it is a 2.5 hour easy hike to Paine Grande with small ups and downs on the way.
Read our article on what to know about the Paine Grande refugio.
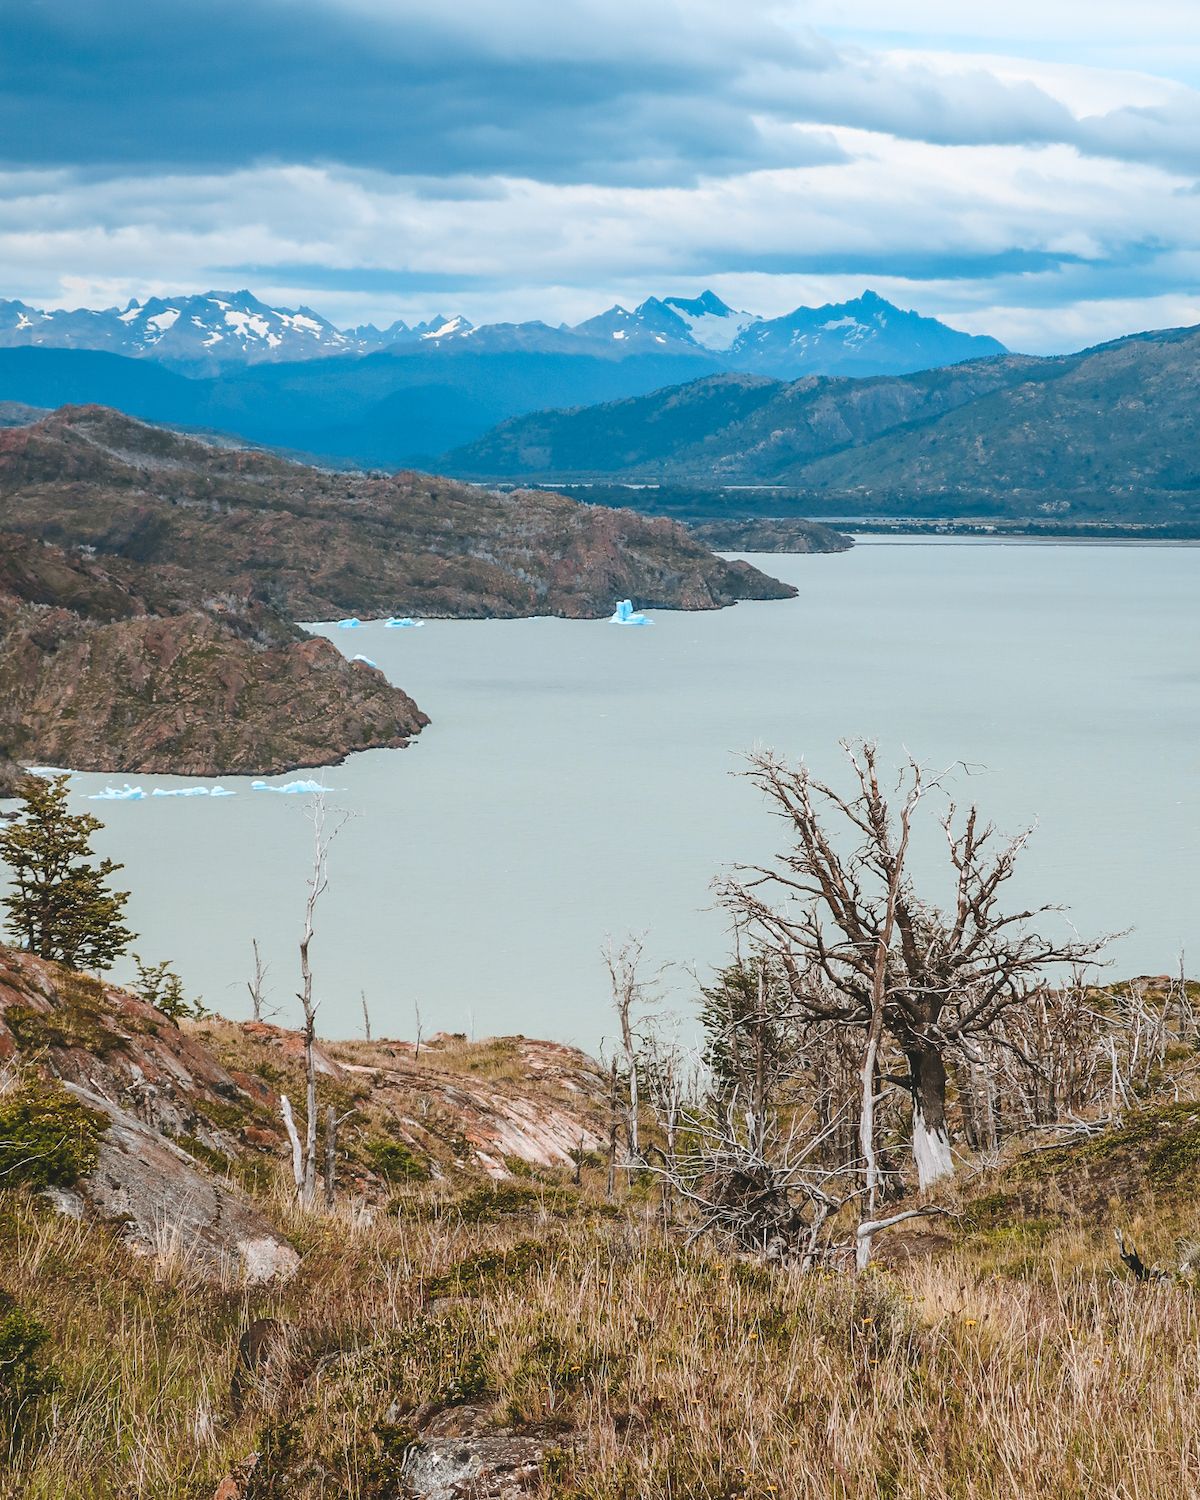
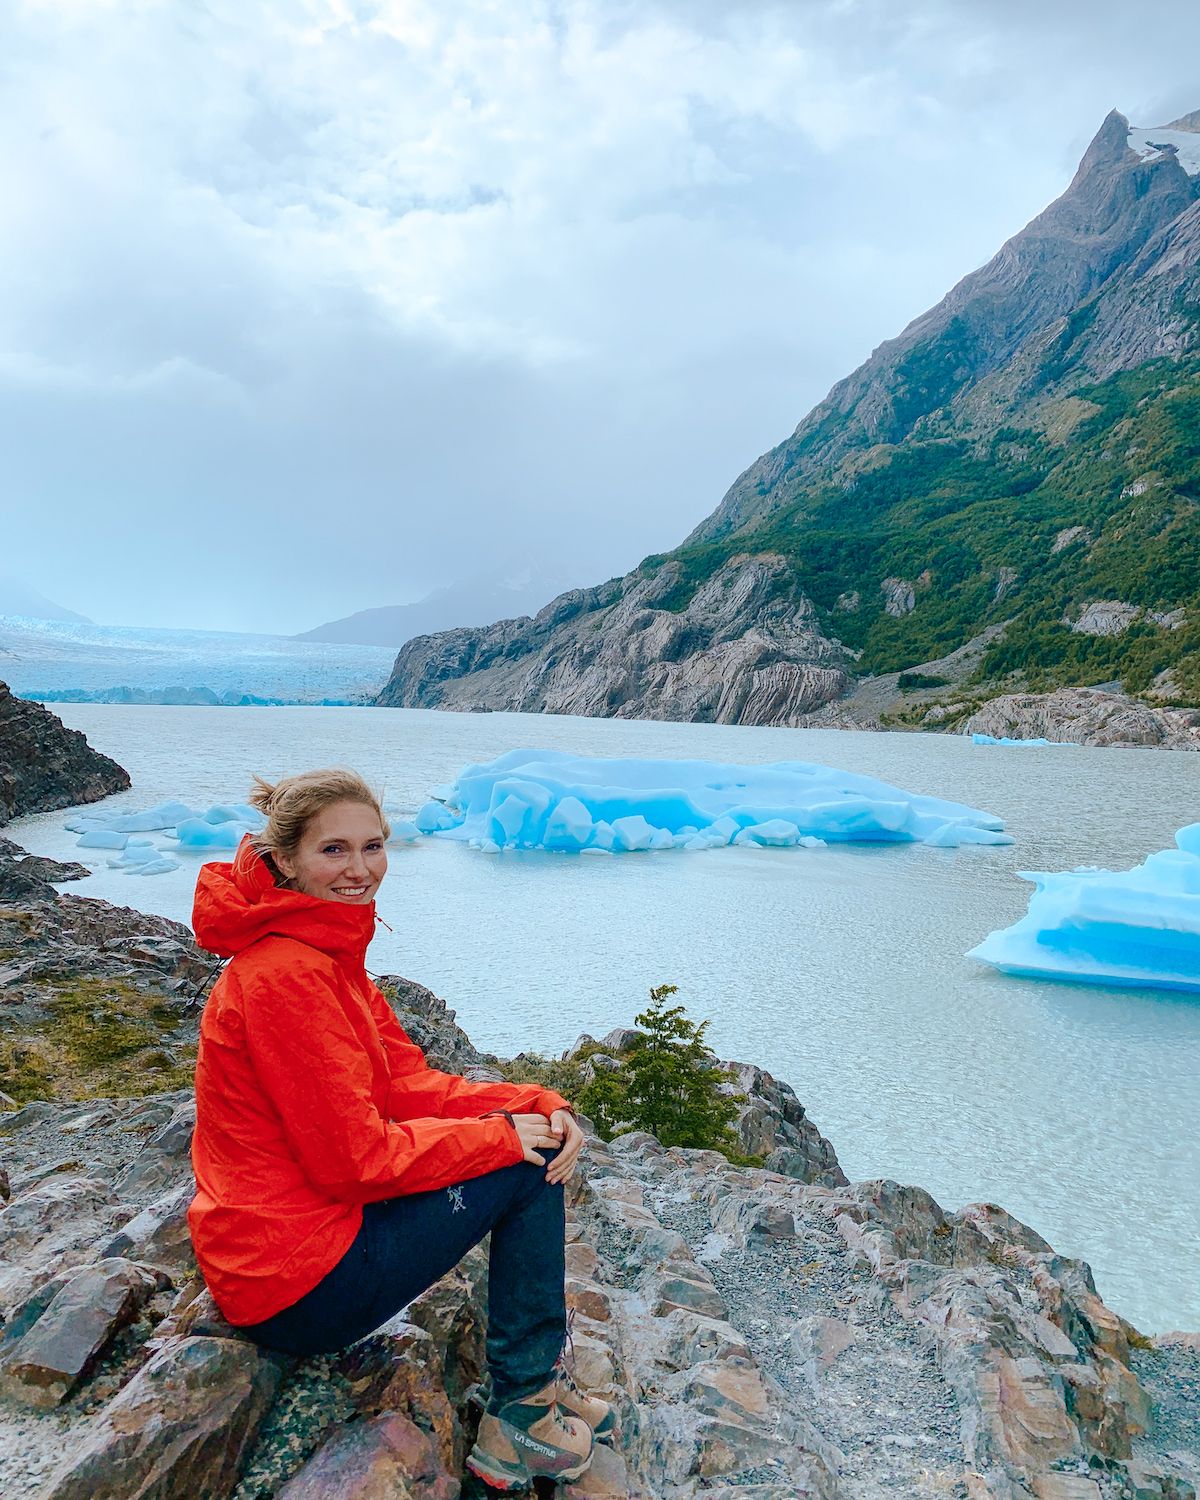
Day 4: Paine Grande to Grey Lodge (3.5 hours, 11 km, 200m ascent, 185m descent)
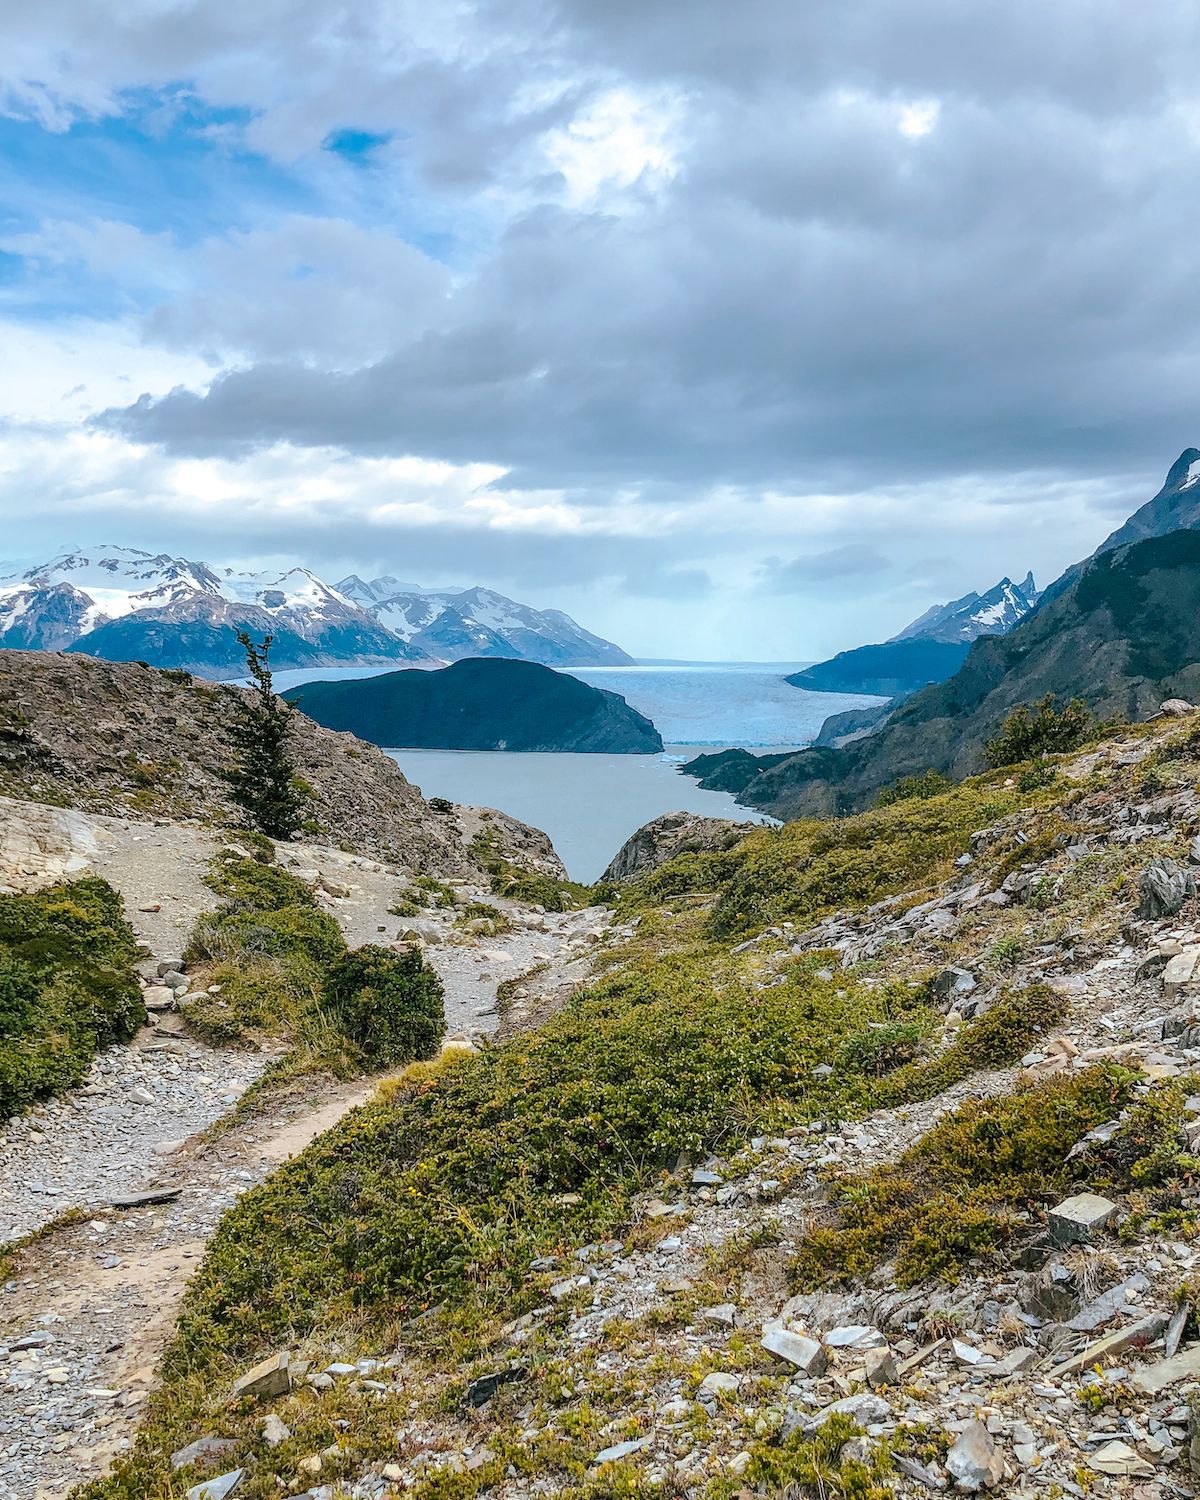
Highlight: You will see views of Grey Lake and small icebergs before the grand finale views of the massive Grey Glacier.
Watch out for the huge gusts of wind coming at you from the front. Once you reach Refugio Grey it's about a 10 minute walk from there to the Grey Glacier lookout point. You don't want to miss it!
Read our article on what to know about the Grey refugio.
Day 5: Grey to Paine Grande (3 hours, 11 km, 185 ascent, 200 m descent) & back to Puerto Natales
Highlight: Today is an easy hiking day with the wind at your back and your last of the trip, so enjoy the views!
It's only 11 km to Paine Grande where you'll catch the catamaran to Pudeto and a bus back to Puerto Natales (30 minute catamaran & 2 hour bus ride). Hiking this direction is a lot faster and less effort so it's a nice way to end off the trip.
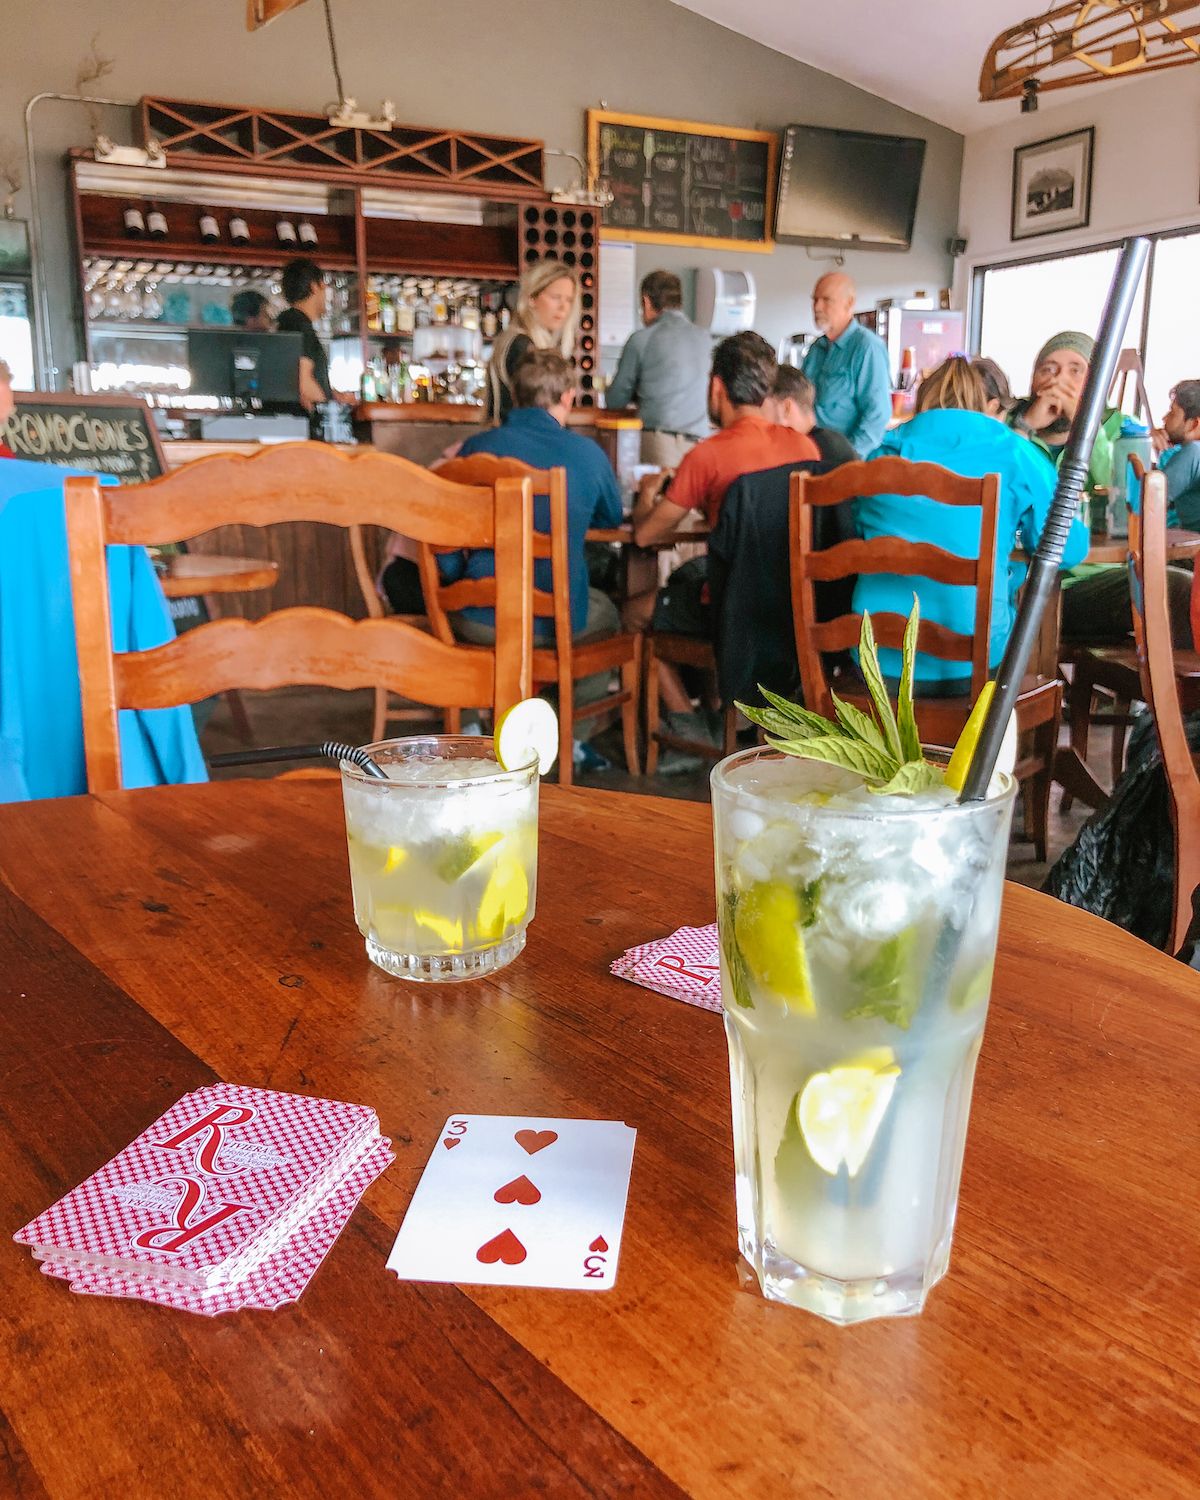
The catamaran is first-come-first-serve so arrive early to ensure you get a seat. The ferry times change depending on the time of year but the last ferry from Paine Grande to Pudeto will take multiple trips to ensure everyone waiting gets across. No stress, and you can get yourself a victory cocktail at the Paine Grande refugio while you wait.
The catamaran costs 25,000 CLP ($30 USD) one way and you pay for your ticket with cash inside the boat. Once at Pudeto, you'll catch your bus back to Puerto Natales.
🚌 Buy your bus ticket in advance through BusbudMeal options at the refugios and campsites
There are a few options for eating while you're on the trek. You can cook, or you can have the cooking done for you. We found it really nice to come into the big lodges and have a seat out of the rain and wind to a nice warm prepared meal.
Full-board/half-board
At Fantastico and Vertice refugios, there are full-board and half-board options. Full board includes breakfast, dinner and a boxed lunch. There was always enough food to keep us full at every meal.
The lunch bag typically consists of a sandwich, Nature Valley bar, juice box, nuts with dried fruit, chocolate bar and a piece of fruit.
Dinners are hearty and come with a big piece of meat. Breakfasts are served with eggs and toast. Make sure to state if you are vegetarian.
Get all the info from our article: W Trek Patagonia Camps Ranked and Rated
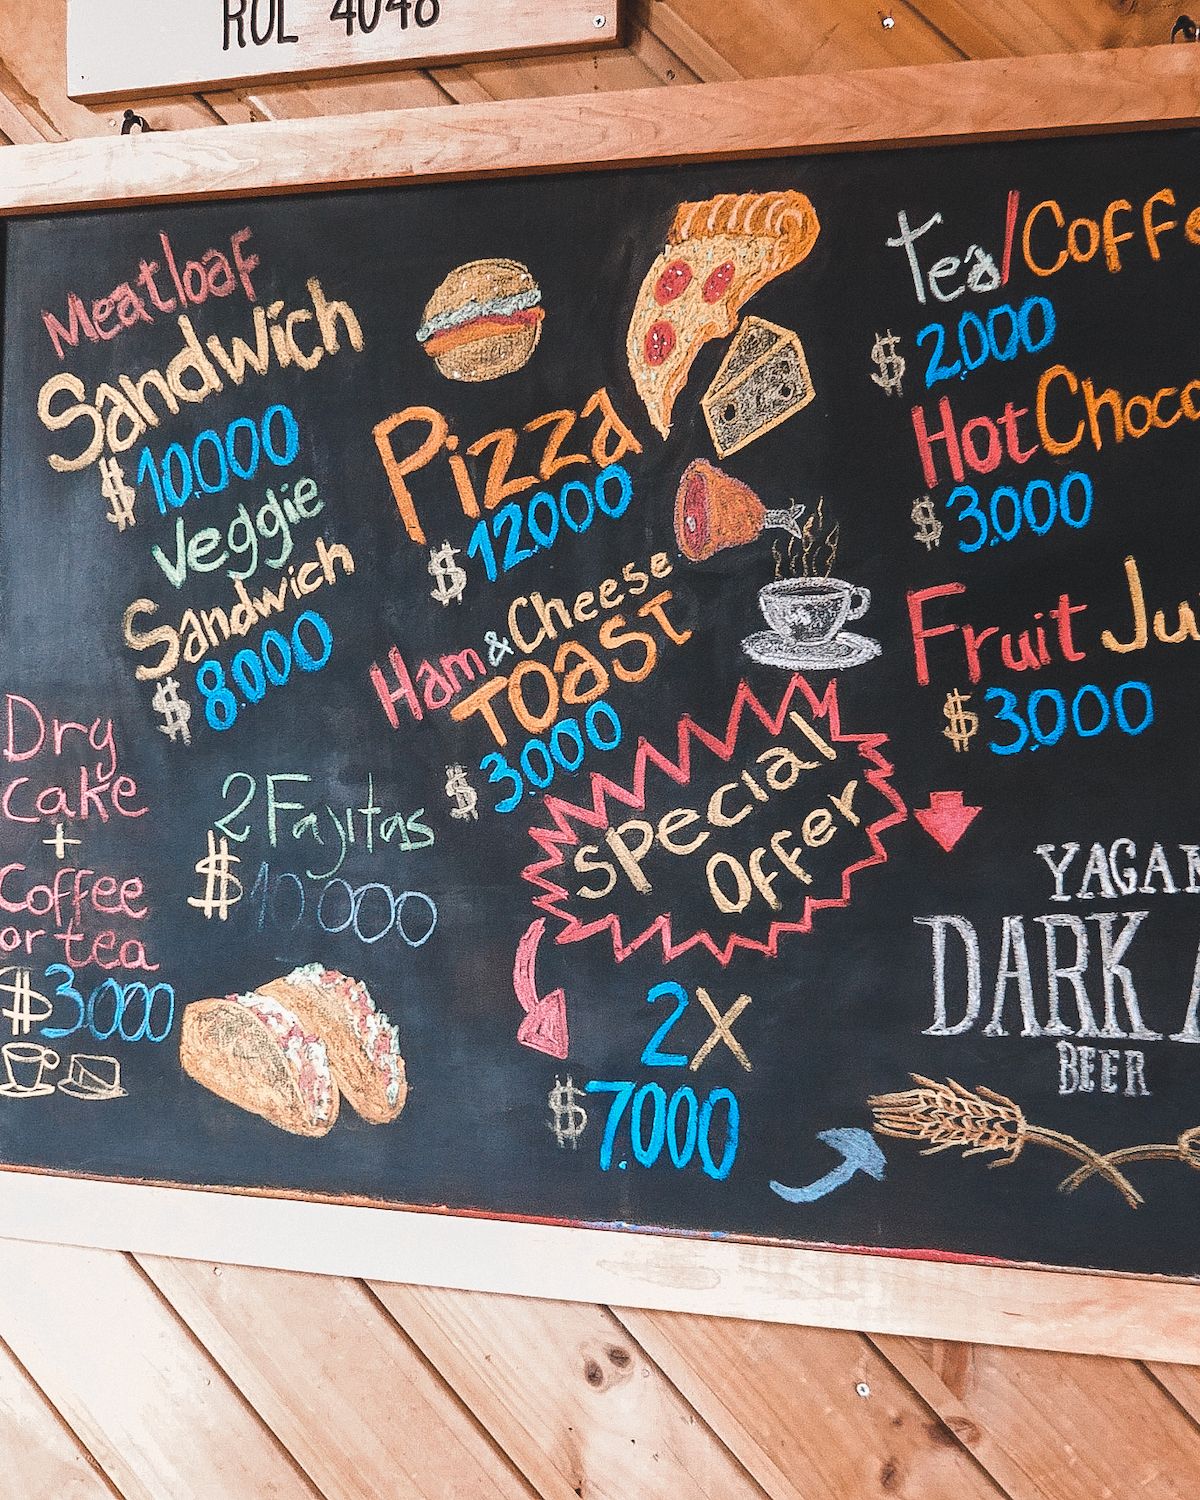
A-la-carte
You can also buy a la carte meals during lunch and dinner at some refugios. At our favourite Refugio, Los Cuernos, they had lasagna, burgers and even a charcuterie board, so we wished we had just ordered breakfast and lunch from there!
Cook your own food
Most refugios have a kitchen where campers can prepare and cook their own food. The downside is that you'll have to carry the weight of your food on the trek.
Most refugios also have a small convenience store where you can purchase extra items along the way, such as soup, Ichiban noodles, cookies, alcoholic beverages, water, crackers, pasta, coffee etc.
If you're going to cook your own food, ensure the refugio you're staying at has a kitchen. Chileno for example does not have a kitchen.
Most lodges take credit card for snacks, food and drinks, however sometimes the credit machine is down so it is better to have a some Chilean Pesos with you.
Bring snacks!
Even if you're not cooking your own food, grab some snacks at the grocery store before your hike while it's cheap. We brought almonds, dried fruit, dark chocolate, and gummy worms. Check out Supermercado Unimarc in Puerto Natales. There is a dried goods stand at the front door.
Full board won't leave you hungry, but it's nice to have a few snacks of choice to lift your spirits during a hard hiking day.
W Trek Packing List
Here is our list of what to pack for the W Trek. This is what we brought with us on our multi-day hike. Each item that is linked, is what we own and highly recommend. We have used them over the years for numerous hikes and camping trips around the world (Nepal, Peru etc.).
Note: we ate half board/full board at the lodges, so this packing list does not include gear to make your own food.
Clothing
|
Other Essentials
|
Top Tip: You won't need a pack cover we were told and saw first hand these things just act like parachutes on the windy sections of the trail. Garbage bag your goods or use dry bags instead.
What you can rent for the W Trek
You can rent a one or two person tent, sleeping mattress, hiking poles, sleeping bag, and hiking shoes (although we recommend bringing your own shoes to avoid blisters!).
Erratic Rock doesn't take advanced reservations and has become very popular, so don't count on getting your gear the night before your trek like we did.
We ran over to Rental Natales and luckily found a two-person tent that had just arrived. Rentals Natales has online reservations and they wash their sleeping bags after every use.
Pre-trek prep in Puerto Natales

Where to stay in Puerto Natales before your trek
Look for a hotel or hostel with free storage. If you're travelling around Chile you probably aren't going to want to bring that extra stuff with you on your hike! We stayed at Treehouse Hostel where you can keep your bags for free in a big wooden locker. All you need is your own lock. Their private room was spacious, quiet and had a private bathroom. Free-self serve breakfast is set up early for people taking the 7 AM bus.Browse more stays in Puerto Natales
Pre-trek preparation checklist
- Grab your rentals the day before you leave on your trek
- Purchase your bus ticket in advance to ensure you get an early departure time. You can reserve your ticket online through Busbud.
- Grab snacks beforehand at a grocery store, such as almonds, dried fruit, dark chocolate, candies, and a roll of toilet paper.
- Pull out cash for catamaran, Torres Del Paine Park fee, and any extra goodies you wish to buy at the camping lodges. There are reliable ATMs in Puerto Natales to pull out cash. Most lodges take credit card for snacks, food, and drinks, but cash is needed for the catamaran and park fee.
Getting to Torres Del Paine National Park
Getting from the Puerto Natales airport to Puerto Natales
A taxi from Puerto Natales airport to Puerto Natales is a flat rate of 7000 CLP for the whole car, not per person. The drive is about 10 minutes.
Taking the bus from Puerto Natales to Torres Del Paine National Park
The main transportation to Torres Del Paine is by bus. The journey from Puerto Natales is 2 hours - 2.5 hours. Consider taking Bus Sur because drivers drive at a reasonable speed (BJ was very slow and many buses passed us). You can book your bus ticket online through Busbud.Arrive at least 15 minutes early for your bus at 7 AM from Puerto Natales to Torres Del Paine. Some people didn't get on and had to wait for the 11 AM bus. It's better to get to the park early and is a must for this itinerary.
The bus first stops at Amarga where everyone gets off to purchase their park pass (cash only). Those going further to Pudeto to catch the catamaran to Paine Grande will need to get back on the same bus. The drive is 30 more minutes to Pudeto. Those headed to Las Torres Hotel catch another 15 minute shuttle bus.
Top Tip: Sit on the front left side of bus from Puerto Natales to Amarga for the best views. Sitting at the front also ensures you're first in line to get your park pass and you can quickly hop on the shuttle.
Start planning your trip to Torres Del Paine National Park
- 💡 Travel tips: see our top 17 tips for the W Trek
- ⛺ Refugios/Campsites: see how we ranked and rated the W Trek refugios & campsites
- 🛏️ Book your stay in Puerto Natales: Booking.com is our go-to for finding places to stay. Sort by top reviewed.
- 🥾 Rent your gear: we rented our camping gear from Rental Natales
- 🚌 Buy your bus ticket to the park: book in advance through Busbud.
- 🛫 Book your flight to Puerto Natales: use Skyscanner to compare flights across different airlines (we recommend booking direct with the airline however).
Check out what the W Trek was like in our Chile vlog
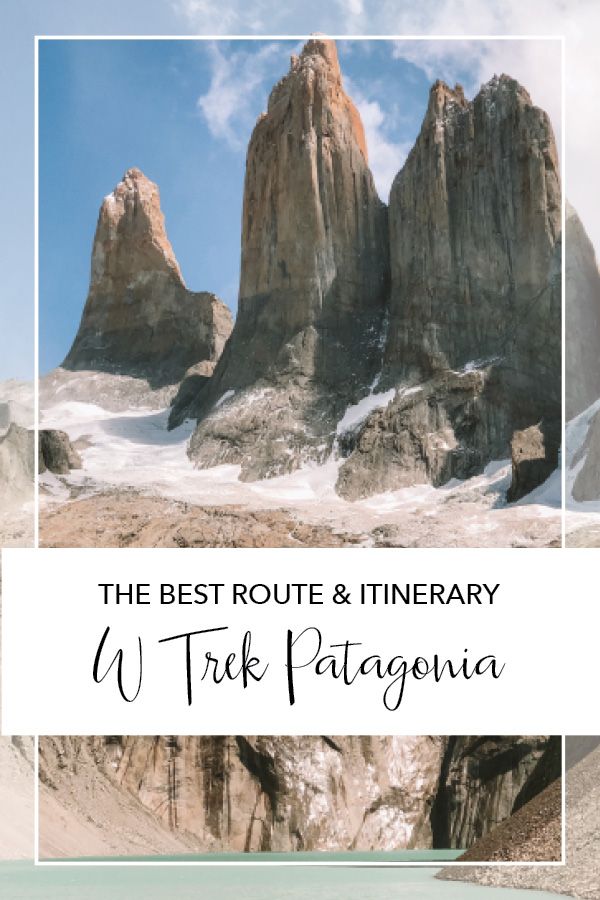
Save and pin this self-guided W Trek itinerary for later:
Looking for more travel inspiration? Check out our list of fun adventure ideas for your next trip.