New Zealand is a no stress destination to explore freely using a unique and popular concept called Freedom Camping. The idea is that you can freely camp just about anywhere on public lands if you have a self contained campervan with a toilet. Freedom camping in a campervan is much easier than tenting around and it's the perfect way to experience the vast natural setting.
Road trip! There are so many incredible places to see and fun things to do in New Zealand. We chose the best of the best and fit it into a 17 day itinerary including a map. Our New Zealand campervan itinerary starts in Auckland and takes you on an exciting journey through the North Island and South Island. We've also included a guide to campervanning New Zealand that will help you get started.
Get ready for an adventure-filled self driving tour of New Zealand!
Ultimate Self Driving Tour of New Zealand
Best campervan rental in New Zealand What is a self-contained campervan and is it important to get one?
North Island Road Trip Itinerary with Map: Day 1: Auckland Day 2: Cathedral Cove Day 3: Waitomo Glowworm Caves & Hobbiton Day 4: Rotorua & Waikarei Terraces Day 5: Hike the Tongariro Alpine Crossing Day 6: Wellington South Island Road Trip Itinerary with Map: Days 7-8: Marlborough Wine Region Day 9: Drive the coast & freedom camp in Lees Valley Day 10: Arthur's Pass Day 11: Franz Joseph Glacier, Fox Glacier & Wanaka Lake Day 12: Arrowtown & Queenstown Days 13-14: Milford Sound Day 15: Mount Cook Day 16: Lake Pukaki Day 17: Drive to Wellington & drop off campervan |
Driving a campervan in New Zealand
Best campervan rental in New Zealand
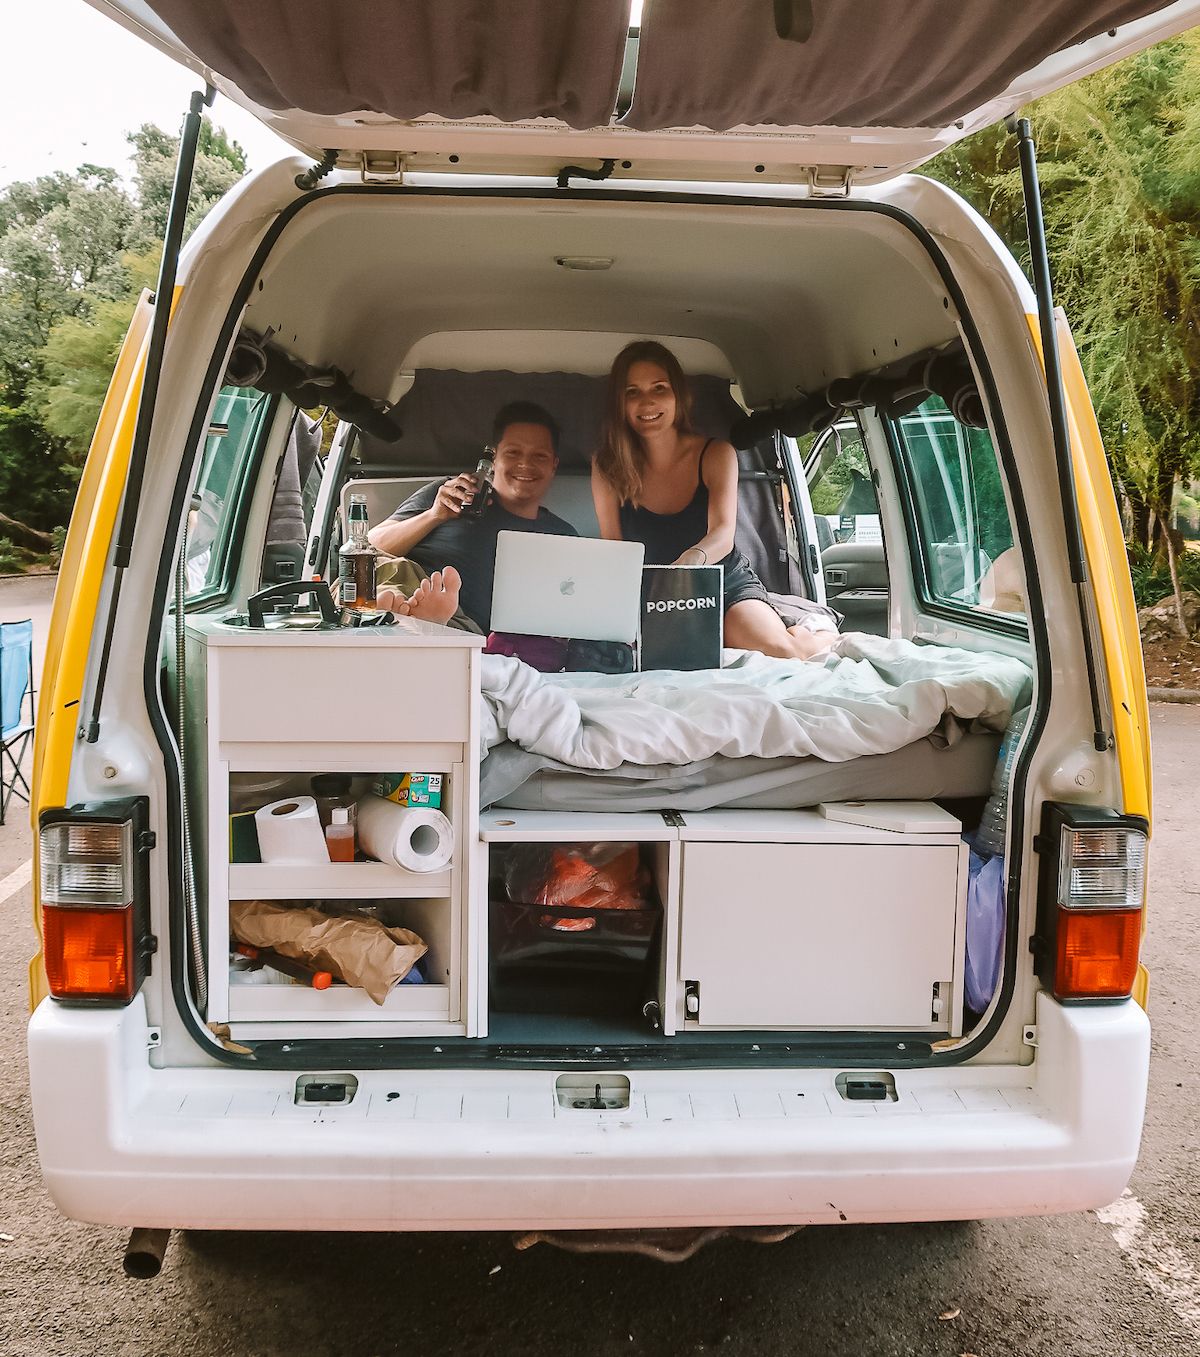
We are avid campers, but had never tried a campervan. We couldn't believe the luxuries you get with one of these self-contained living spaces on wheels: running water, sink, pull out stove top and a comfy bed that's ready to crawl in at any time!
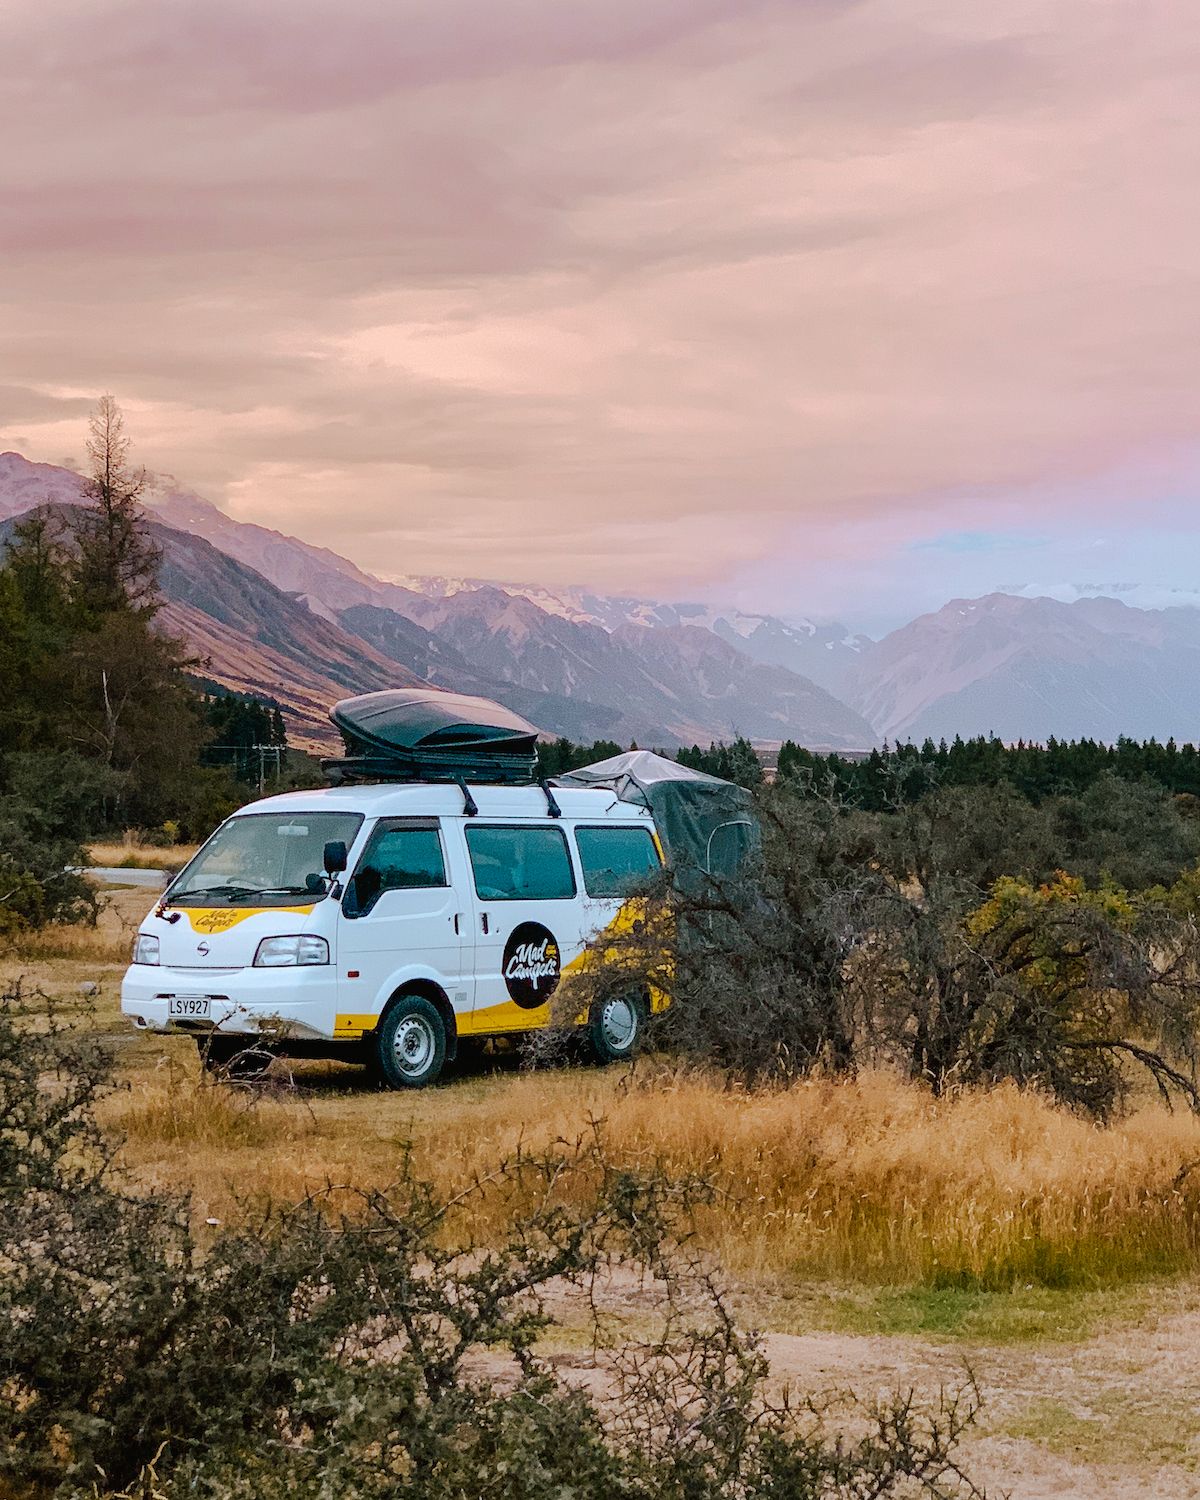
We chose Mad Campers because they had a clean design and were newly built. No obnoxious sayings spray painted on the sides like Wicked Camper's "Driver on ACID". The size of our campervan was perfect for us two.
If Mad Campers is sold out for your dates, try Spaceships. They are highly rated and also include bedding, cooking gear and can sleep up to 2 people. Just make sure you rent their self-contained option (we explain what this is in the next section, and why it's important).If you're traveling as a family, consider the Juicy Condo, which still feels like a campervan rather than a big camper and sleeps up to 4 people.
Renting a campervan in New Zealand is a lot cheaper than renting a car and spending money on accommodation. The hotels are not cheap in NZ!
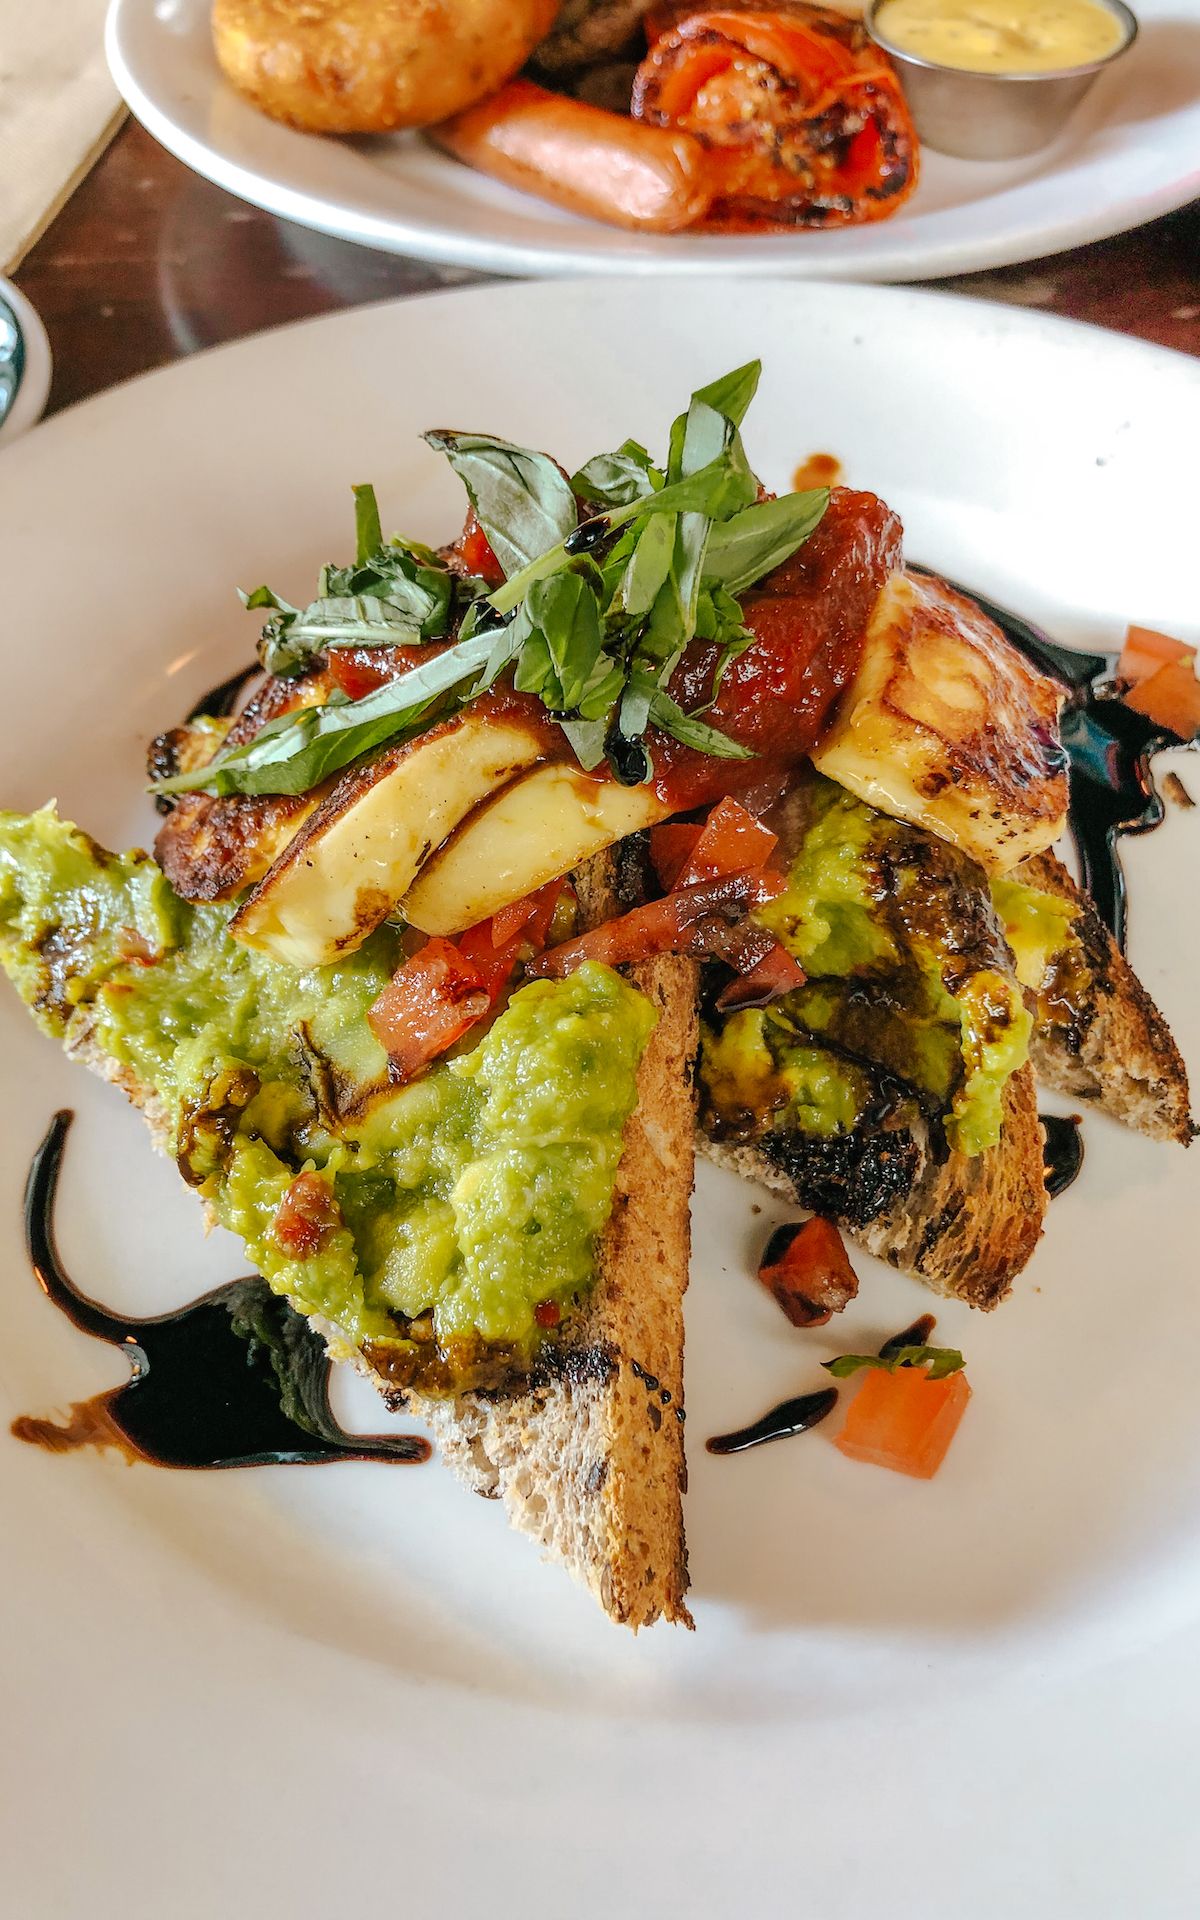
Check out our easy & delicious campervan meal ideas.
What is a self-contained campervan and is it important to get one?
A self-contained camper is a government certified vehicle that meets the sanitary conditions of having a toilet, potable drinking water and a grey water system (sink drain). The van will have a blue sticker on the window if certified. We absolutely recommend getting a self-contained camper, because without one, your freedom camping options are limited. You will have to stay at more expensive, crowded camping sites (called holiday parks) that have shower and washroom facilities. These holiday parks are busy with large camper vans and families.
What is freedom camping, actually?
One of our favourite parts of our road trip was searching for unique private camping spots on DOC (Department of Conservation) land. Just make sure to look up the rules for each county before parking your van, or you can be fined $200!
By far the easiest thing to do to get started is to download the Rankerz app. It will be your camping bible to help you find free or paid camping spots. Some are parking lots, and some require 4x4 access. If that fails, the Campable app is like an Airbnb for campervans, so you can check there too.
There are places that have very limited freedom camping spots, or that are completely restricted. You will see no camping signs everywhere for popular spots like Mount Cook, Millford Sound and Franz Joseph Glacier. In this case, you will have to bite the bullet and stay at paid DOC sites or at a holiday park. Sometimes it will be better to pay to get the most out of the itinerary.
Top Tip: Freedom camping sites, especially in municipalities and towns, have limits on how many campers can stay. One tip is to avoid arriving any later than 6PM to get a spot. In parking lots, a sign may state a maximum of overnight campers allowed. However, it is against the law in NZ to drive tired. So, if its late in the evening, you have a good excuse to stay in a parking lot, even if it's above the sign quota.
17 Day New Zealand Campervan Itinerary
North Island Itinerary Map (Days 1-6)
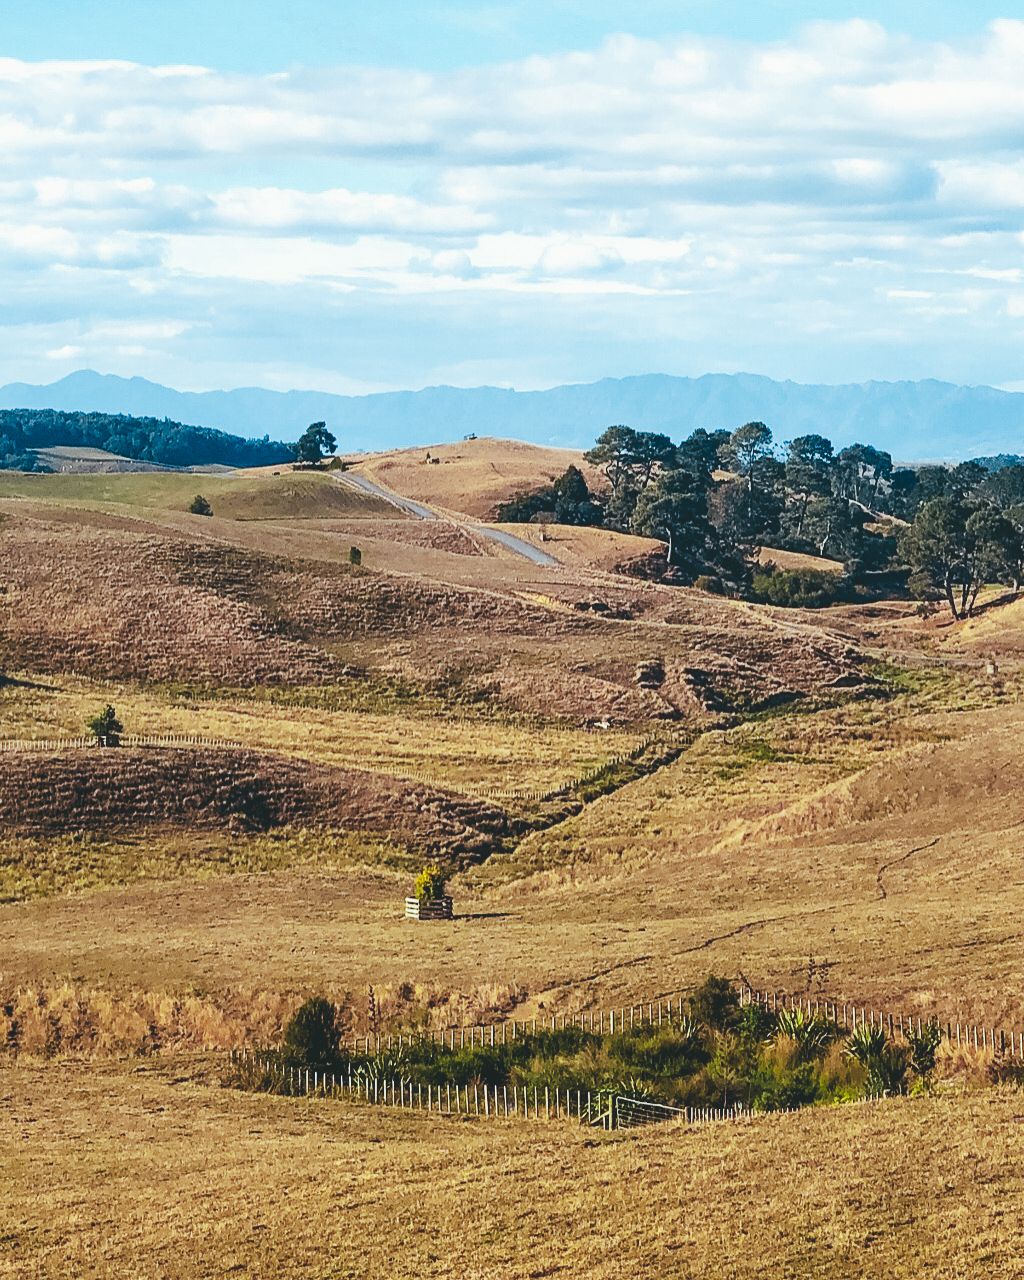
Now you're ready to hit the road. The North Island has gorgeous rolling hills, sandy beaches, geothermal parks and volcanic landscapes that offer unique sights and experiences.
Day 1: Auckland

Auckland is a long flight away from most places, so we recommend staying one night near the airport to get a good sleep before taking the van out onto the road. You'll have to be sharp, because they drive on the left here! Mad Campers offers free pick up if you stay near the airport.
We arrived early and took a taxi into Auckland (strangely slightly cheaper than Uber) to grab brunch and supplies. We ate at Chuffed, a bright and white-walled cafe tucked away on High Street in the downtown core. It's a great starting spot to walk around and gather any supplies you need for your adventure on the road. We bought a cheese grater, hanging lights, candles, power adapter, and a doormat. Ari was able to pick up some camera gear as well.
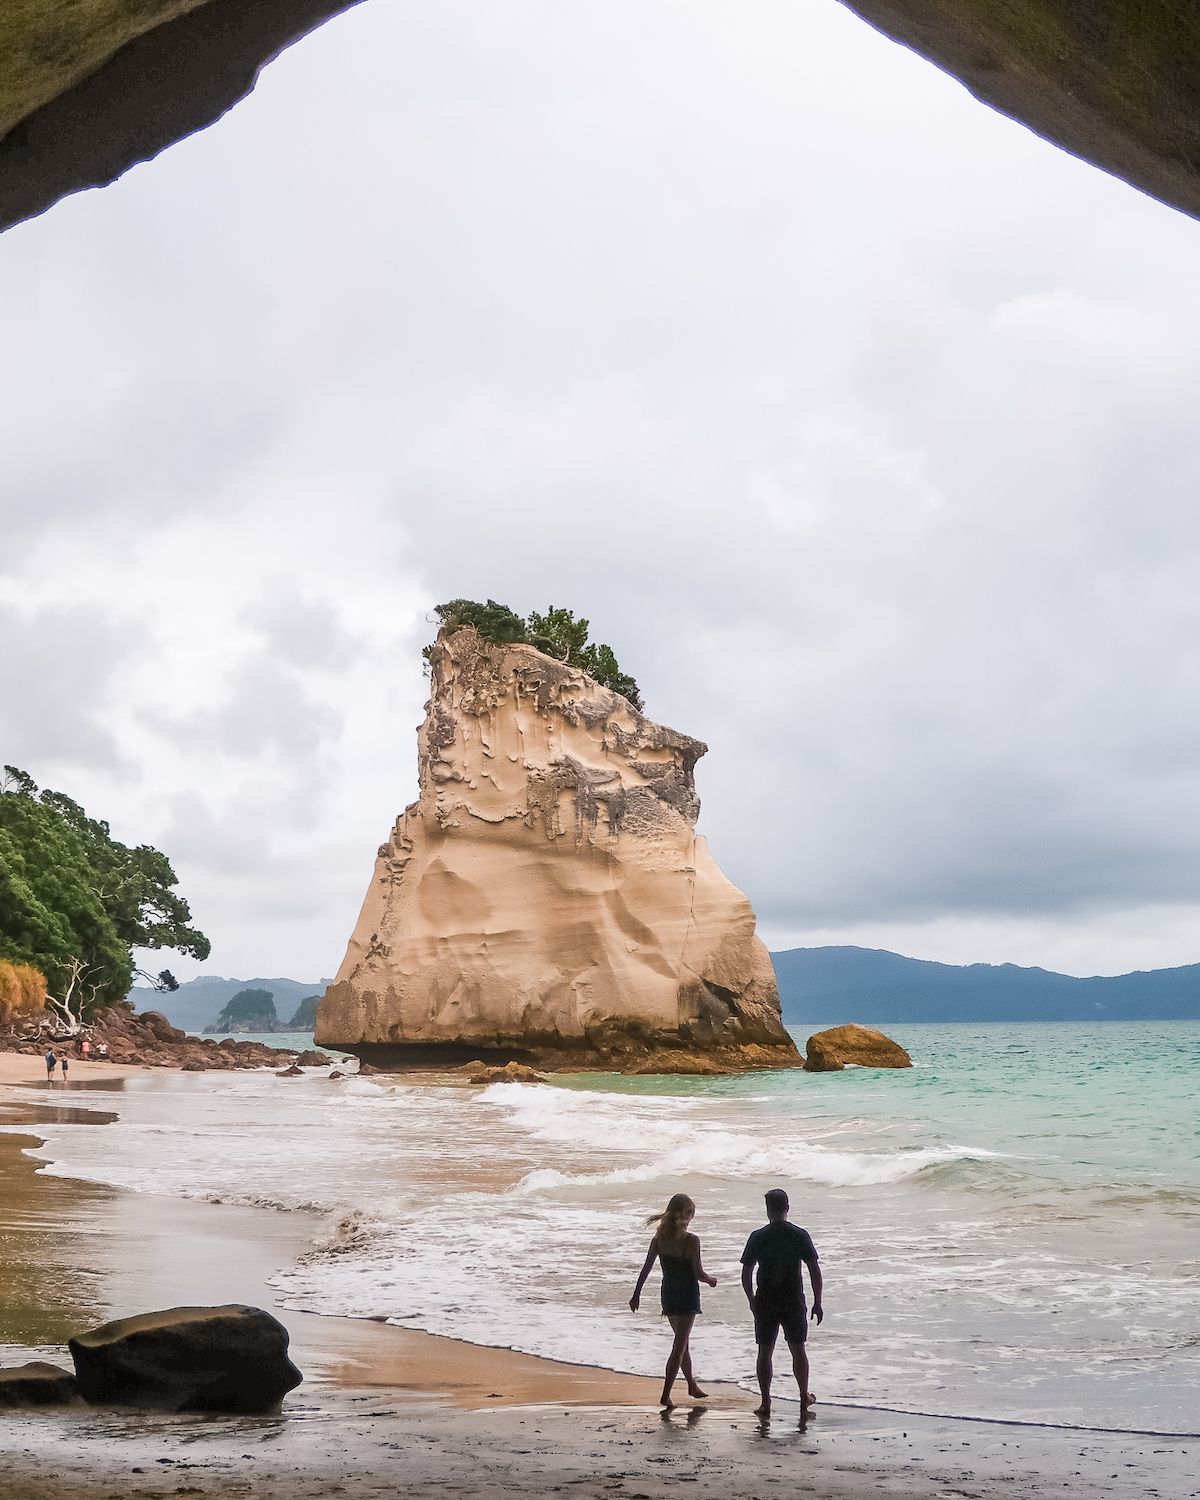
Day 2: Cathedral Cove
Total driving time: 2.5 - 3 hours
Today's the day you will meet your trusty camper van. You'll be shown how to use the gas stove, portable toilet, and water tank. If you don't catch it all the first time they show you, have no fear! There is a handy manual. After the quick 30-minute orientation we were off.
First stop: grocery store! It was time to stock up our fridge. Countdown ended up being our favourite grocery store, since New World and Fresh Choice always had higher prices. New World was also very strict with buying alcohol and they made us grab both our passports from the van to be able to purchase it. No other grocery stores or liquor stores required this. I guess it's a compliment.
How to get to Cathedral Cove
Next, we were on our way to Cathedral Cove (Te Whanganui-A-Hei Marine Reserve), a picturesque cove that perfectly frames a large rock coming out of the sea. After about a 2.25 hour drive you will reach the free lower parking lot. In high season (Oct 1- April 30) you have to drop off your van here and take a shuttle to the entrance of the park. It's only $7 NZD roundtrip for the shuttle and the jolly driver likes to crack a few jokes. In low season from May 1 - Sept 30, the upper car park is open so you won't need to take the shuttle.
Cathedral Cove walk
From the drop off point from your shuttle, it's about a 30 minute walk to the cove (1 hour round trip) with scenic views along the way.
The first part of the walk is a paved path and then it turns into wooden stairs that lead you down to the golden sandy beach. Cathedral Cove was one of our favourite activities our whole trip. Plan for at least an hour down there, but don't miss the last shuttle back to the parking lot!
Hot Water Beach & Whangamata surf town
Consider visiting Hot Water Beach or the quaint surfer town of Whangamata on your way to Cathedral Cove. Hot Water Beach is an area where you can dig holes in the sand and create your own little thermal pool. We chose to visit Whangamata instead, since the tide times didn't work out at Hot Water Beach. You can only dig pools 2 hours before and 2 hours after low tide.
Where to camp for the night
There are only a few freedom camping spots available in the area, so make sure to try to arrive before 6 PM. Look up camping spots on your Rankerz app.
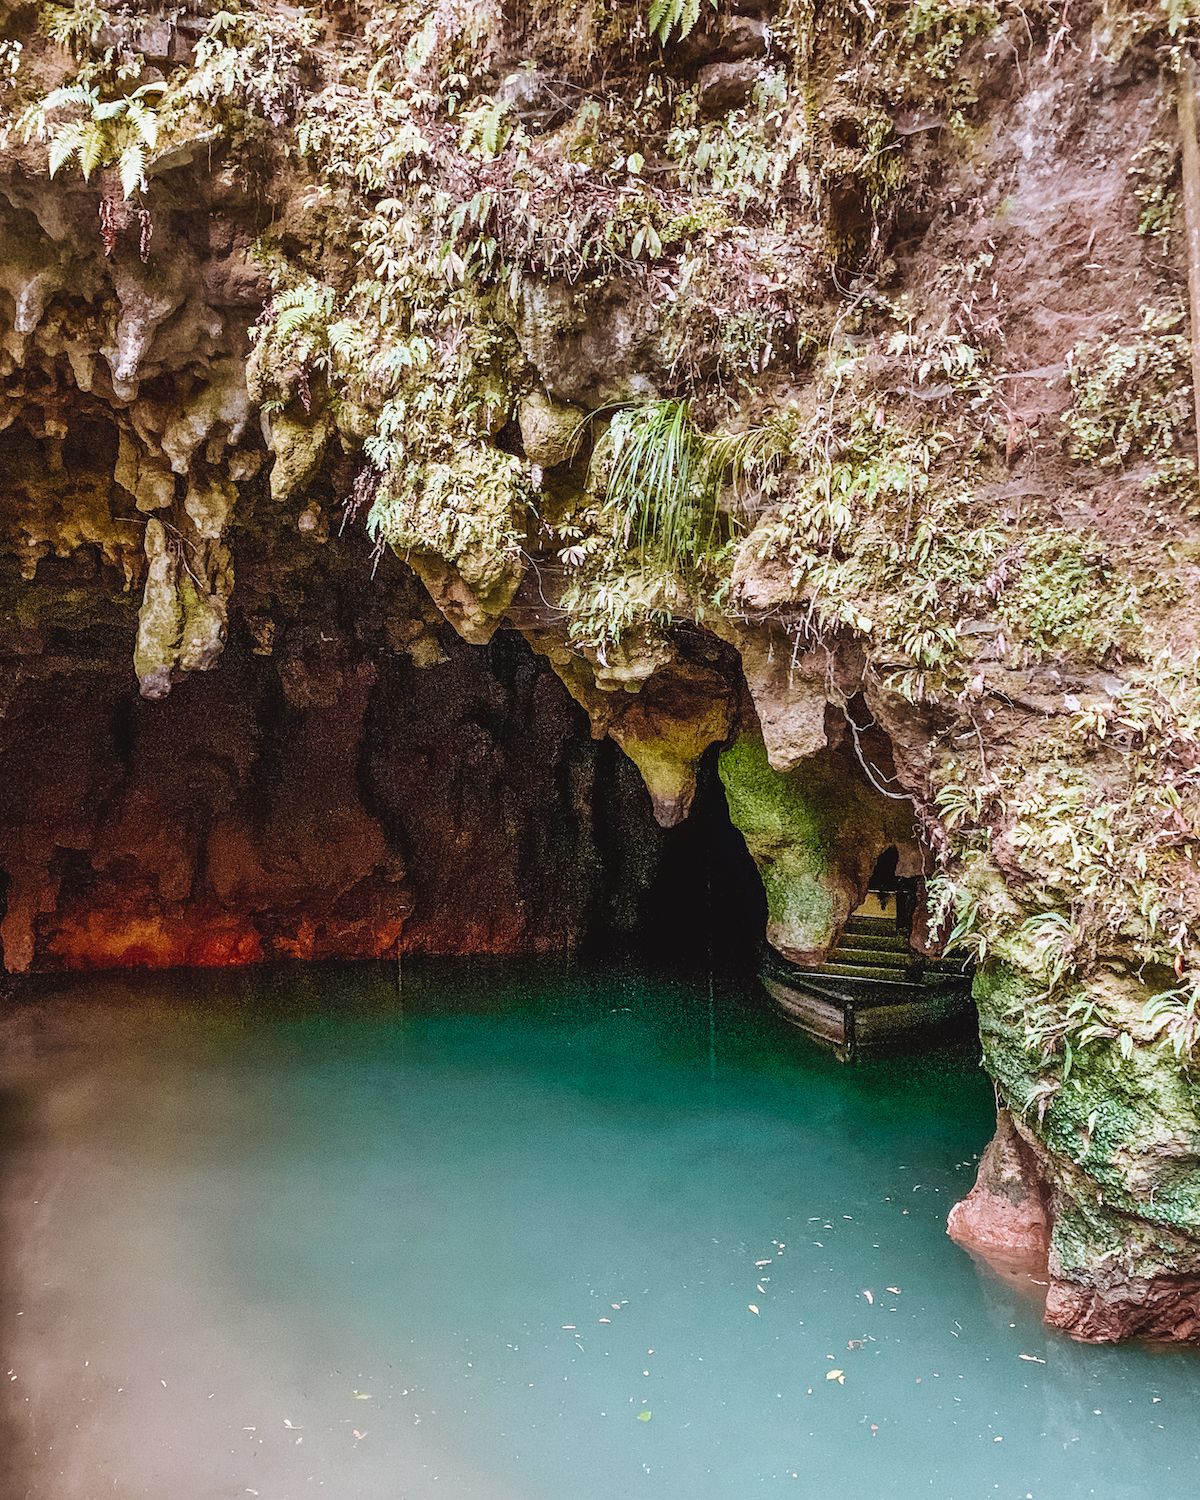
Day 3: Waitomo Glowworm Caves & Hobbiton
Total driving time: 4.25 hours
Waitomo Caves
Today will be filled with unique once-in-a-lifetime experiences!
It's a three hour leisurely drive to the multi-level Waitomo Caves. In the 30-million year old caves, you'll be able to see thousands of glowworms radiate their bioluminescent light!
🌌 Reserve your Waitomo Caves ticket online, since certain time slots can fill up. Our tour included a boat ride through a dark area of the cave where you get to see millions of glow worms. It looked like the Milky Way!Top Tip: wear sunglasses that afternoon so your eyes adjust more quickly.
Hobbiton
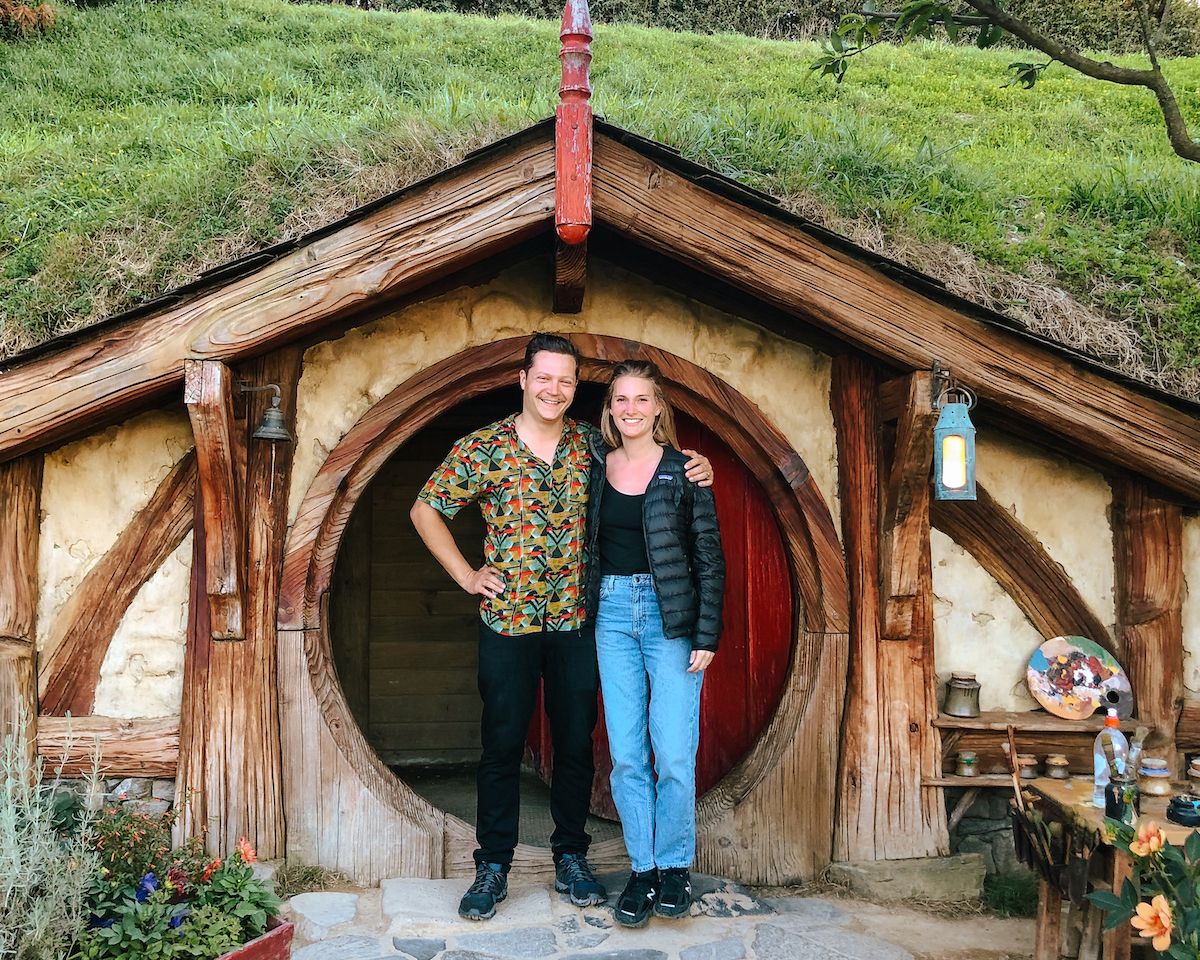
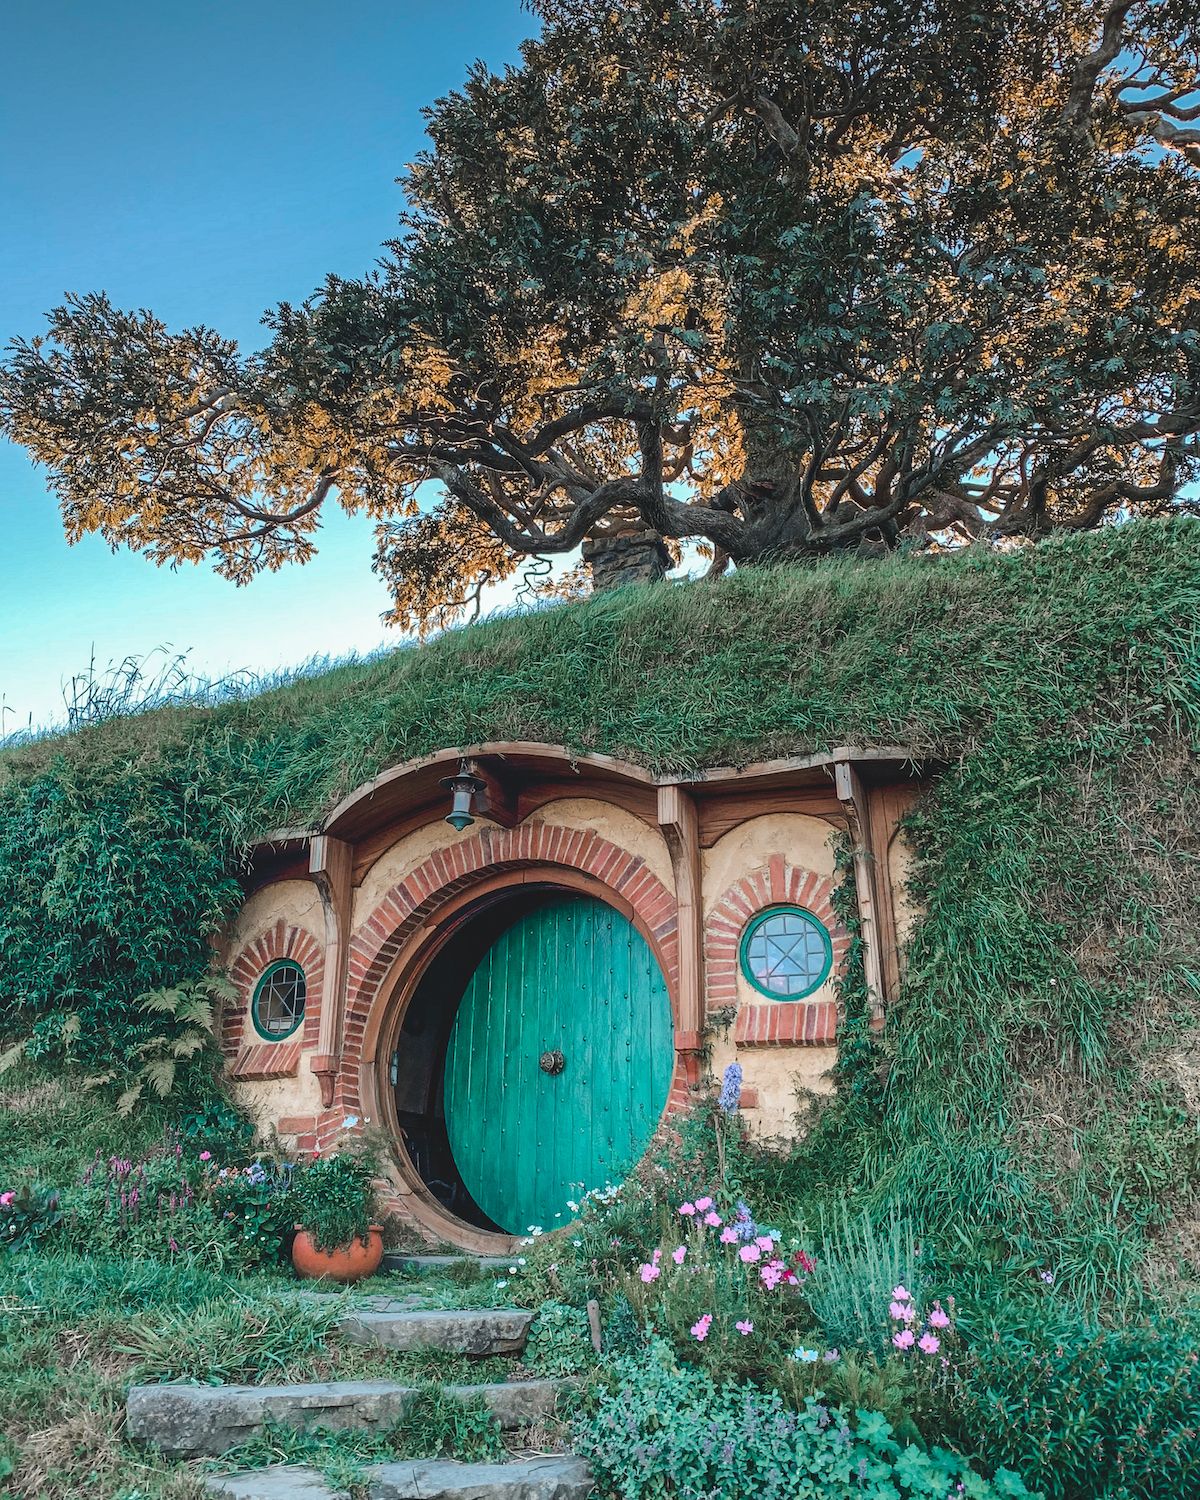

After your tour, drive another 1.25 hours to Hobbiton. You literally drive into the shire, a mythical place depicted in the The Lord of the Rings. It was incredible with rolling green hills, just like in the books and movies.
We highly recommend the Hobbiton Evening Banquet tour. It's the last tour of the day, so you have the place to yourself during sunset. As your imagination runs wild with thought of life in the pristine shire, you get to go one step further and head into the Green Dragon to drink craft beer and eat a delicious banquet style dinner, as the hobbits would!
Get into the Green Dragon fast and nab the two big leather chairs by the fireplace for the welcome drink. Next, prepare yourself for a feast of chicken, lamb shank, fish, roast veggies, sausages, salad, mashed potatoes, gravy and bread all laid out on platters within grabbing distance at your table. DIG IN! It really felt like we were in the movie and the music they played was perfect. The Evening Banquet Tour sells out months ahead so make sure you reserve your spot well in advance.
🧙 If you can't get a spot on the banquet tour, or don't want to commit to 4 hours, there are multiple 2-hour Hobbiton Movie Set Tours a day. They also include a drink in the Green Dragon. Reserve your ticket through GetYourGuide. We like how they offer free cancellation up to 24 hours in advance.Where to camp for the night
Stay at a local farm down the road called Da Barn Campersite, which you can book through the Rankerz or Campable app. Through Campable it was slightly higher in price. Hobbiton is a 30-minute walk from the camper site or you can arrange with the owners of the farm to drop you off. That way you can have couple pints of beer and not have to worry! After our tour was done, the tour guides at Hobbiton happily dropped us off back to the farm for free with their shuttle bus!
Day 4: Rotorua & Waikarei Terraces
Total driving time: 3 hours

Rotorua
Today you will drive through Rotorua, a volcanic area renowned for its geothermal activity. There are many geothermal parks you can visit, where you can walk through otherworldly sights, detox in a mud bath, or soak in the mineral-rich hot pools.
🌋 Check out these highly rated tours in Rotorua through GetYourGuide:We like how there is free cancellation up to 24 hours in advance.
Wairakei Terraces Hot Pools
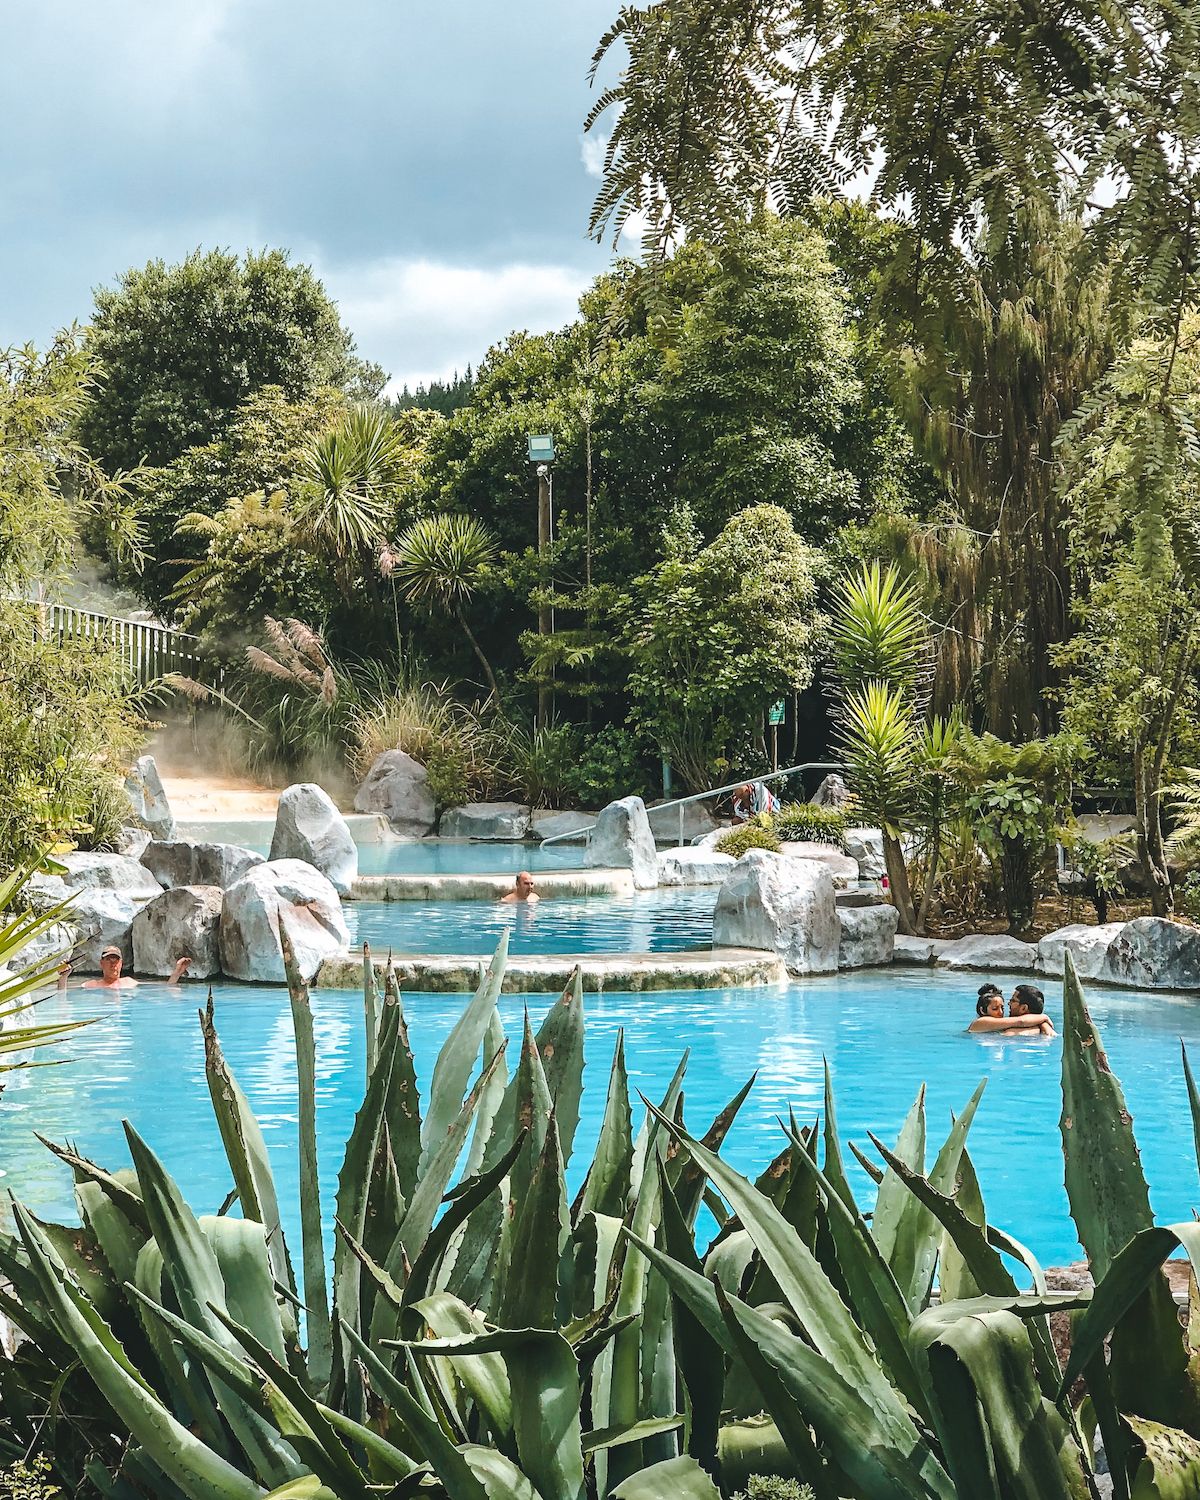
After Rotorua, we stopped in at Wairakei Terraces, since they had a mix of thermal sights and a thermal health spa to relax at. We found this thermal spa to be quiet compared to others. After traveling a few days in the campervan, it was a great chance to shower and clean up as well!
You need to purchase separate tickets to bathe in the thermal pools vs. walking around the area to view the silica terraces. We enjoyed both activities, and loved soaking in the mineral rich silica pools. The thermal baths were serene, relaxing, hot and clean. A bonus was that there was a 50% promotion going on through GrabOne. They have lots of these sales, so check it out before you go!
Where to camp for the night
After your relaxing soak, it's time to find a camping spot. The Rotorua area doesn't have the best freedom camping spots, so we recommend driving 1.5 hours to the Whakapapa Scenic Reserve. We pulled over on the side of the gravel road a few kilometres into the park to stay for the night. Staying here will set you up nicely for your hike in Tongariro the next day.
Day 5: Hike the Tongariro Alpine Crossing
Total driving time: 2-3 hours, depending on where you camp
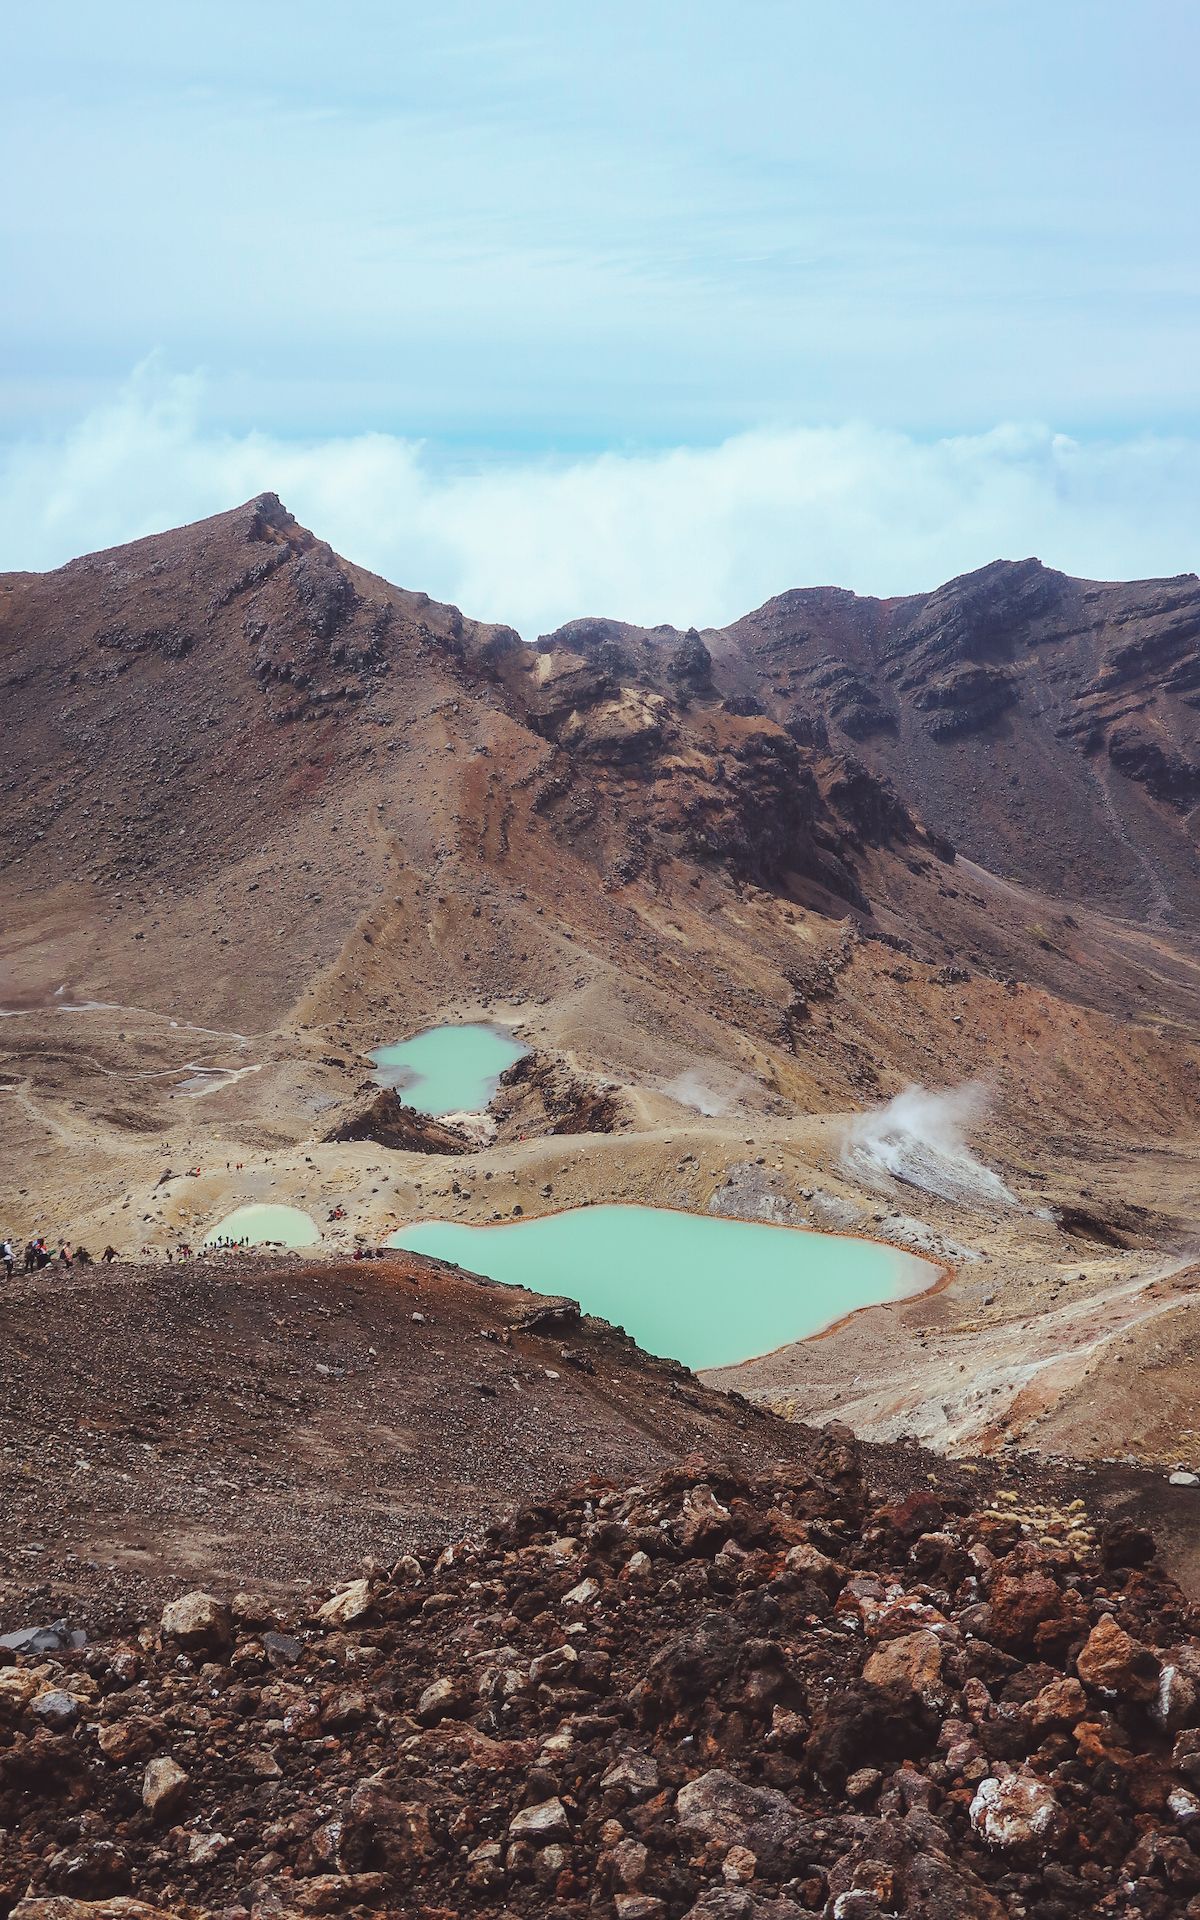

Today is your chance to stretch your legs. The hike through the Tongariro Alpine Crossing, aka the sinister Mordor from Lord of The Rings, is difficult, but rewarding. You get to see active volcanoes and otherworldly thermal lakes.
The hike is 19.4 km in distance, with a total ascent of 765m and total descent of 1,125m. The first 100 meters of the descent is very steep, but the rest is very gradual and easy on the knees. Depending on your pace and stops along the way, the hike will take you between 5-8 hours. We higjly reocmmend renting hiking poles for the steep sections of the hike.
Tongariro Alpine Crossing Shuttle
We bought shuttle tickets online from Tongariro Crossing Shuttles, since they are flexible if you need to change the date or timing of your shuttle. We easily changed ours to an hour later due to weather conditions. The company picks you up in the village nearby called National Park. Here, you can leave your campervan for free. Once you finish your hike, the shuttle will pick you up (on an hourly basis) and take you back to the Alpine Centre. Roundtrip shuttle tickets cost $45 NZD.Where to camp for the night
After your hike, start your drive down to Wellington and stay at your campsite of choice along the way using the Rankerz app. We stayed at Waikanae Beach.
Day 6: Wellington
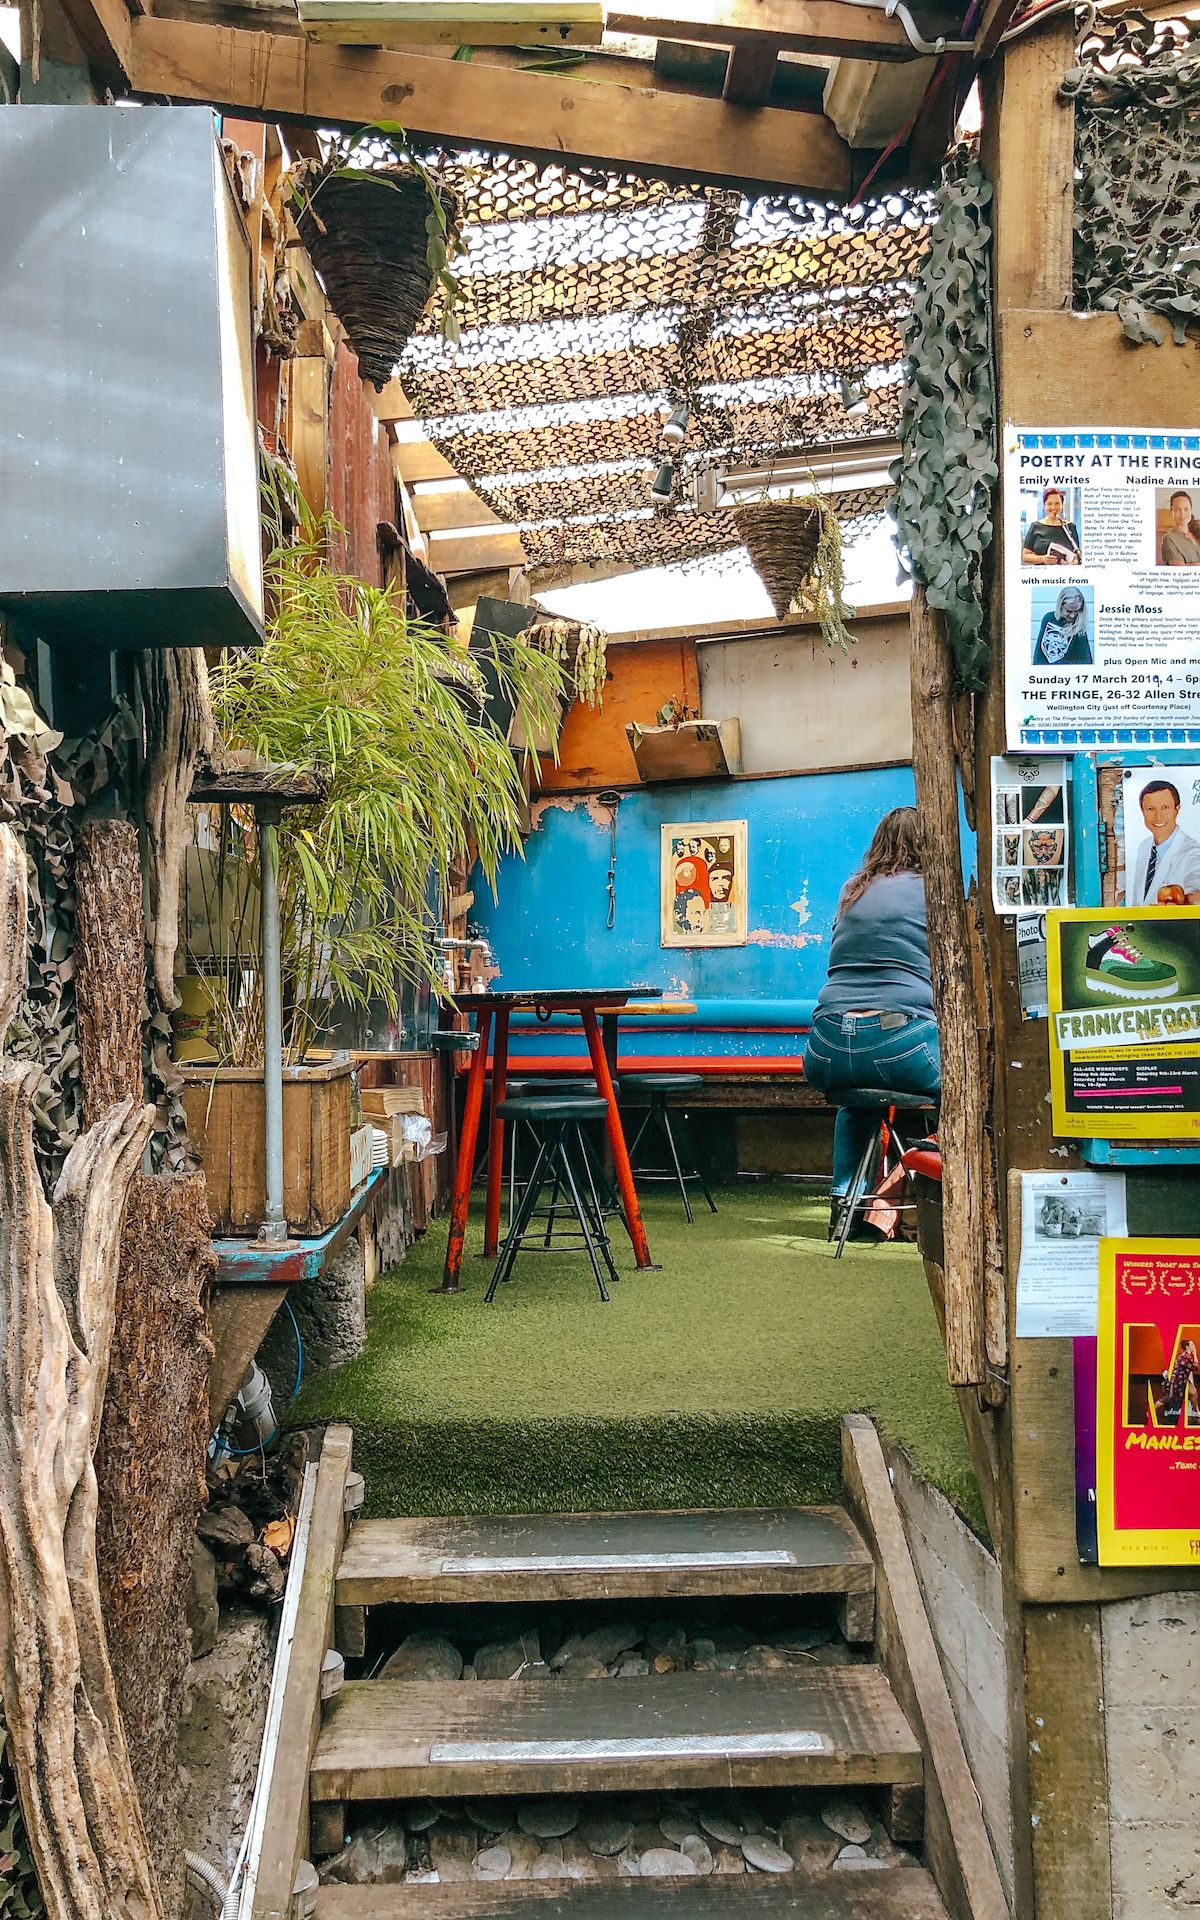
Wellington is New Zealand's cultural hub with a contemporary art scene and an abundance of cafe and restaurants. Did you know it's the world's windiest city? Just wait until you feel it. We enjoyed visiting Fidel's Cafe, a colourful restaurant serving Cuban coffee and homestyle dishes. On the bohemian Cuba street you'll find many boutique stores, cafes, and coffee roasters to explore.
Where to camp for the night
There are a couple free spots you can stay in Wellington with the camper, but you'll likely need to arrive early to grab a spot. You could also reserve a paid camping spot in advance. Check both the Rankerz and Campable apps.
South Island Itinerary Map (Days 7-17)
The less busy South Island is where the scenery really starts to change. Highlights of this leg of the trip include a stay in the Malborough wine region and incredible natural sights, like Milford Sound, Mount Cook, Franz Joseph Glacier and Lake Pukaki. Just drive onto the ferry from Wellington to Picton and you're on your way!
Day 7 & 8: Marlborough Wine Region
Total driving time: 4 hours (including ferry)
It's time to cross over to the other island. Book your ferry ticket in advance to get the best price and time. We chose BlueBridge ferries since they were slightly cheaper, but do we ever wish we took Interislander. BlueBridge has a smaller boat and it made us so seasick!
Once you arrive on the South Island, it's only a 30 minute drive to Renwick, the hub for biking the golden mile of wineries in the Marlborough region.The next day we picked up our rental bikes from Bike2Wine and stopped in at six wineries. You don't need to make reservations in advance for the wine tastings, and lots of them are free!
Our favourite wineries
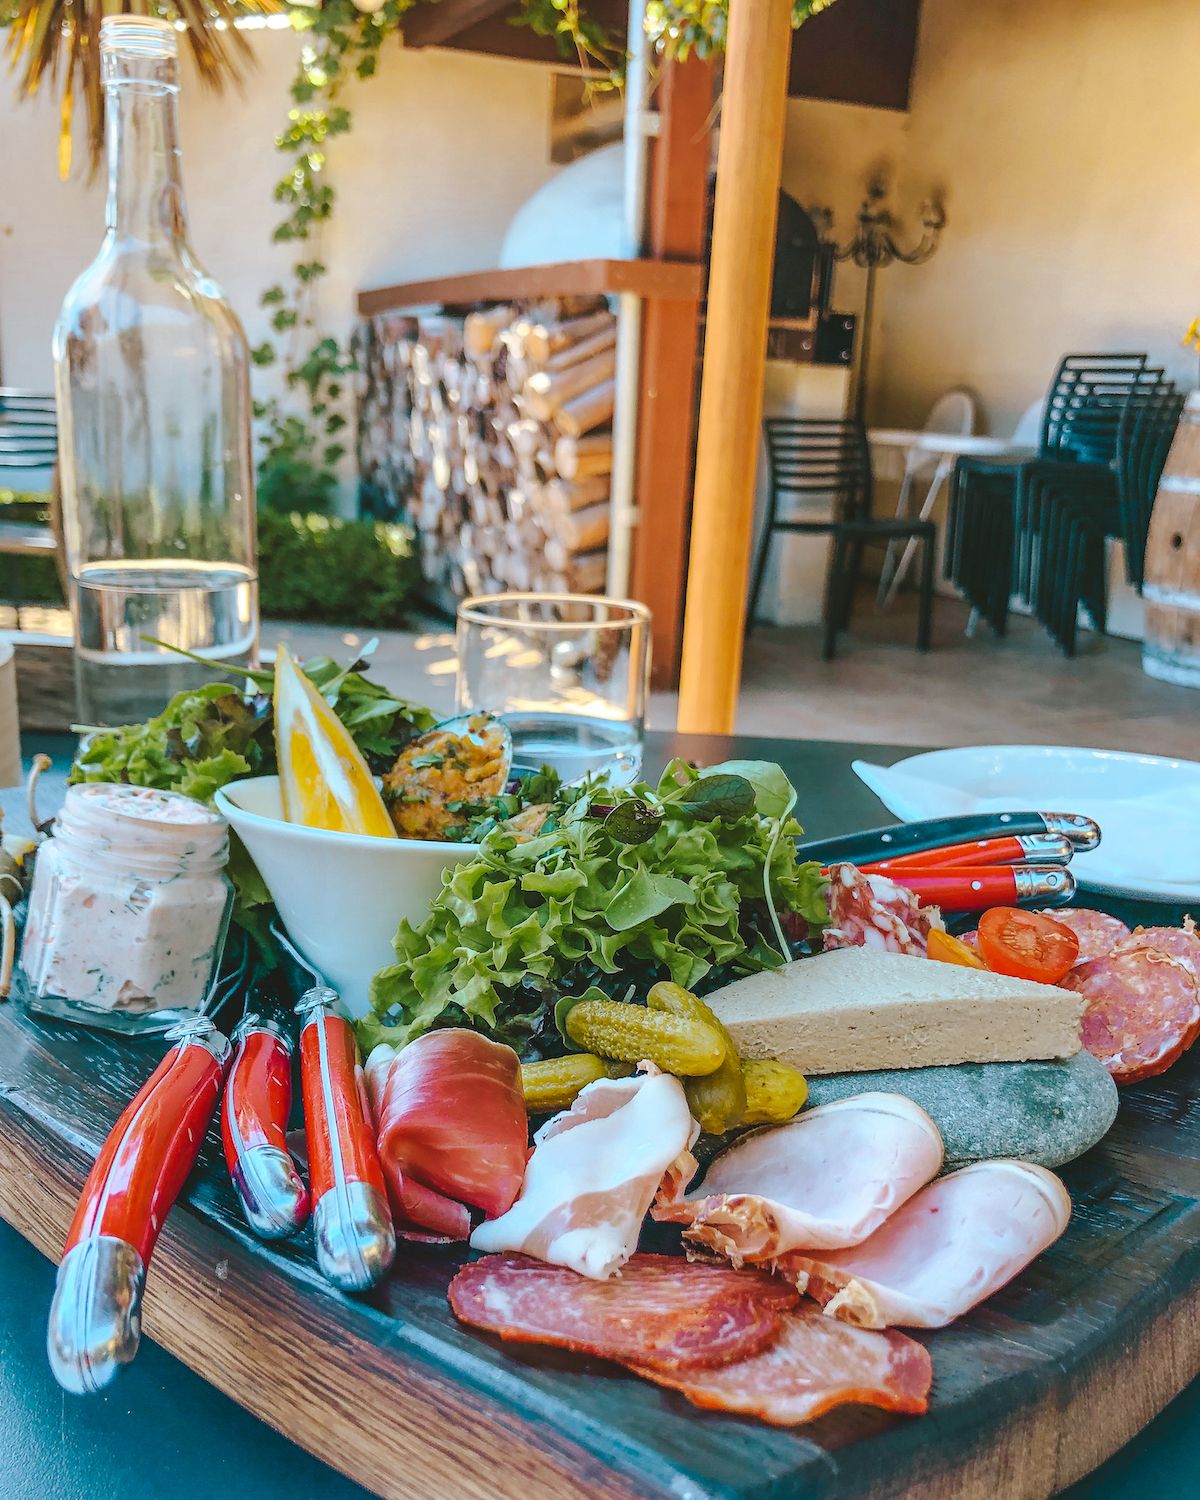
Best winery for lunch: Giesen Wines
Giesen Wines was founded by three German brothers and besides their wine, they create delicious charcuterie boards! It was a great experience to taste their wines with a platter for lunch. We got the last table, so recommend booking a table in advance, especially in high season.
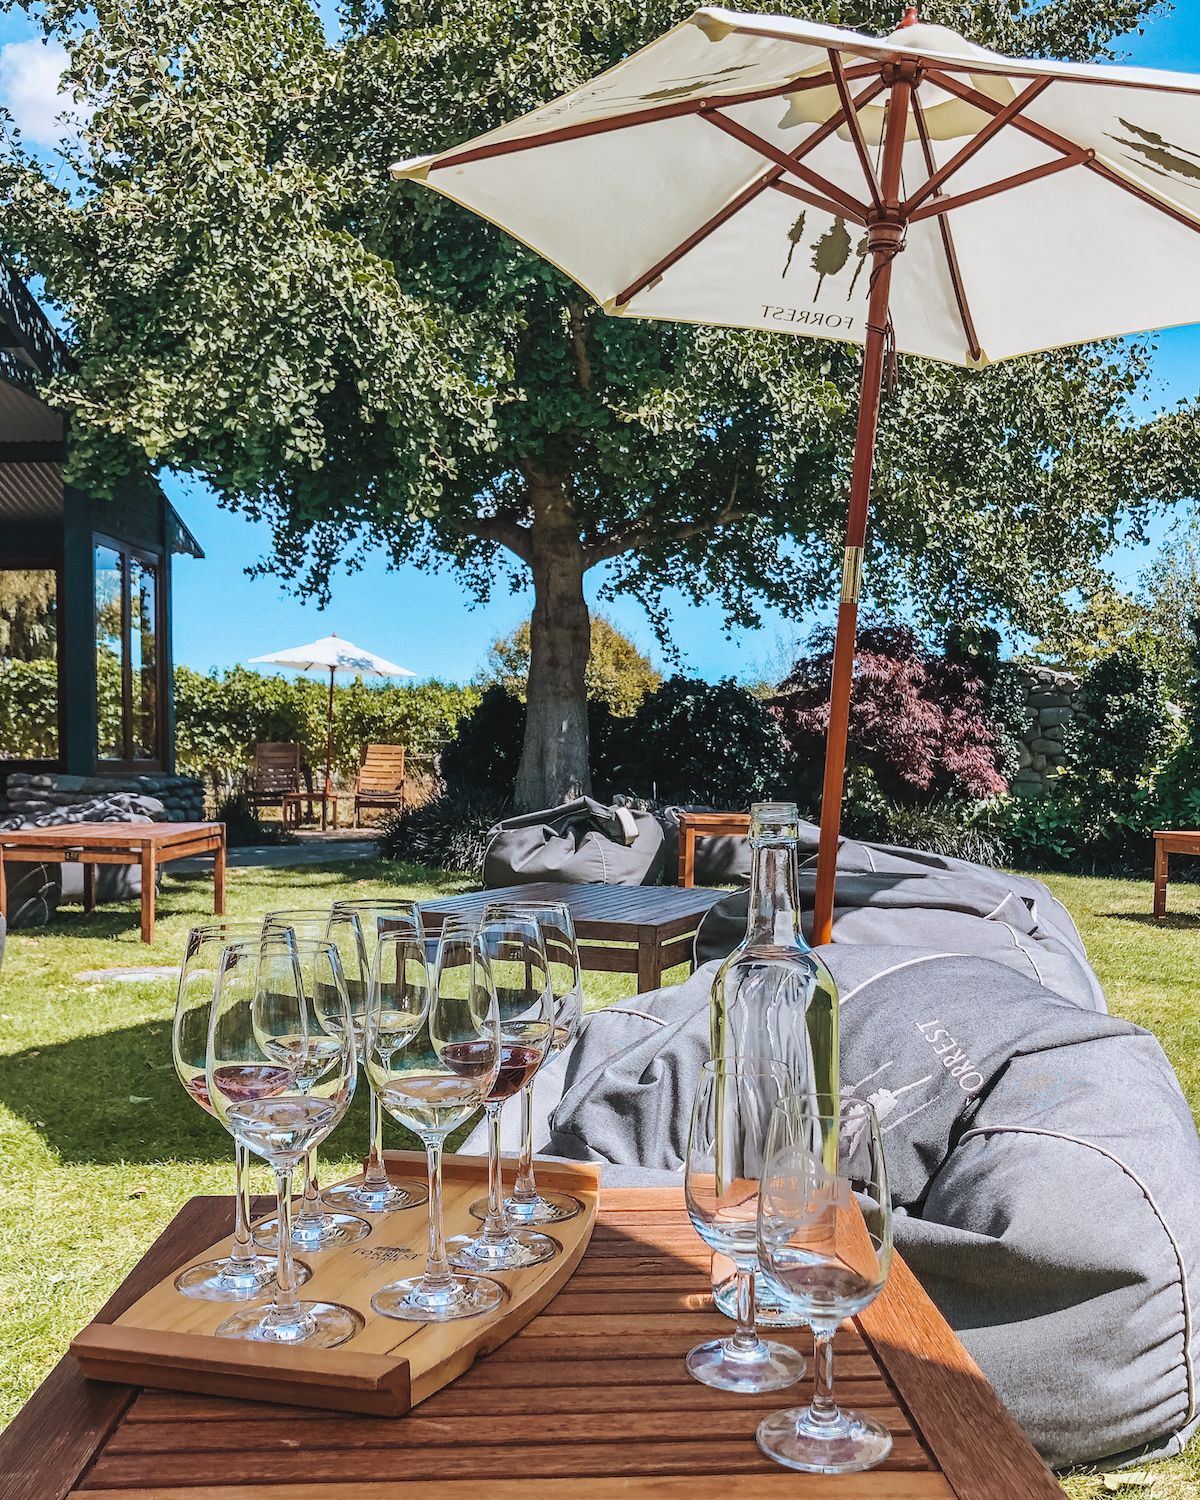
Best winery for the setting: Forrest Wines
Forrest Wines had the best setting to relax and taste wines out of the six we visited. We chose a table with bean bag chairs to sit at for our tasting, and the person who worked there came over with our wines. She gave us an informative explanation of each one, and we ended up buying a bottle.
Where to stay in Renwick
We chose to take a break from the van and booked a B&B in town that had a clothes washer. It felt great washing our sheets from the van! Olde Mill House is a great choice, since they offer free bike rentals and breakfast. Browse more stays on Booking.com.Day 9: Drive down the coast and freedom camp in Lees Valley
Total driving time: 4.5 hours
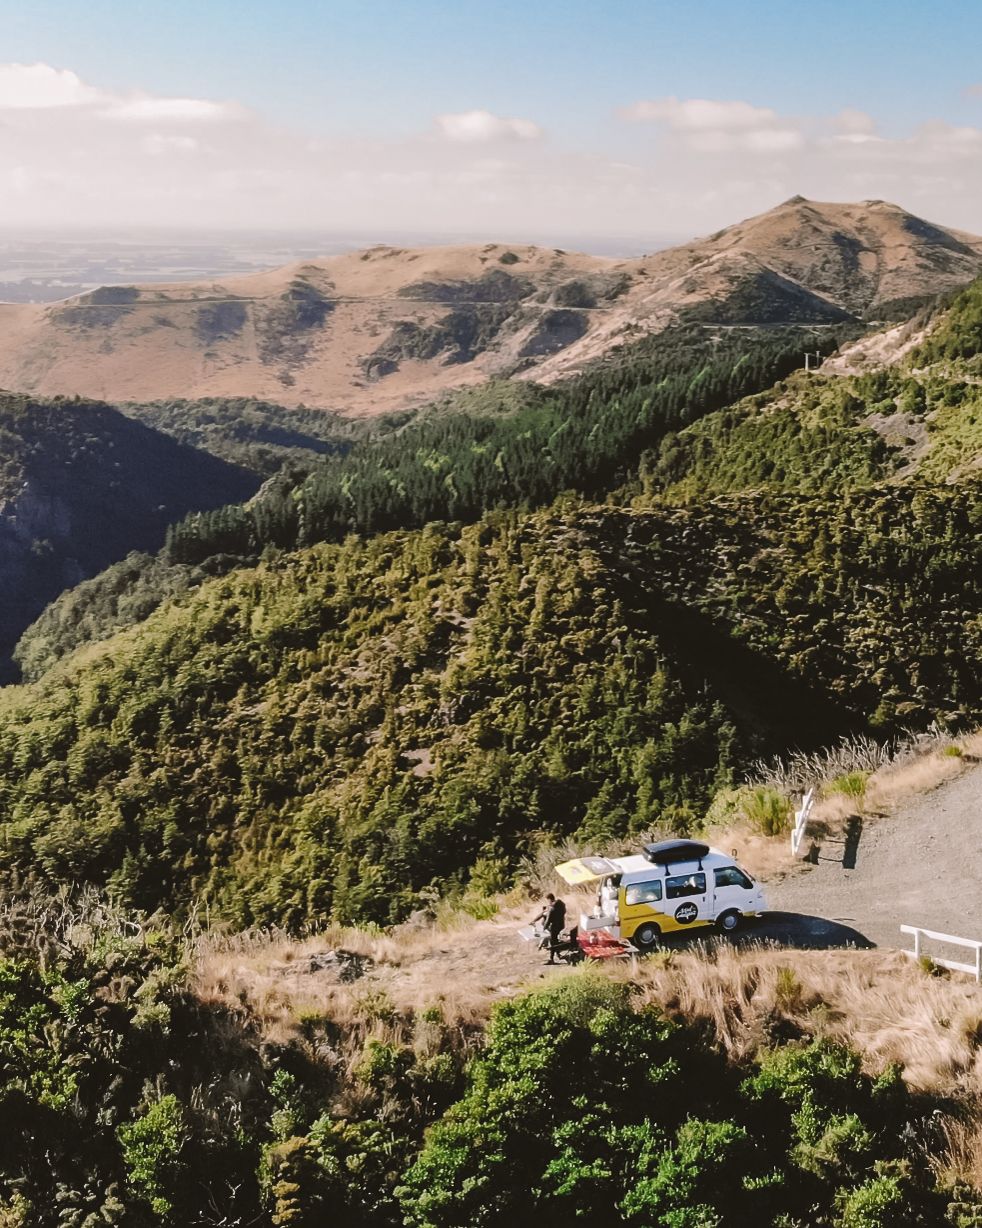
Today will be a longer driving day down the coast of the island on your way to Arthur's Pass. We stocked up on groceries and were ecstatic to find one of the most scenic and private camping spots of our whole stay! Lees Valley has a winding hillside road through the mountains with a few pull-out spots you can park the campervan at for the night. Check out our camping location here on Google Maps.
Day 10: Arthur's Pass
Total driving time: 4.5 hours
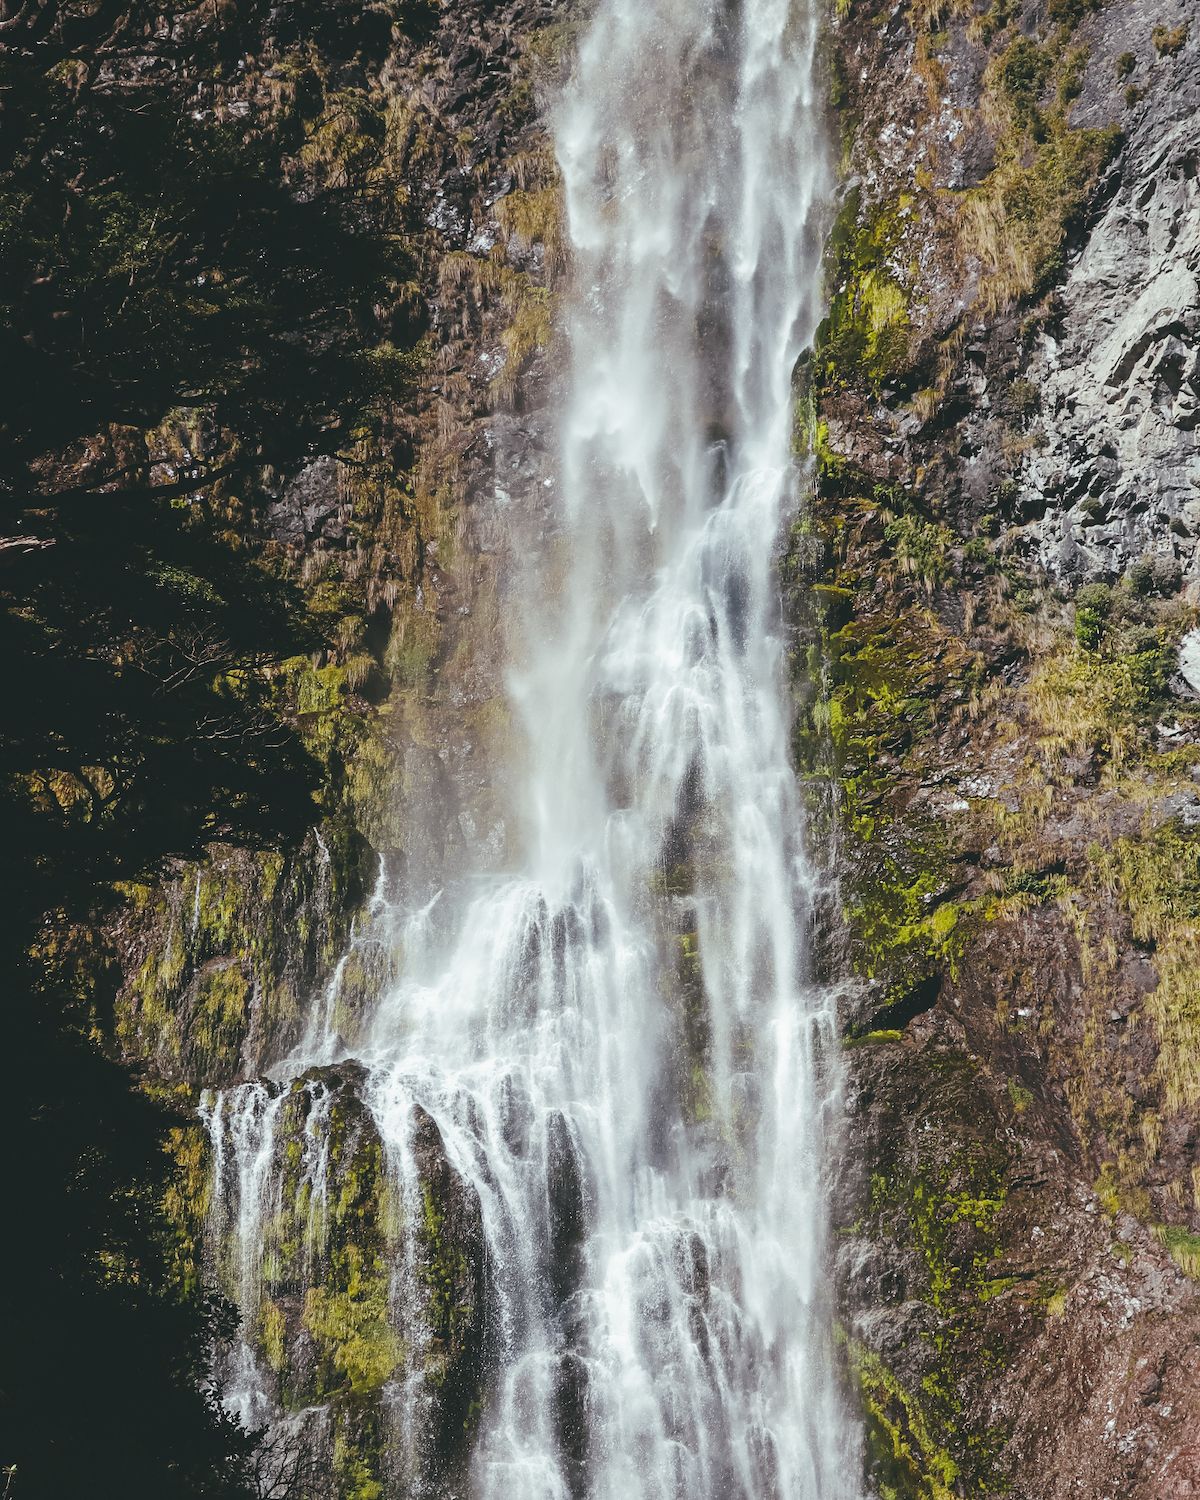
Today you'll drive through Arthurs Pass, known as one of the most scenic drives through New Zealand. Our highlights were hiking to the magnificent waterfall at Devil's Punchbowl and driving through Castle Hill, where hundreds of giant free-standing limestone rocks sprawl across a golden hill. Park your campervan in the town of Arthur's Pass to stretch your legs, and take the leisurely 1-hour roundtrip hike to Devils Punchbowl. The waterfall is impressive!
There is a lot of hype around this drive, but we were left slightly underwhelmed compared to other areas of New Zealand.
Where to camp for the night
Find a place to camp near Franz Joseph Glacier for the night. Freedom camping is strict in this area so we stayed at a paid campsite.
Day 11: Franz Joseph Glacier, Fox Glacier & Wanaka Lake
Total driving time: 3.5 hours
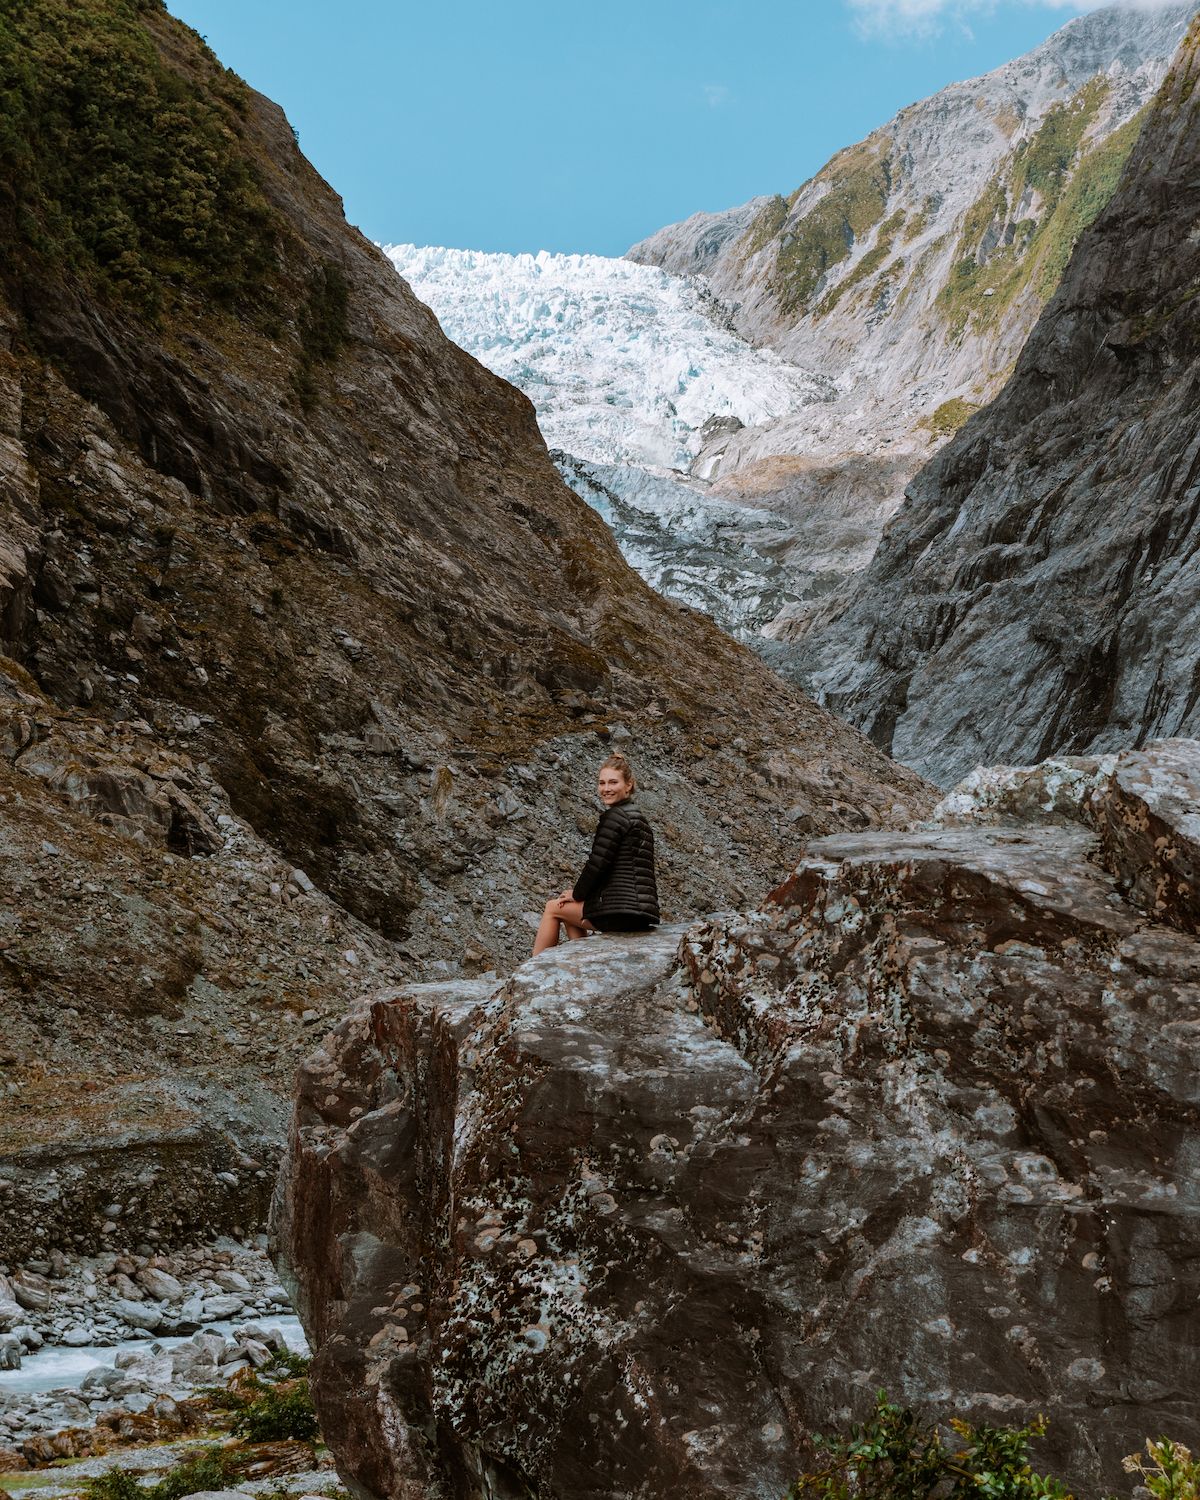
Wake up early to see Franz Joseph Glacier, since the clouds tend to roll in by the afternoon. It's an easy 1.5 hour round trip hike to the glacier on a wide river stone path. Once you reach the glacier, it's a breathtaking sight!
The glacier's size is decreasing every year at an alarming rate, so we felt fortunate to have seen it. As you walk to the glacier, there are signs that show you where the glacier used to be located and at what year. It puts it into perspective how far and quickly it has receded.
🚁 For an exciting activity, book a scenic helicopter flight that brings you close to Fox Glacier or Franz Joseph Glacier with a snow landing. GetYourGuide offers many highly rated tours with free cancellation up to 24 hours in advance:Where to camp for the night
Drive to Wanaka Lake for the night and relax lakeside. Use the Rankerz app to find a spot.
Day 12: Arrowtown & Queenstown
Total driving time: 1.25 hours
Arrowtown
On your way to Queenstown, stop in at the super cute Arrowtown for some lunch. The quirky and historic gold mining town is filled with cafes, boutiques and galleries.
Queenstown
Queenstown is known as the "adventure capital of the world" where you can find tons of adventurous activities to do such as skydiving, bungee jumping, and rafting. We didn't partake in any adventure sports, but explored the town.
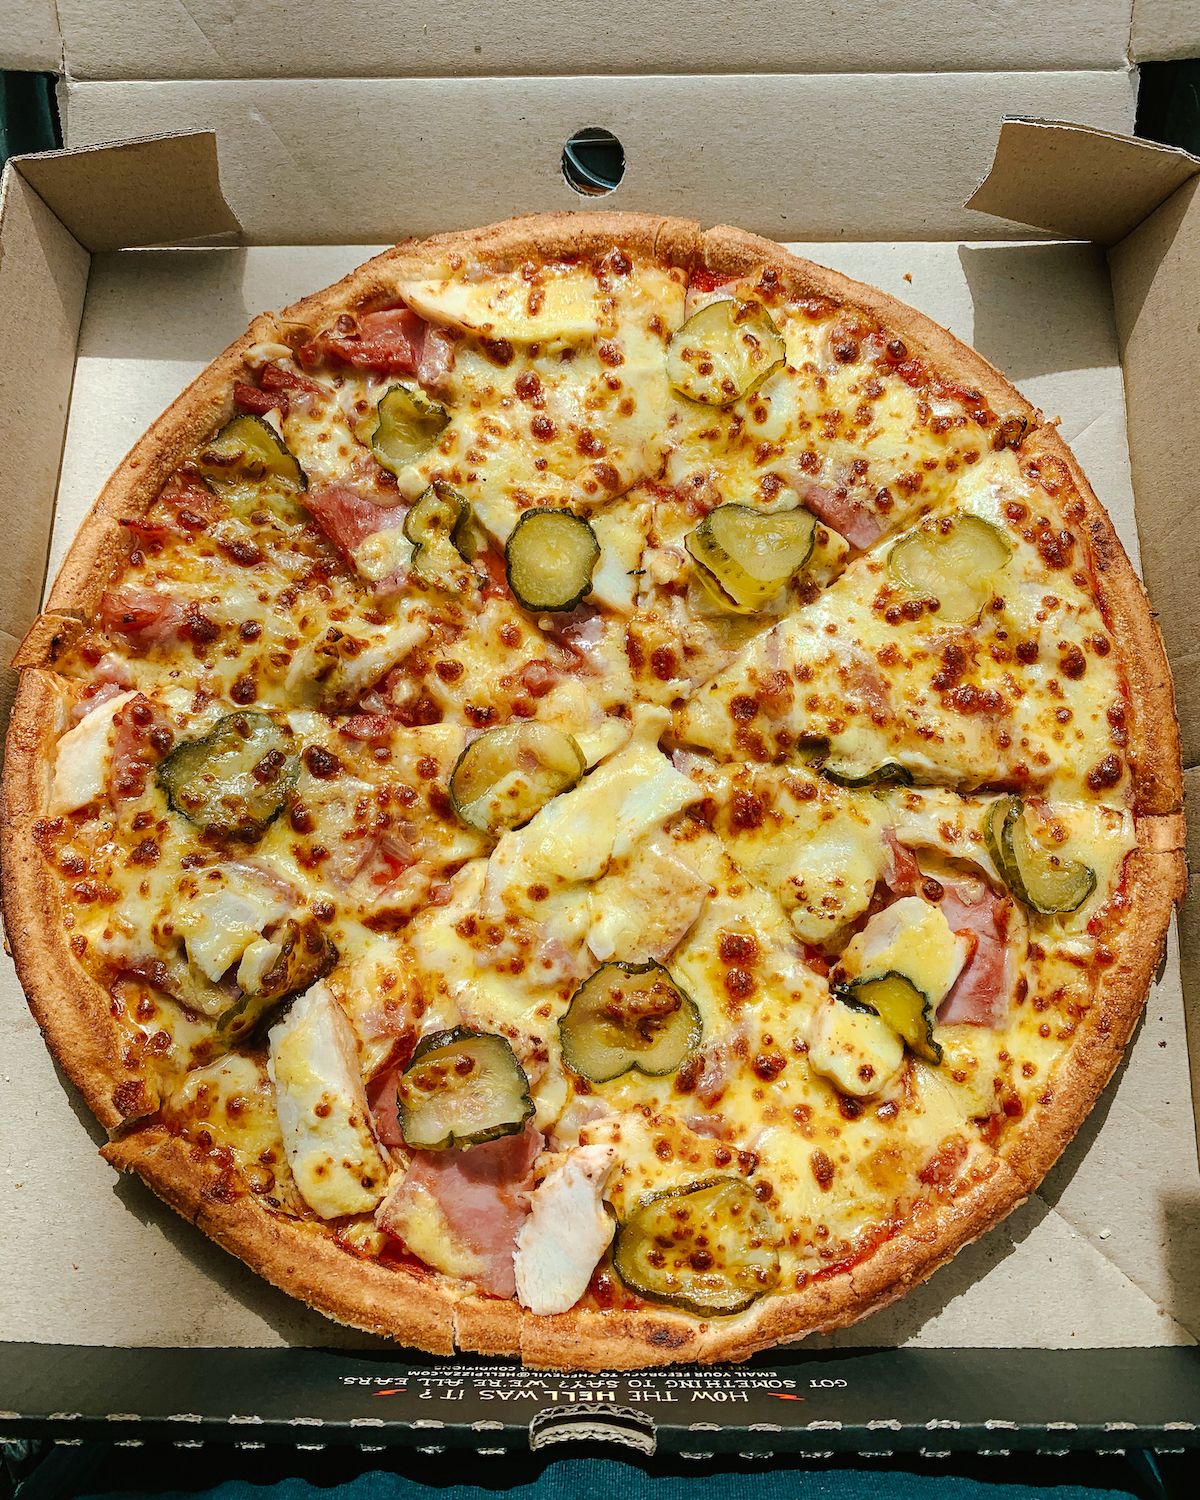
🤠 Browse adventurous activities in Queenstown though GetYourGuide or Viator.Must try: HELL Pizza
We were shocked to see HELL Pizza, our favourite pizza shop that used to be open in our hometown of Vancouver. We had no idea it came from New Zealand! The company is 100% free-range and they have the wackiest, but most delicious pizzas. You must try their Cursed pizza which has honey mustard sauce, chicken, ham and smoked cheddar. It sounds weird but it is SO GOOD!
Where to stay in Queenstown
There are holiday parks you can stay at in the area, or you could opt to stay the night in a hotel on the lake.
Awesome Queenstown hotels if you want a break from the campervan:Day 13: Drive towards Milford Sound and stay nearby
Total driving time: 2.75 hours
The famous fjords of Milford Sound are a must see. We chose to stay at one of the many campsites past Te Anau Downs, which are an hour away from Milford Sound. They are all on Rankerz, but remember to bring cash - there are no attendants here. There are a couple of campsites directly in Milford Sound, but they require advance reservations and are expensive.
Stop in at Te Anau for some lunch at Sandfly Cafe. We don't know why they picked the name of New Zealand's most annoying insect, but our meal was tasty! It's also next door to the grocery store if you need some groceries.
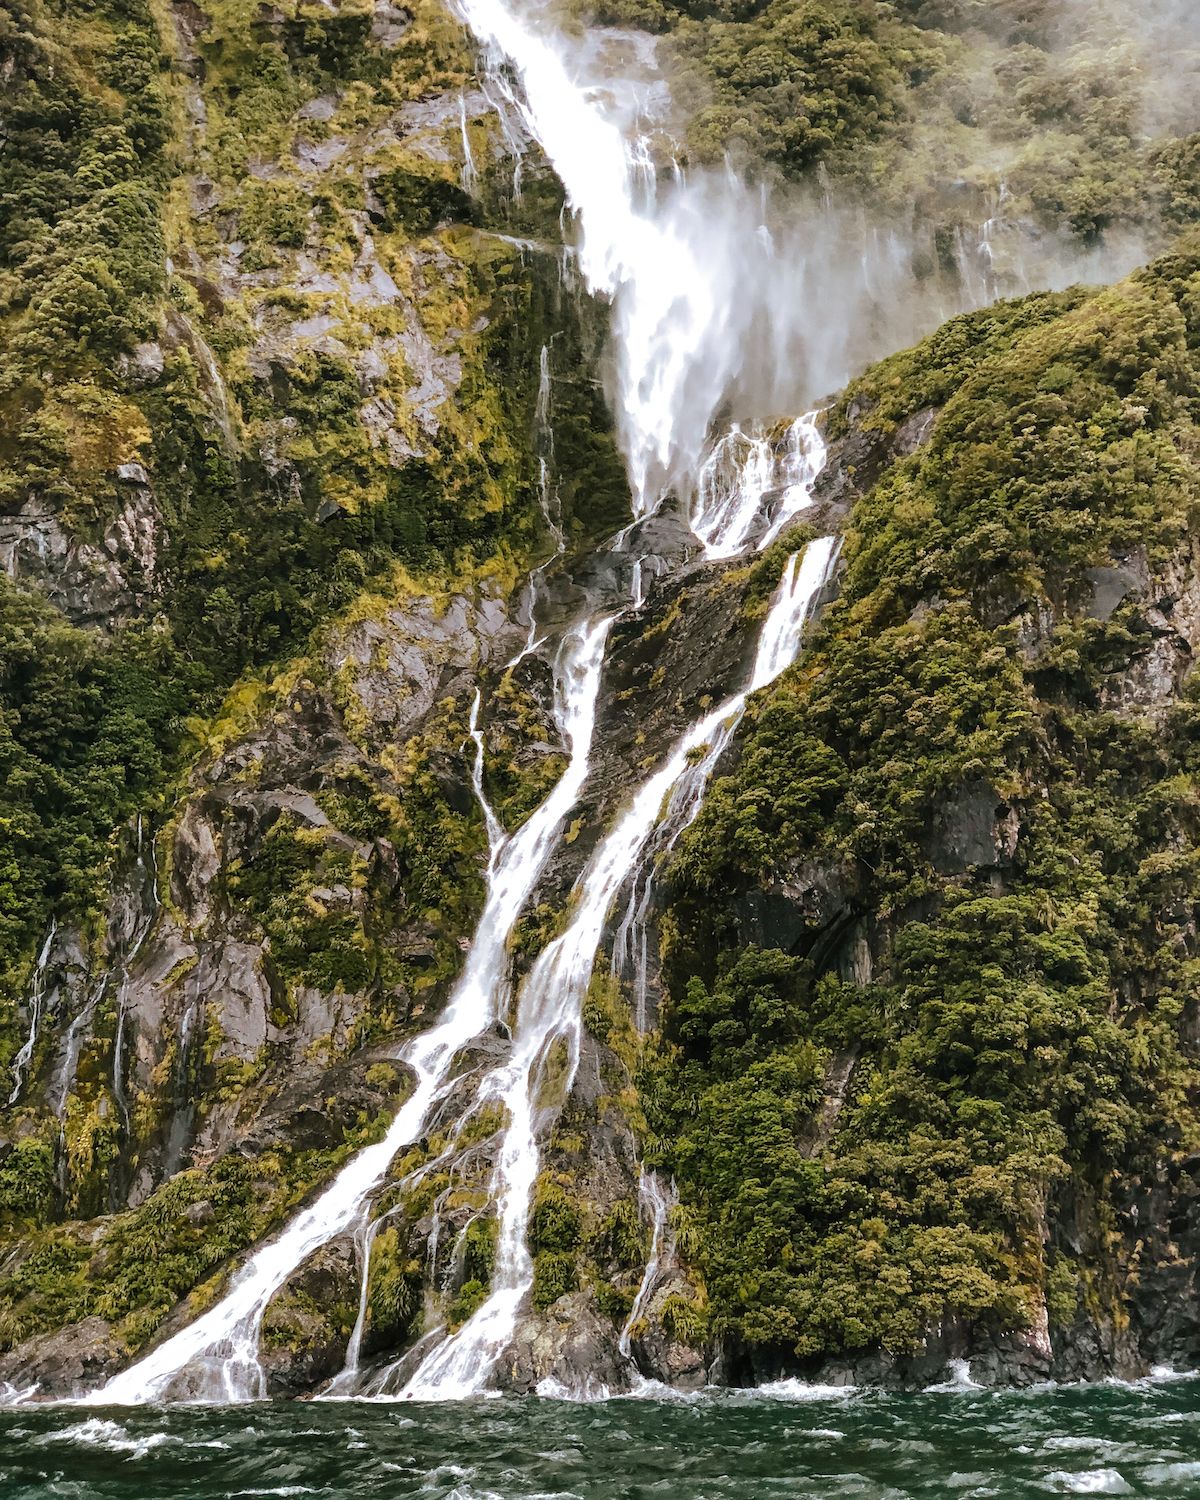
Day 14: Milford Sound
Total driving time: ~3.75 hours
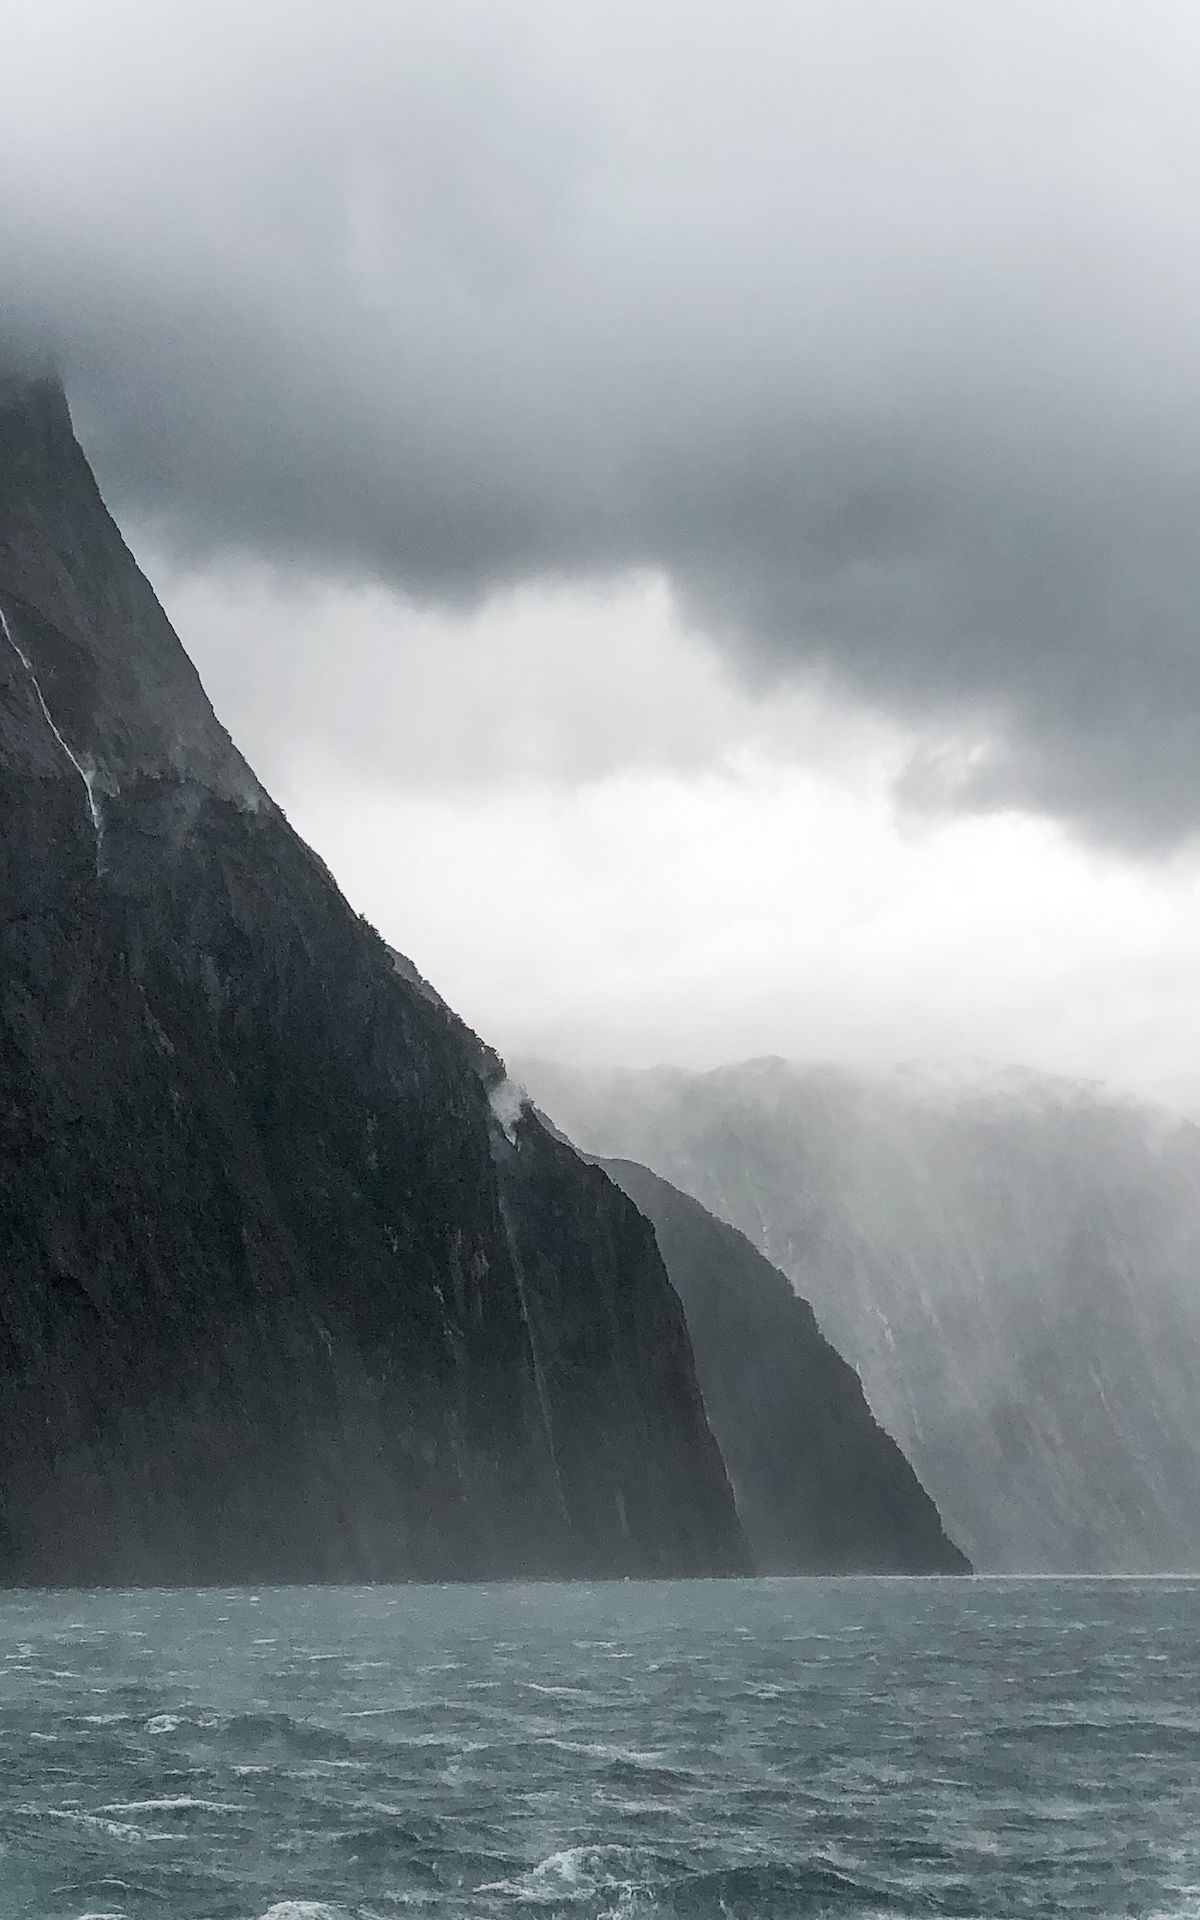
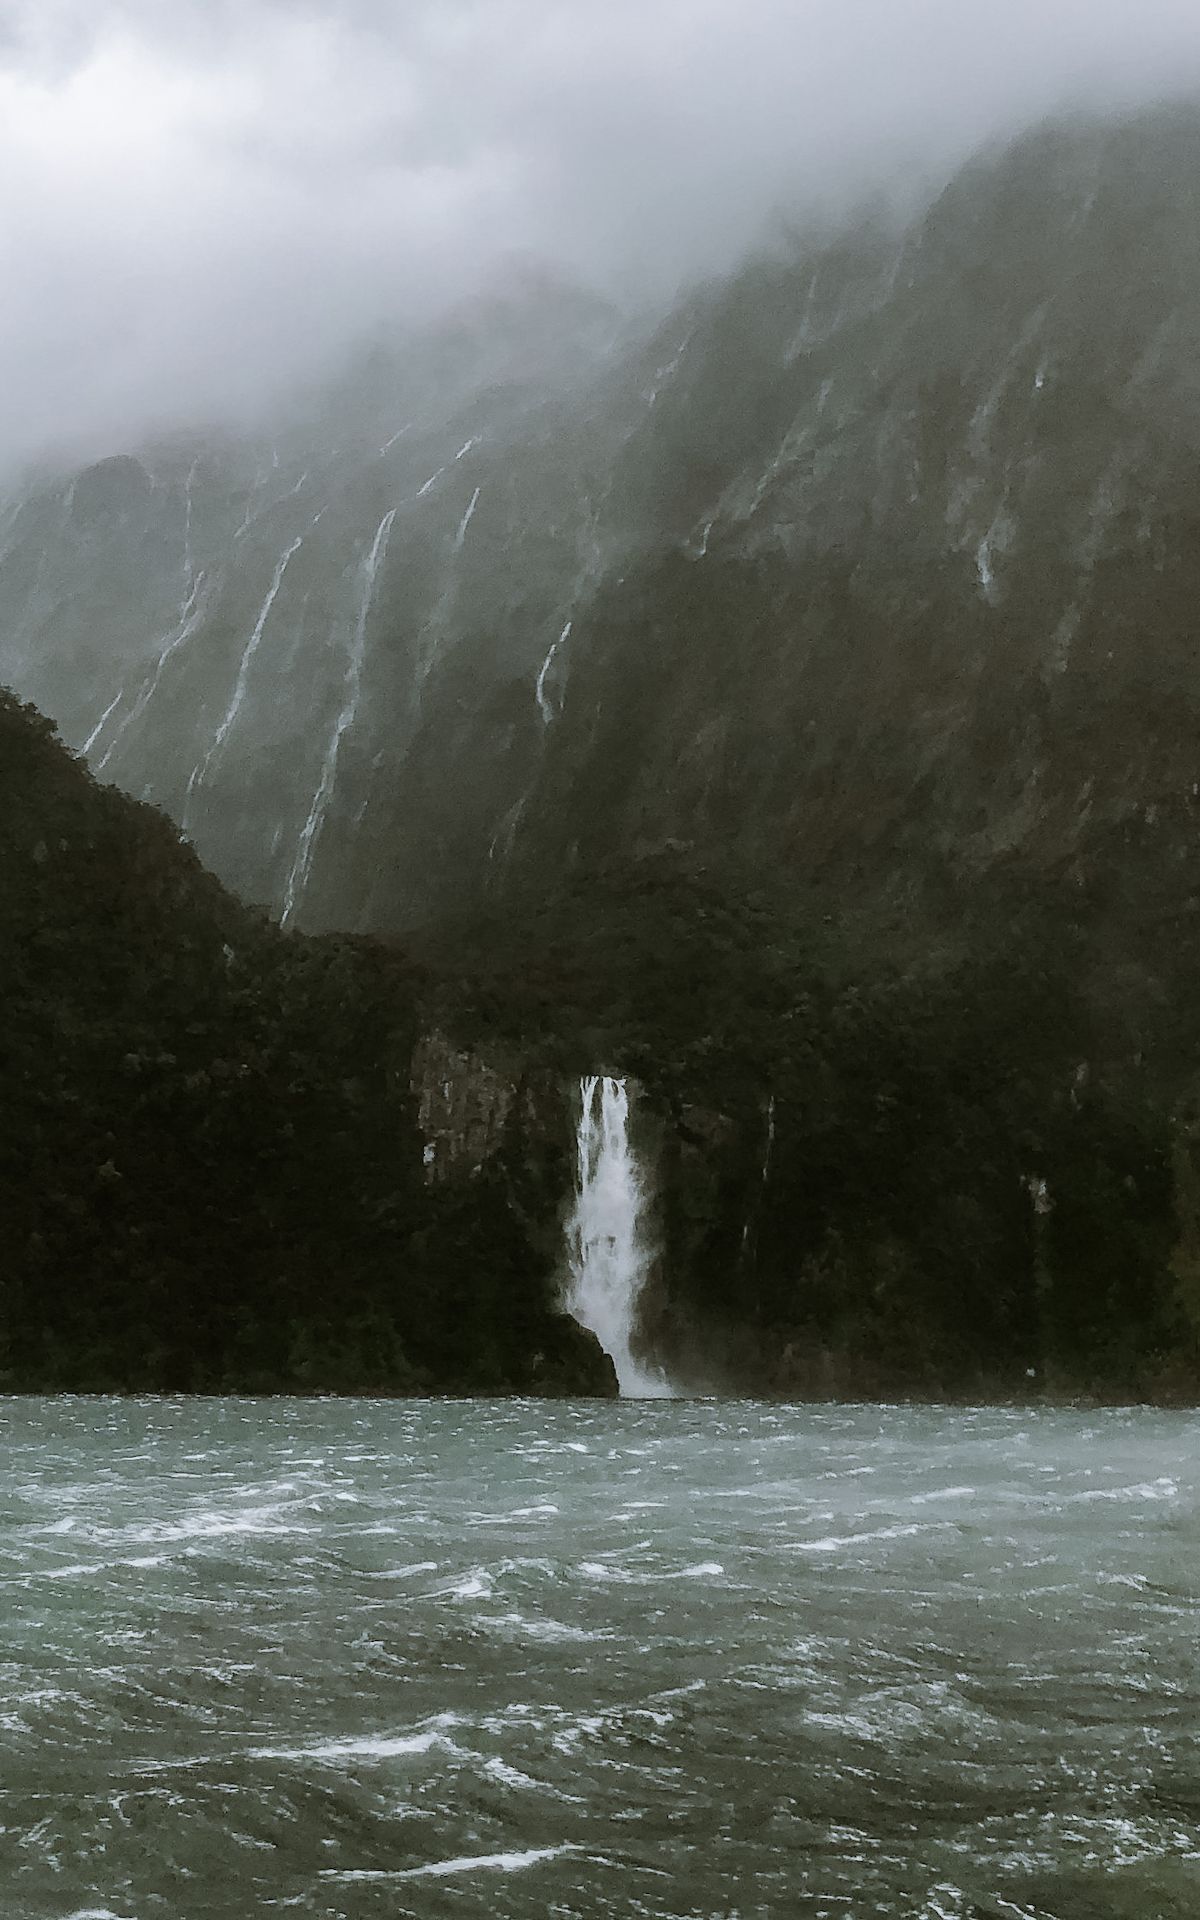
We woke up with the worst weather of our whole trip through NZ. Pouring rain, crazy winds, and thick cloudy skies. Sadly for us, it was the day we booked our Milford Sound fjord tour. We were bummed out and didn't even know if it was worth going. Were we ever wrong!
When it rains, hundreds of waterfalls cascade in the area. On our boat tour the eerie grey waters, shaded mountains and gushing waterfalls made it mysterious and raw! With an average of 182 days of rain each year, you just might have a rainy day. Take our advice and embrace it!
When booking your tour, book the earliest boat available, so you avoid tour busses leaving from Queenstown in the morning.
🛳️ Book your Millford Sound cruise through GetYourGuide or Viator.Where to camp for the night
After your tour, use your handy Rankerz app and camp somewhere along the way towards Mount Cook.
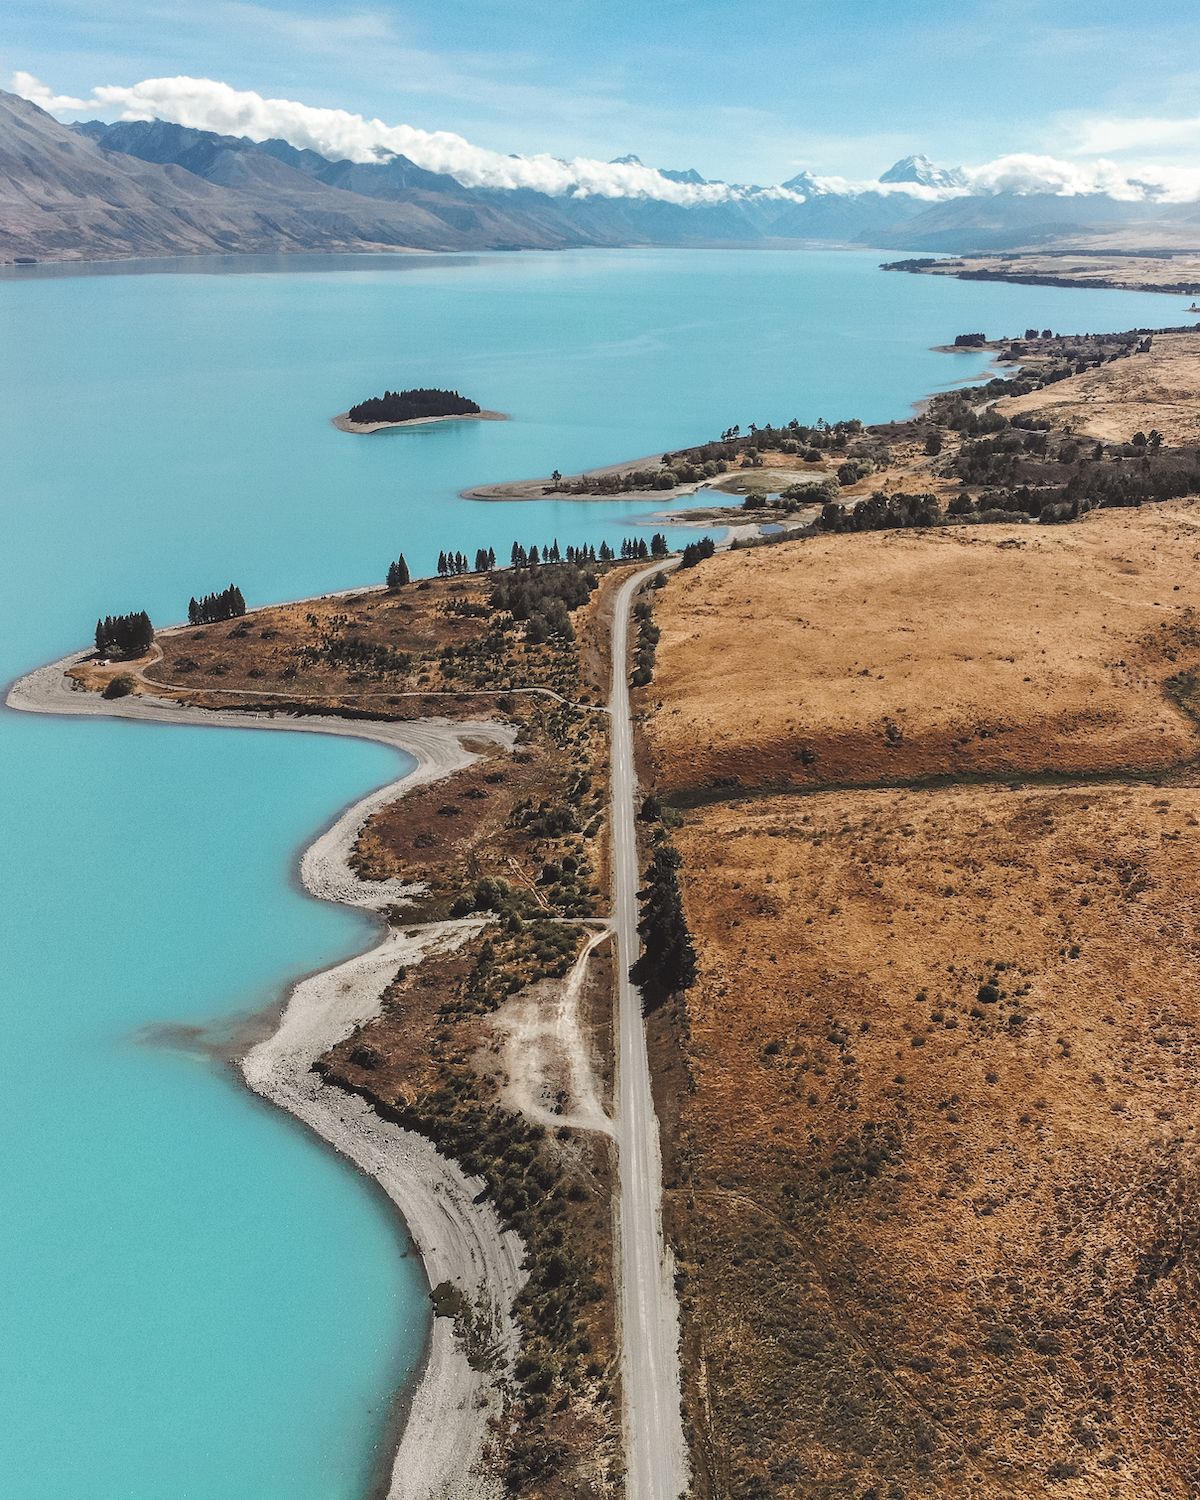
Day 15: Mount Cook
Total driving time: ~3.75 hours
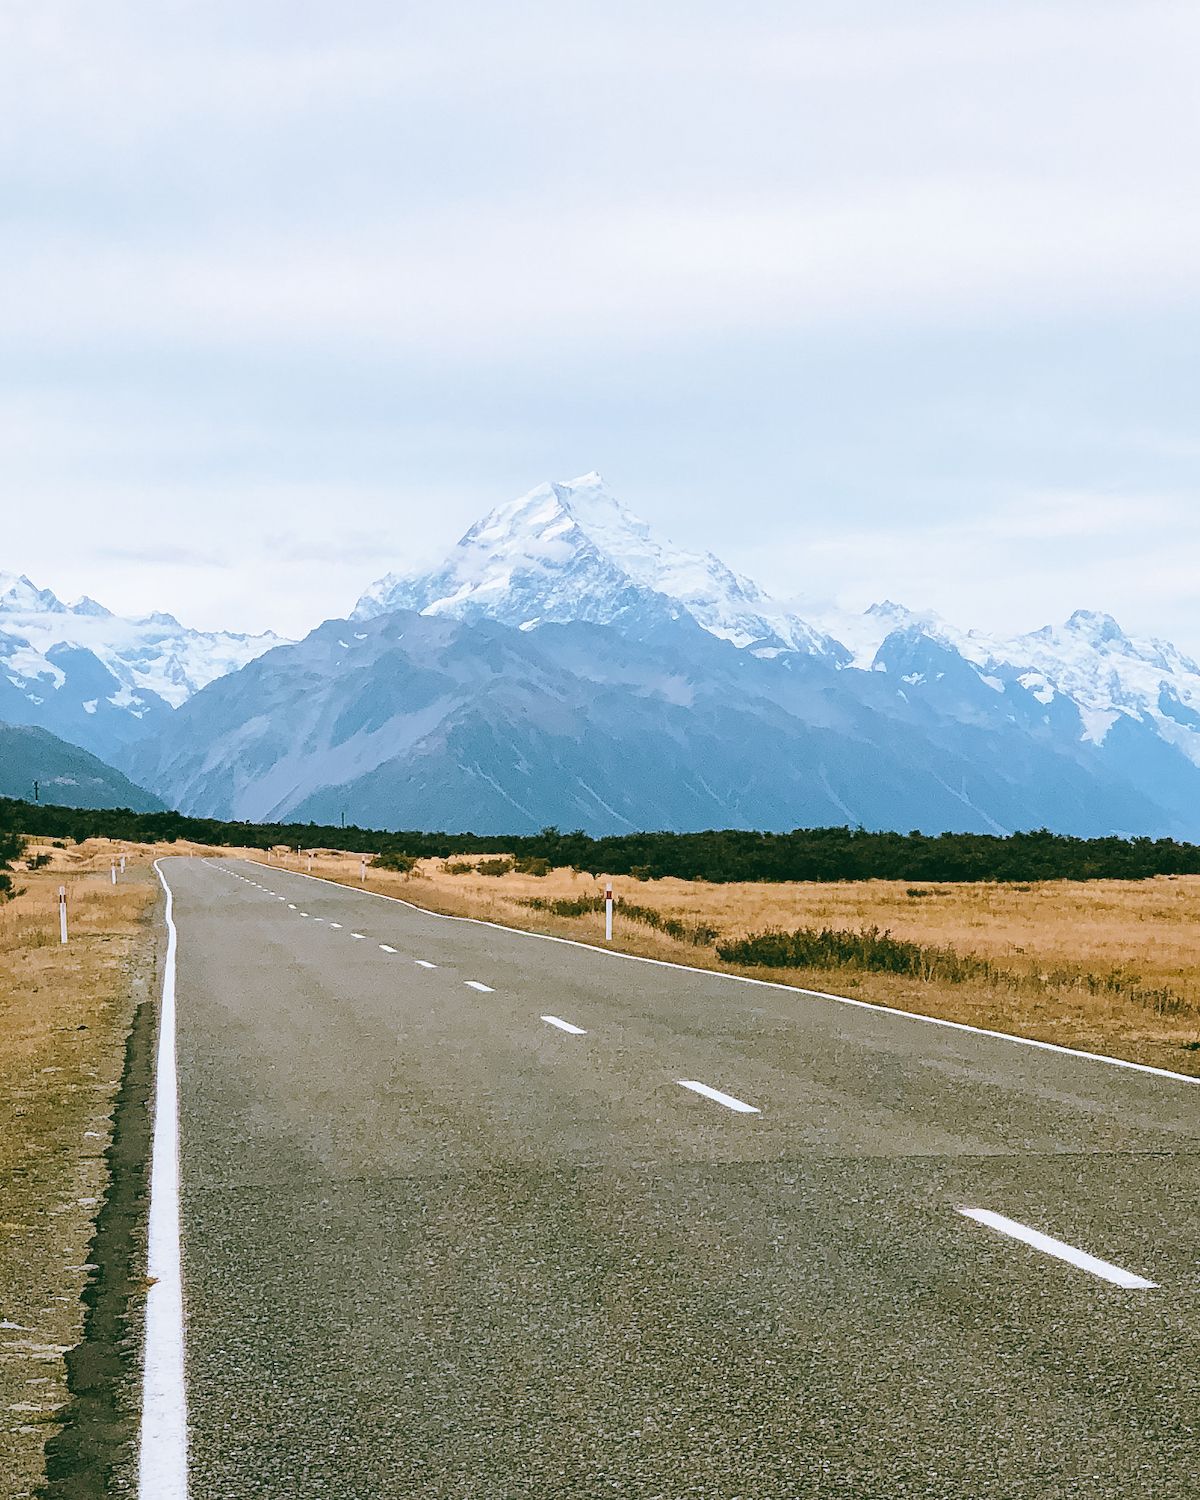
We took the drive towards Mount Cook National park to see views of the magnificent mountain. Mount Cook is a must-see spectacle of geological beauty. There are no freedom camping spots along Mount Cook Road, but there are a couple cheap ones near the end of the road. Those spots were so busy however, we turned back!
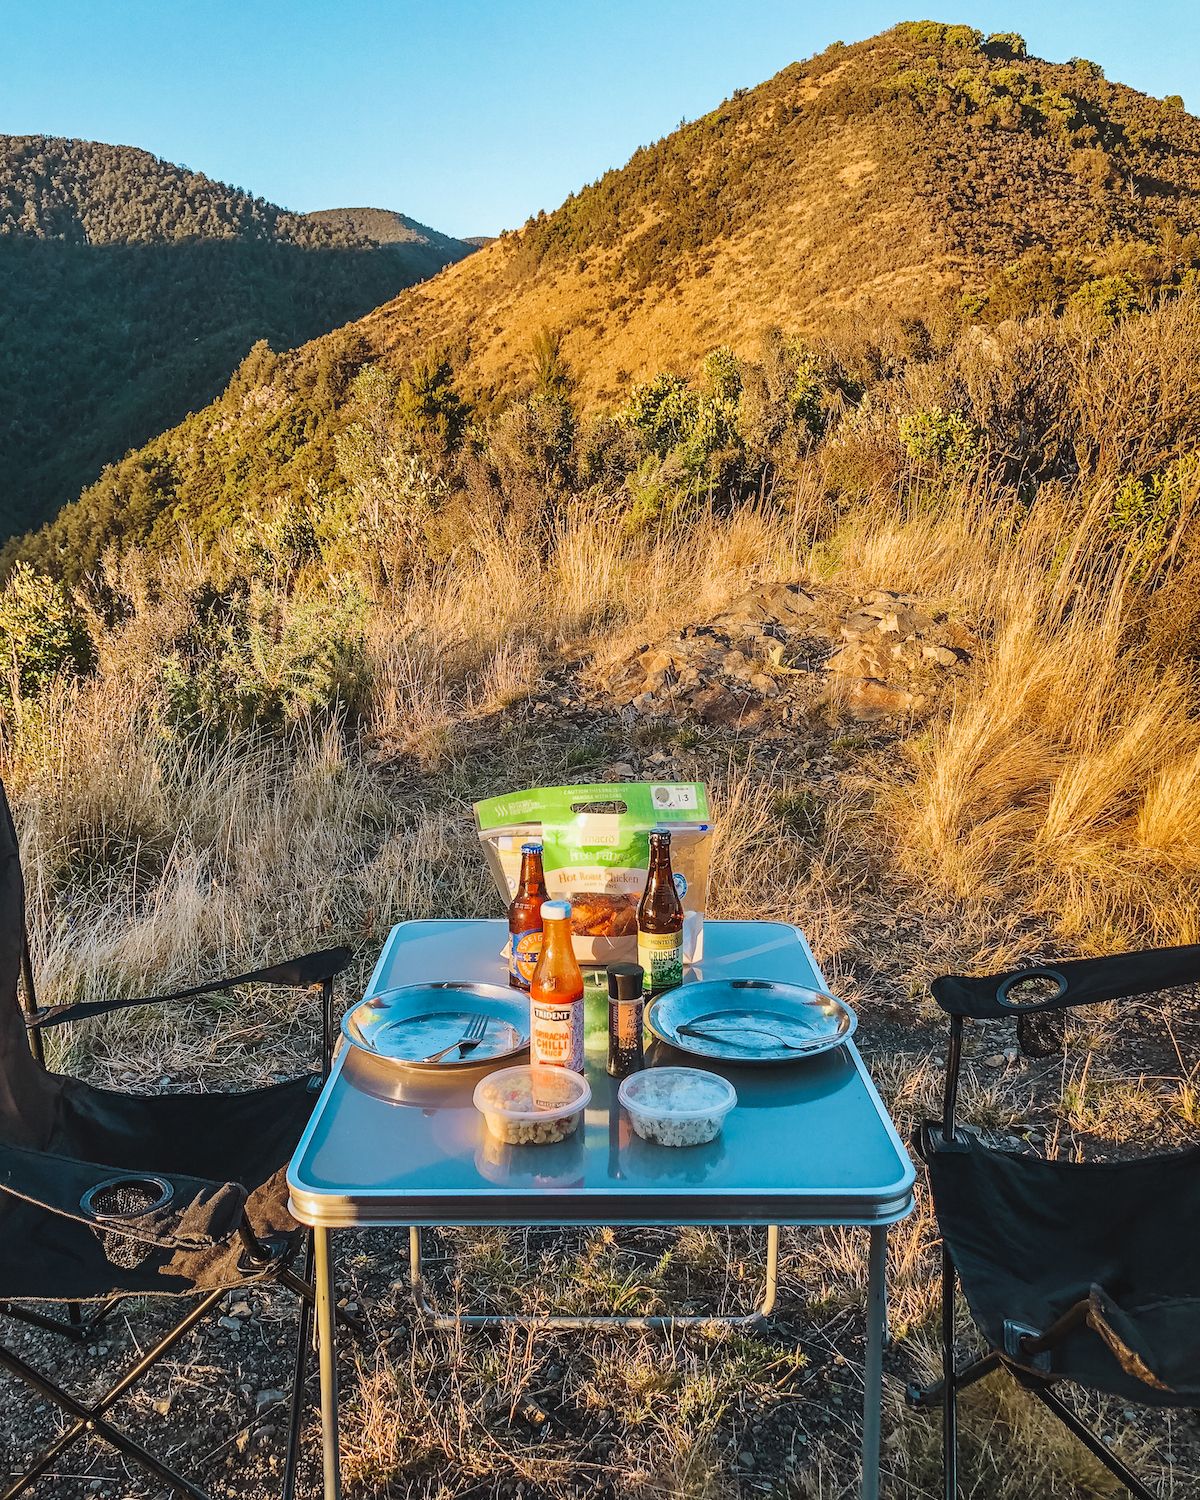
We stayed at Glenntanner Holiday Park, which is more expensive at $25 NZD per person/night, but it had more space, showers, and even a nice view of Mount Cook from our camping spot! We cooked up some tacos and had a wonderful evening.
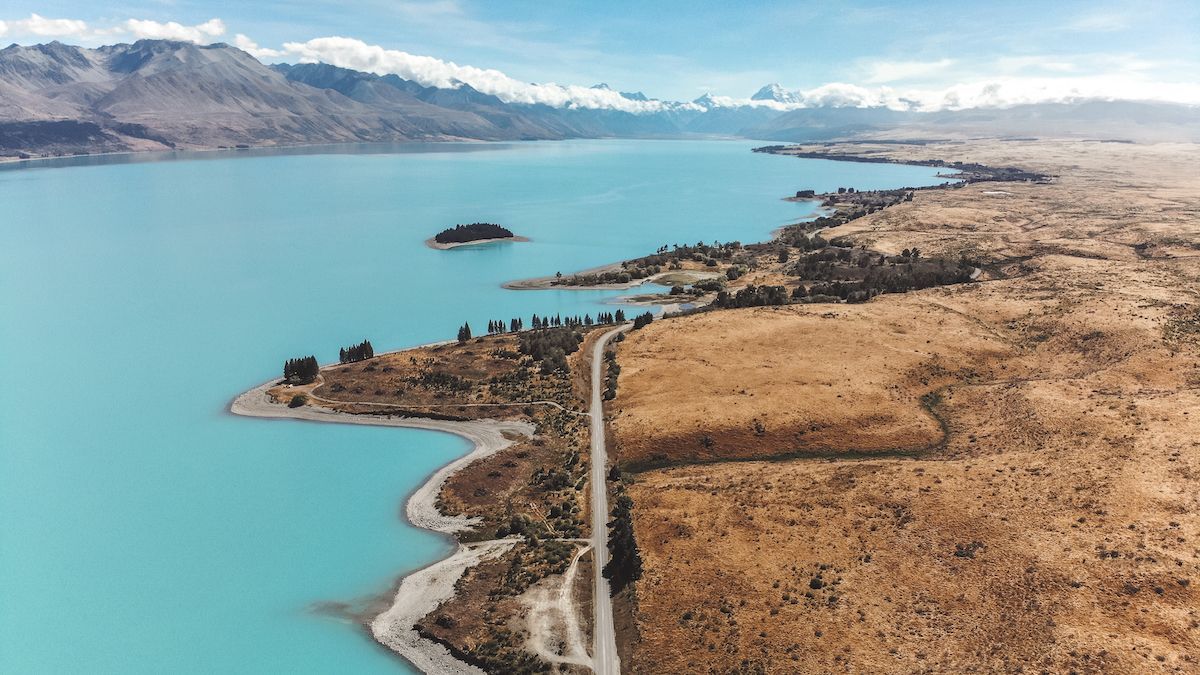
Day 16: Lake Pukaki
Total driving time: 45 minutes
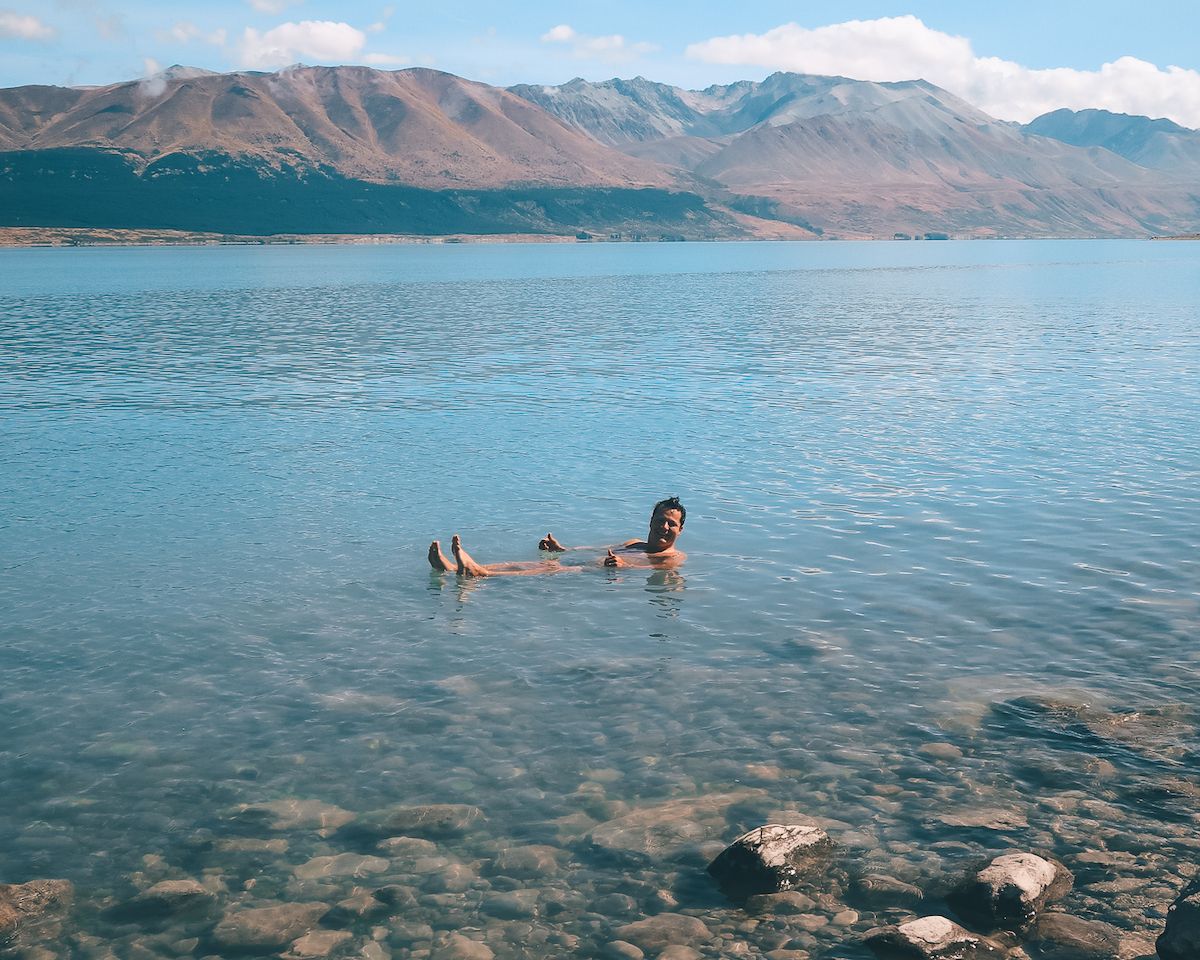
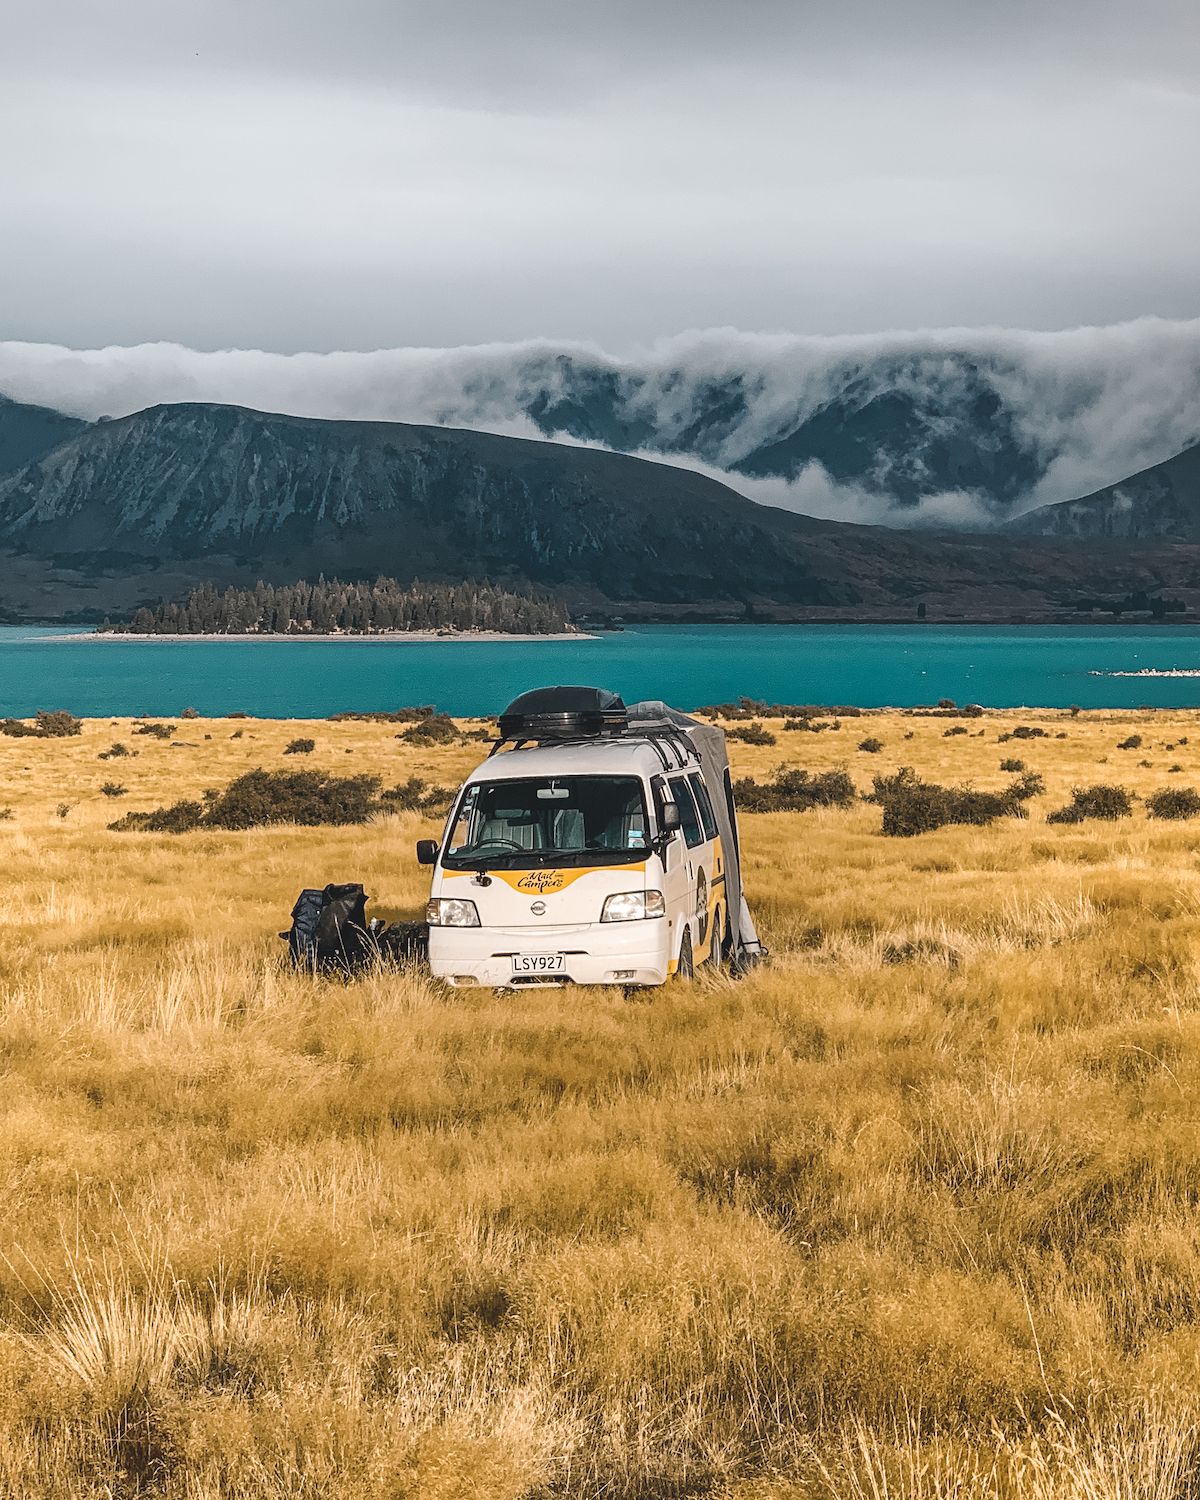
Just when you think you won't see any more natural beauty like Milford Sound or Mount Cook, the stunningly blue Lake Pukaki comes into view. We think it's the most beautiful glacial lake in the world and may even top Moraine Lake in Alberta!
The best part is that there is a lot of freedom camping available on the Eastern side of the lake. We had a spot all to ourselves! We enjoyed taking a swim in the lake and watching the sunset. It was our top camping spot of our whole trip after Lees Valley.
Day 17: Drop off van in Christchurch and fly home
Total driving time: 3.5 hours
It's about a 3.5 hour drive to Christchurch where you drop the van off. There actually isn't a Mad Campers office here, but an airport parking lot, where you drop your keys off at a parking desk and hitch a shuttle ride to the airport.
Stop in at Lake Tekapo along the way for lunch to take in more beautiful glacial lake views.
Top Tip: There are no garbage cans at the airport parking lot, so make sure you clean your van beforehand!
That rounds out our 17 day New Zealand Campervan itinerary. We hope you enjoy freedom camping to its fullest and try out the best way to experience the country!
Helpful items to bring on your New Zealand campervan trip
These are helpful items that will go the mile for campervan living and outdoor activities during your time in NZ:
Clothing
|
Campervan Essentials
|
Fun Tips
- Make sure to have The Lord of the Rings Trilogy downloaded on your computer so you can binge watch it in the van. Go to a local movie theatre and grab some popcorn!
- Download the Gaspy app and scout out the locations with the best gas prices. There can be quite a difference in price based on location.
- The coffee is excellent, everywhere. Even gas stations have espresso machines.
When you can't stand cooking anymore and you just want to pig out, try these certified Groovy meals:
- Pedros House of Lamb - prepare yourself for that quintessential NZ lamb
- Hell Pizza - Try the Cursed pizza. Chicken, smoked cheddar, pickles and honey mustard never tasted so good.
- Sushi joints - You'll see lots of sushi joints along the way in towns. The salmon is fresh!
- Mince Beef Pie - available almost everywhere, these hearty savoury pies will fill you up
- Fish and Chips - also a ubiquitous Kiwi staple, make sure you remember to order tartar sauce
Extra budget considerations
- We had to fuel up about every 400km of driving with the van. A full tank cost us around $65-$75 NZD per tank (2019 price).
- If you want to charge your laptops, you'll have to stop in at coffee shops. The van only has a USB charger.
- Alcohol isn't cheap; 4 ciders or 4 beers cost around $12 NZD.
- Hotels - if you want to take a break from the van. We rarely saw anything under $200 a night.
- Van improvements (door mat, hanging lights, candle, cheese grater, extra set of tongs, metal plate)
- Some districts or areas don't have free camping spots. You may have to pay around $7-$15 NZD per person/night.
- Liquid petroleum gas refill (for your gas stove) at end of stay is around $8 NZD
See what is was like in our New Zealand vlog:
If you love road trips, check out our other road trip itineraries:
Related: See 15 hidden gems in New Zealand to add to your itinerary.
Looking for more travel inspiration? Check out our list of Fun Adventure Ideas and Cultural Travel Experiences to inspired your next trip.
Love food? Don't miss our list of Unique Culinary Experiences Around the World.